
Jeff Keller
October 24, 2021
Magic Mirror Part 1: Hardware
My Magic Mirror adventure is split into two parts, this post will cover the hardware and my next post will cover the software side of the project.
Intro
The winter months are normally when I start new tech projects since Vermont winters tend to keep me indoors. Last winter I took on the task of building a Magic Mirror and I am finally getting around to posting about it now.
I had seen pictures of these smart mirrors online for years and always thought they were a great idea. But most of the articles I could find had to do with the software side of the project and I couldn’t find many ideas regarding hardware beyond “use a Raspberry Pi”. I am pretty happy with how my mirror frame and mounting turn out so I figured I would share that story here.
What is a Magic Mirror?
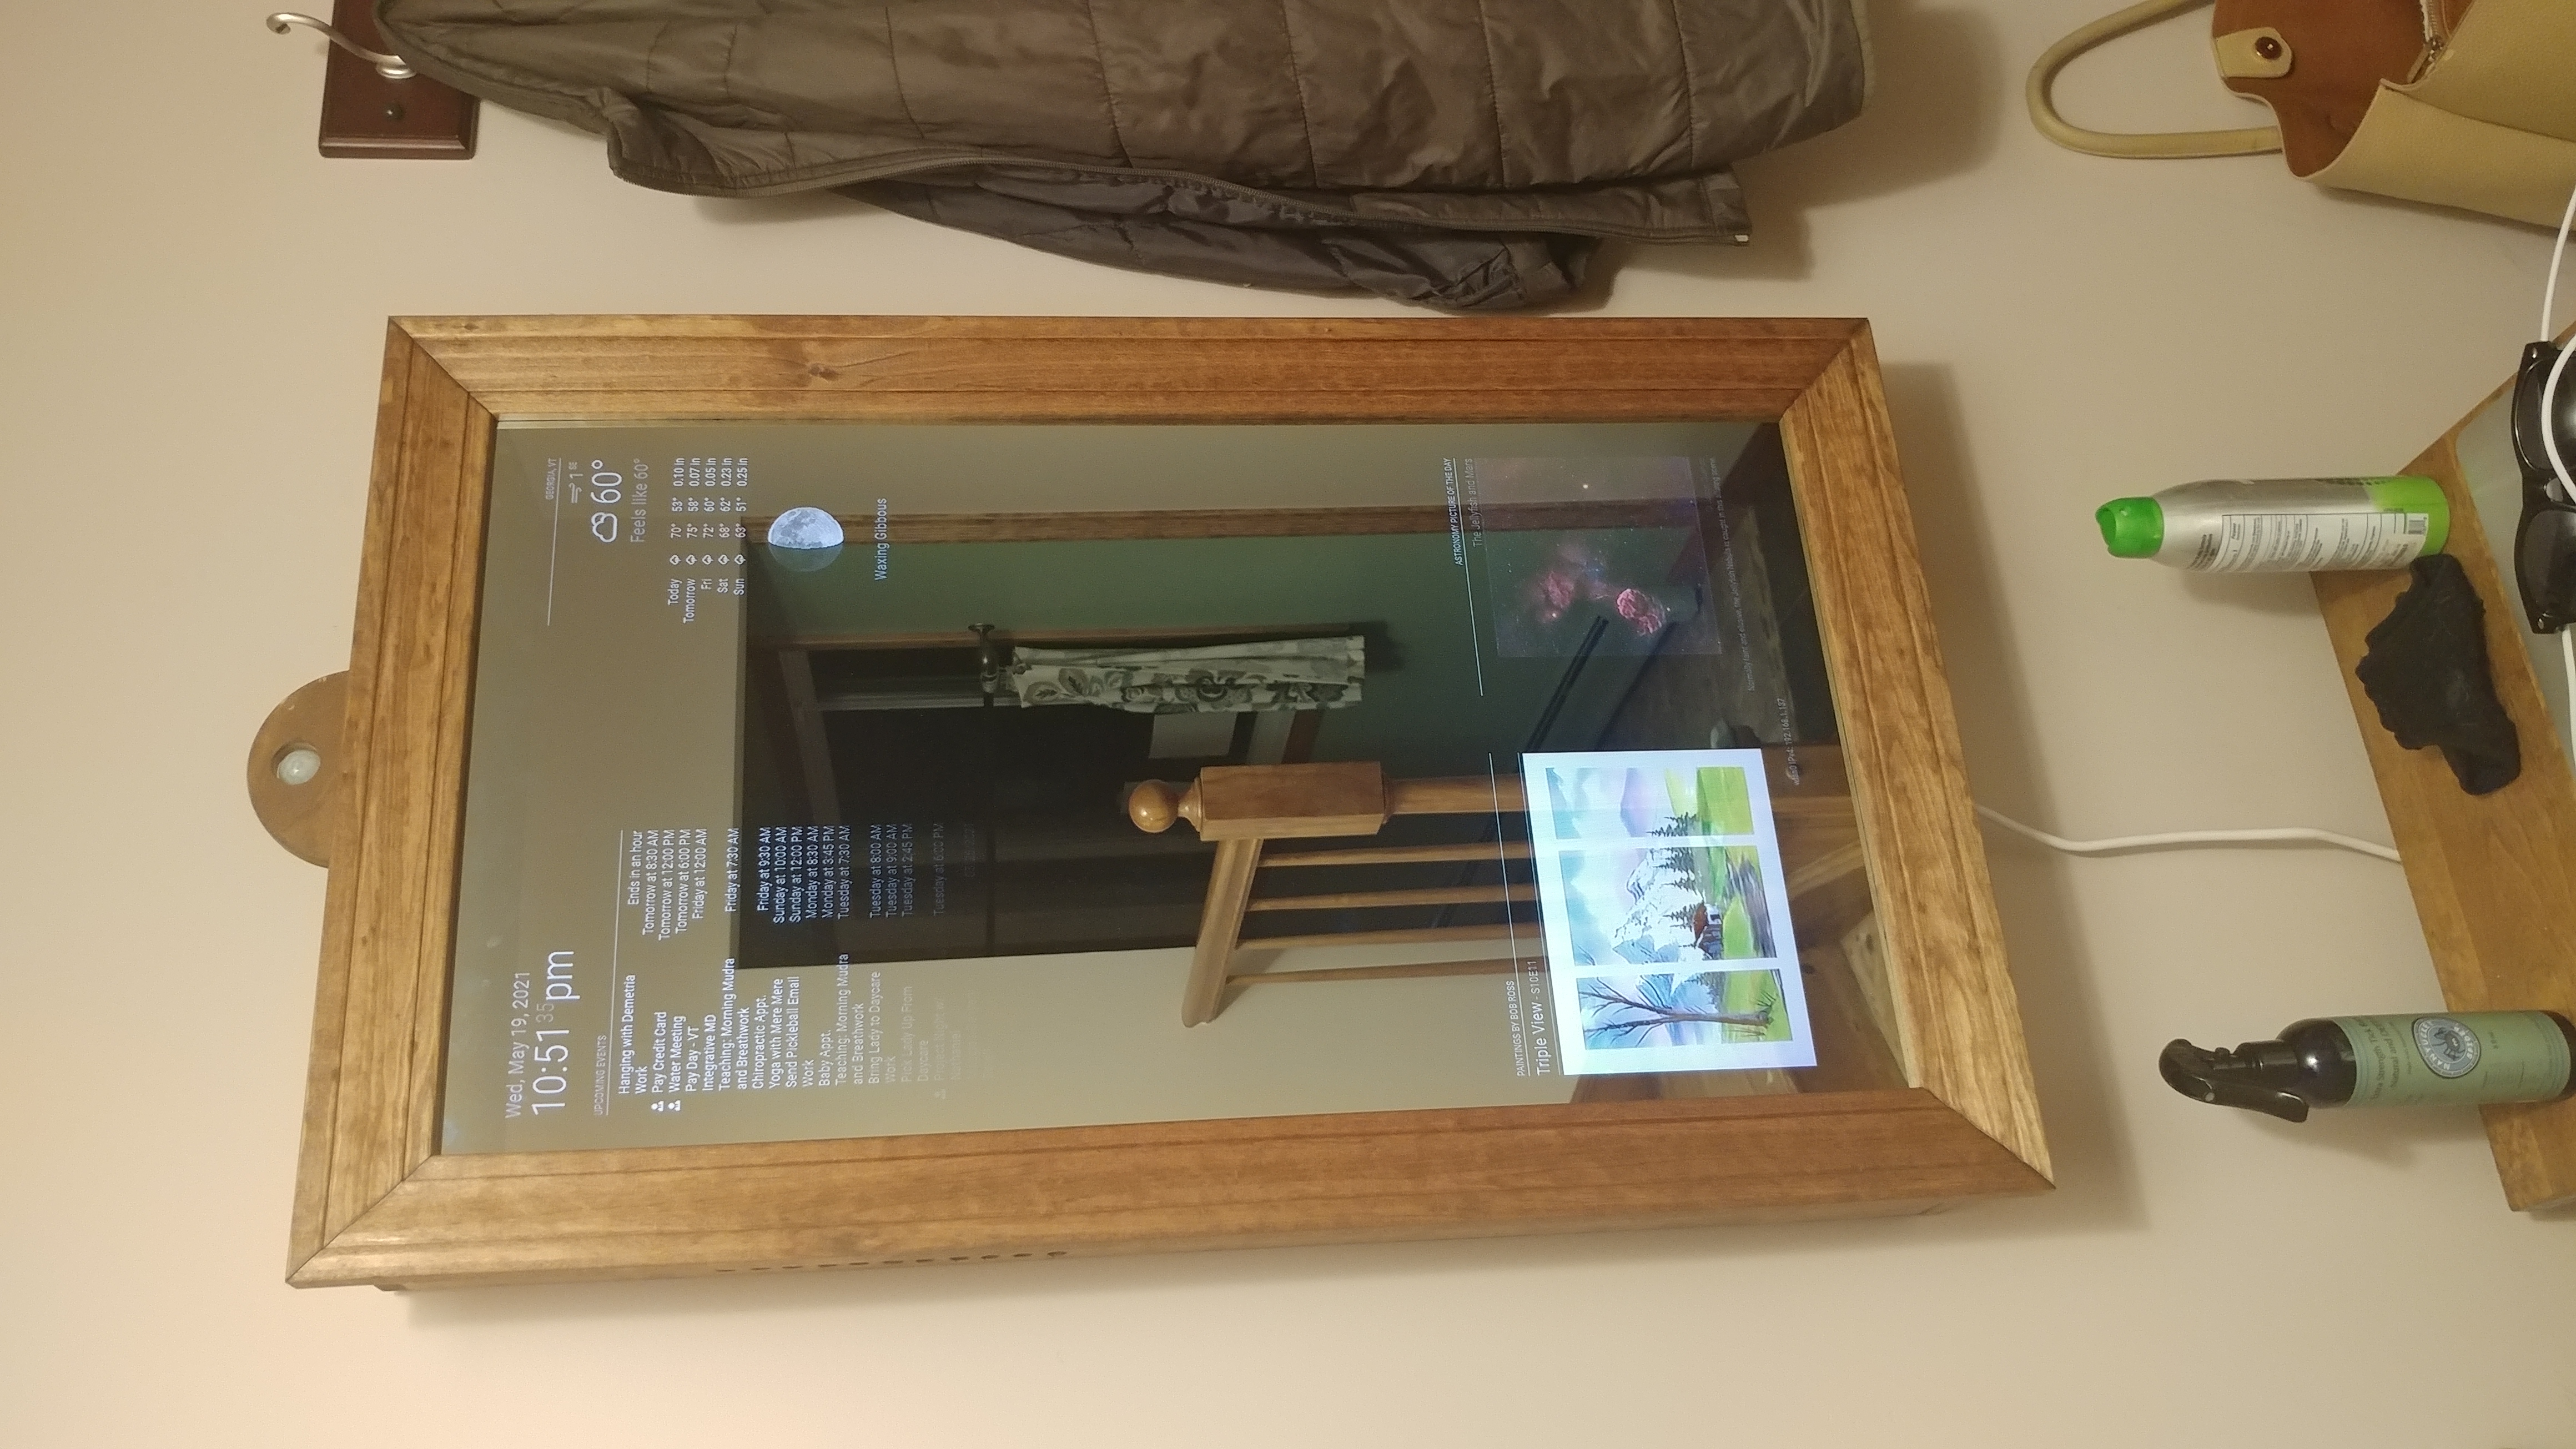
A Magic Mirror is a smart mirror running open source software from the MagicMirror project. A computer-connected display sits behind a piece of two-way glass—the same stuff you see in interrogation rooms in crime movies and TV shows—which gives the illusion of text floating within a mirror.
What content or information you display on the mirror is completely up to you. The MagicMirror project is modular and there are many third-party modules available. The image below depicts the final layout of my mirror. Check out my next post for details regarding the software configuration.
Hardware
Raspberry Pi + old TV
I had an old Raspberry Pi 3B laying around collecting dust so I decided that it would be the brains of my Magic Mirror. The fact that it had Wi-Fi and an HDMI output made it a good fit for the job.
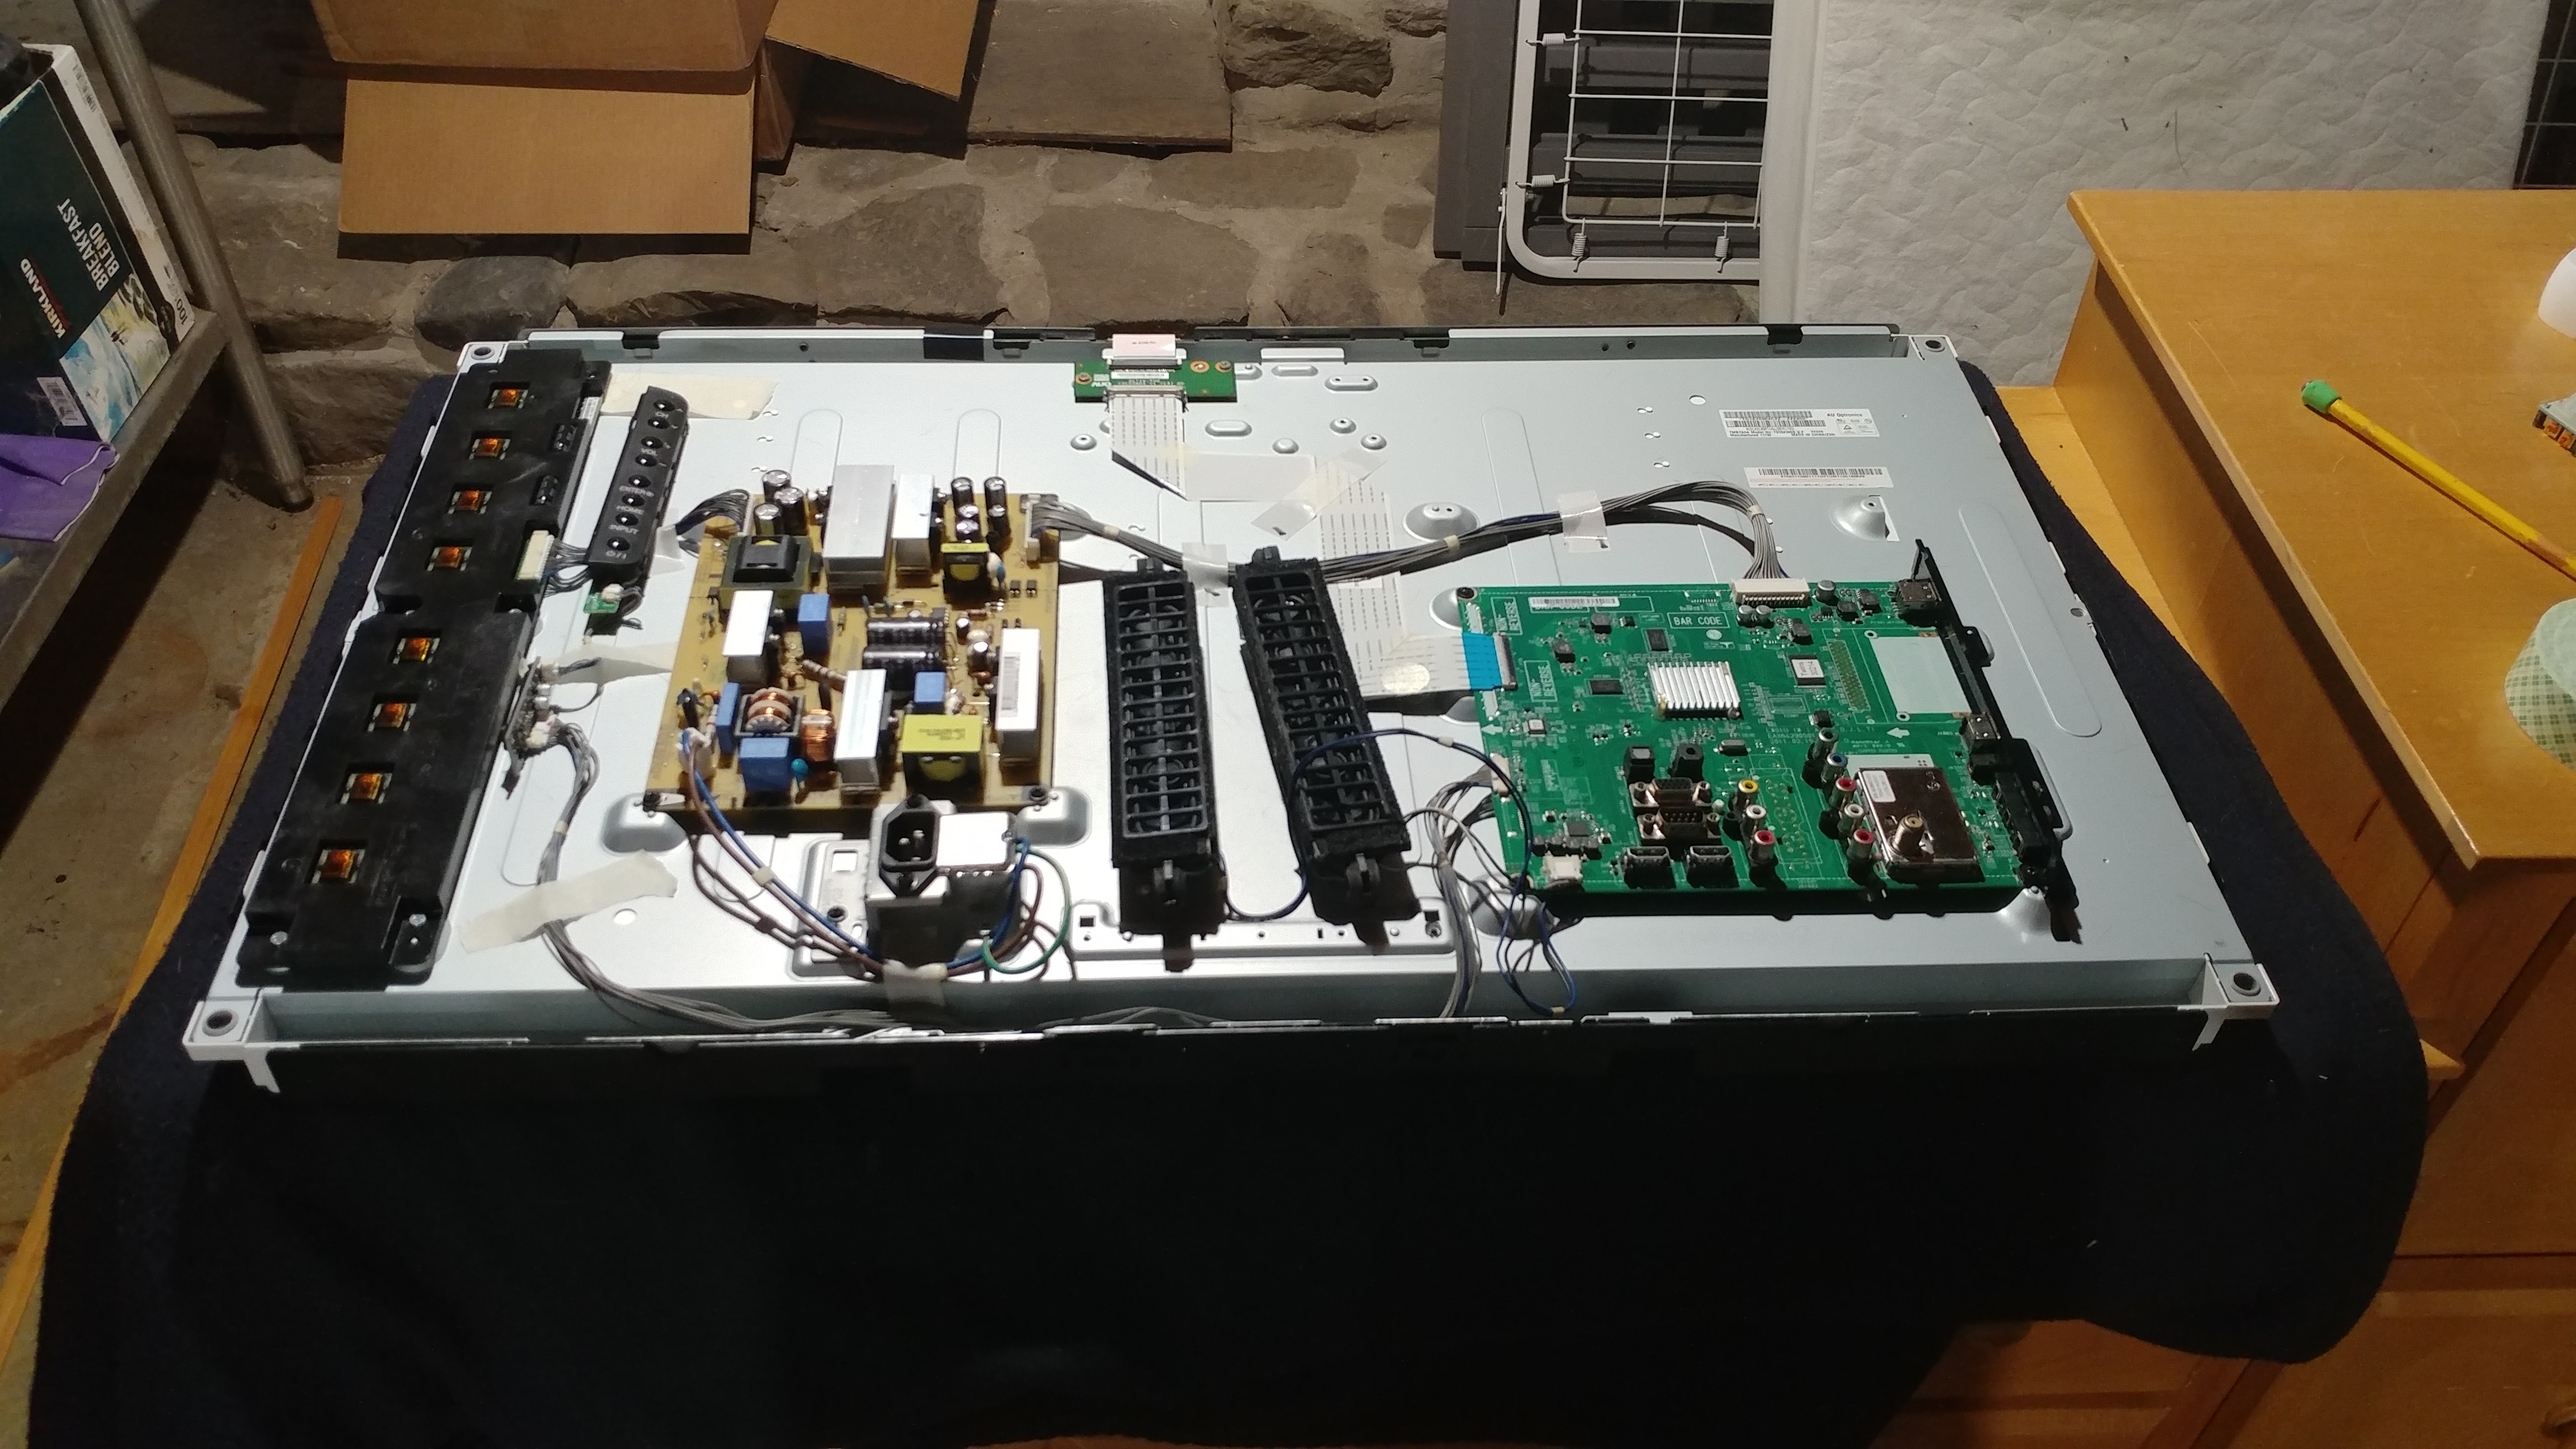
For the display I used an absolutely ancient 1080p LG LCD TV from like 2009 that my wife had in her apartment before she even met me. It’s a 42 inch TV and was just the right size for this project. Any smaller and it wouldn’t be very useful as a mirror and any bigger and I would have broke the bank buying the mirror glass (more on this later). For those of you who attended Beerfest 2019, this is the TV that was mounted to the deck and was ultimately rained on that day…. Well, it still works!
I first removed the outer plastic housing. Like most TVs, the display, power supply, and motherboard are all mounted together on a single chassis, so it was easy to work with. The speakers and power/volume button assemblies were mounted to the outer housing, but I wanted to retain their functionality, so I attached them to the inner chassis with double-sided tape.
Building a Frame
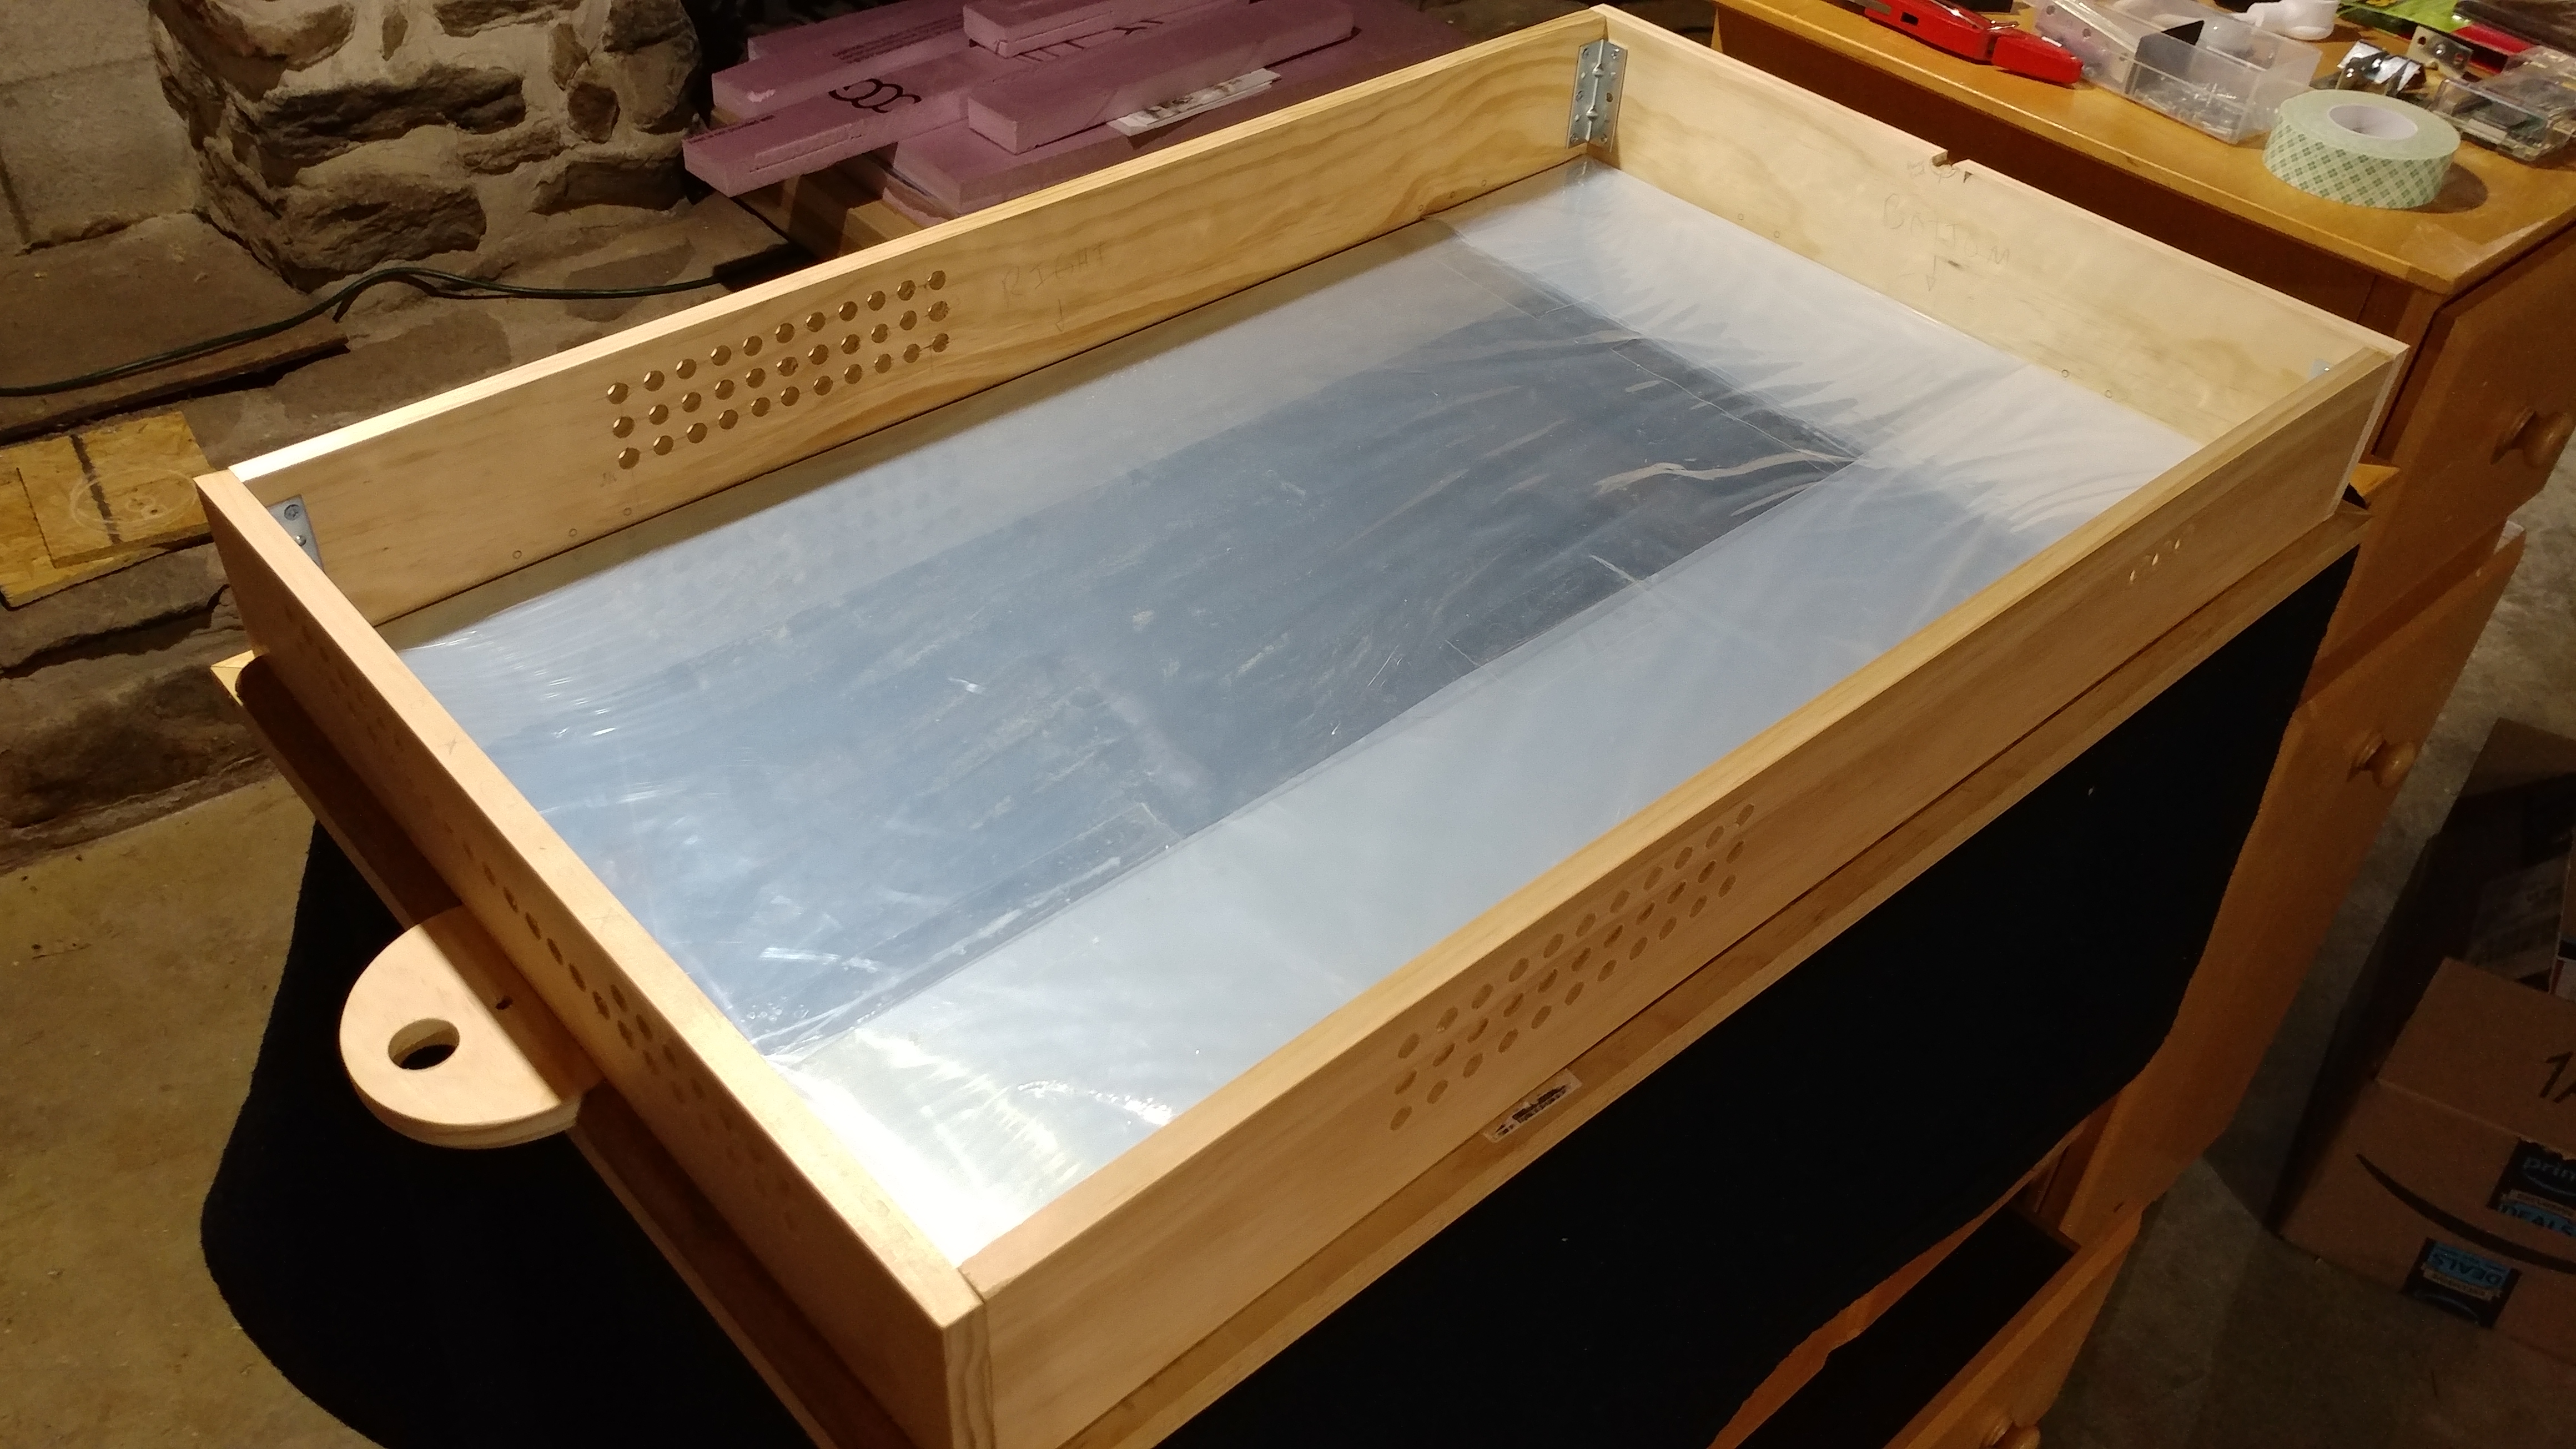
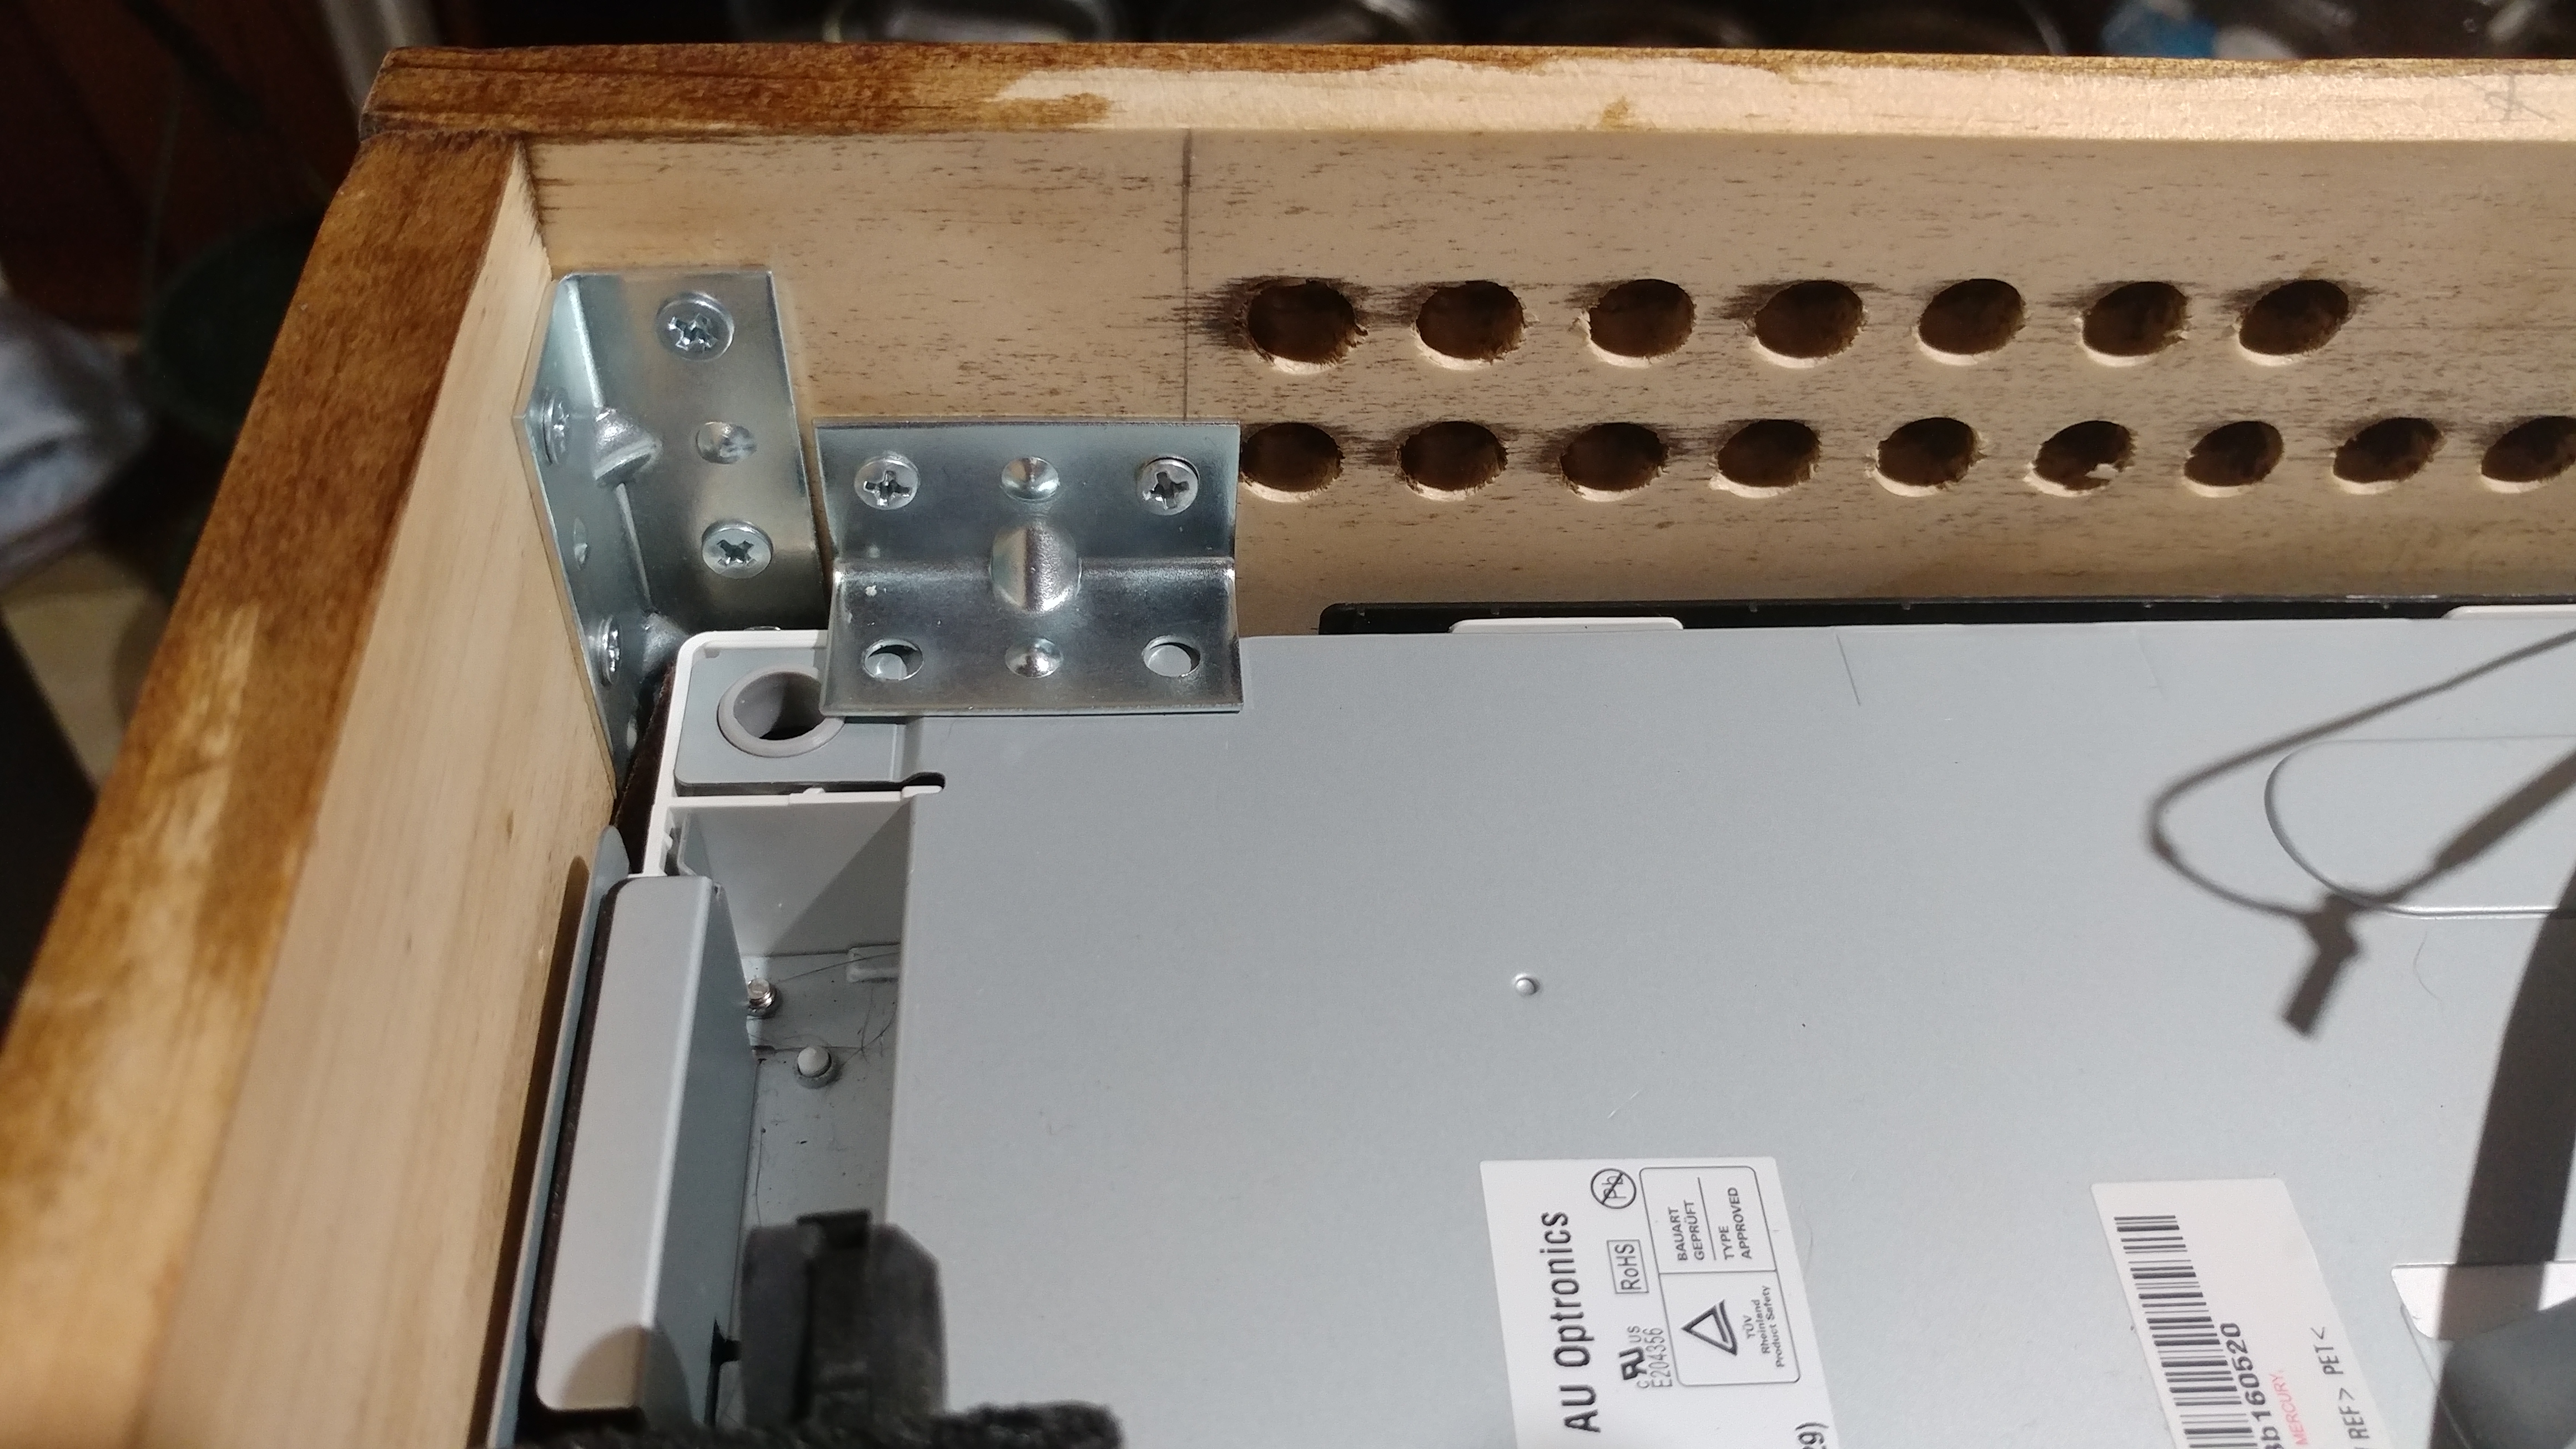
I used 4" x ½" inch boards to build a box frame around the TV chassis and secured them with corner brackets. I then measured and drilled many, many holes for the speakers (left/right), power cable (bottom), ventilation (top), and buttons (lower right). It was a good excuse to get my dad’s old drill press back in working order.
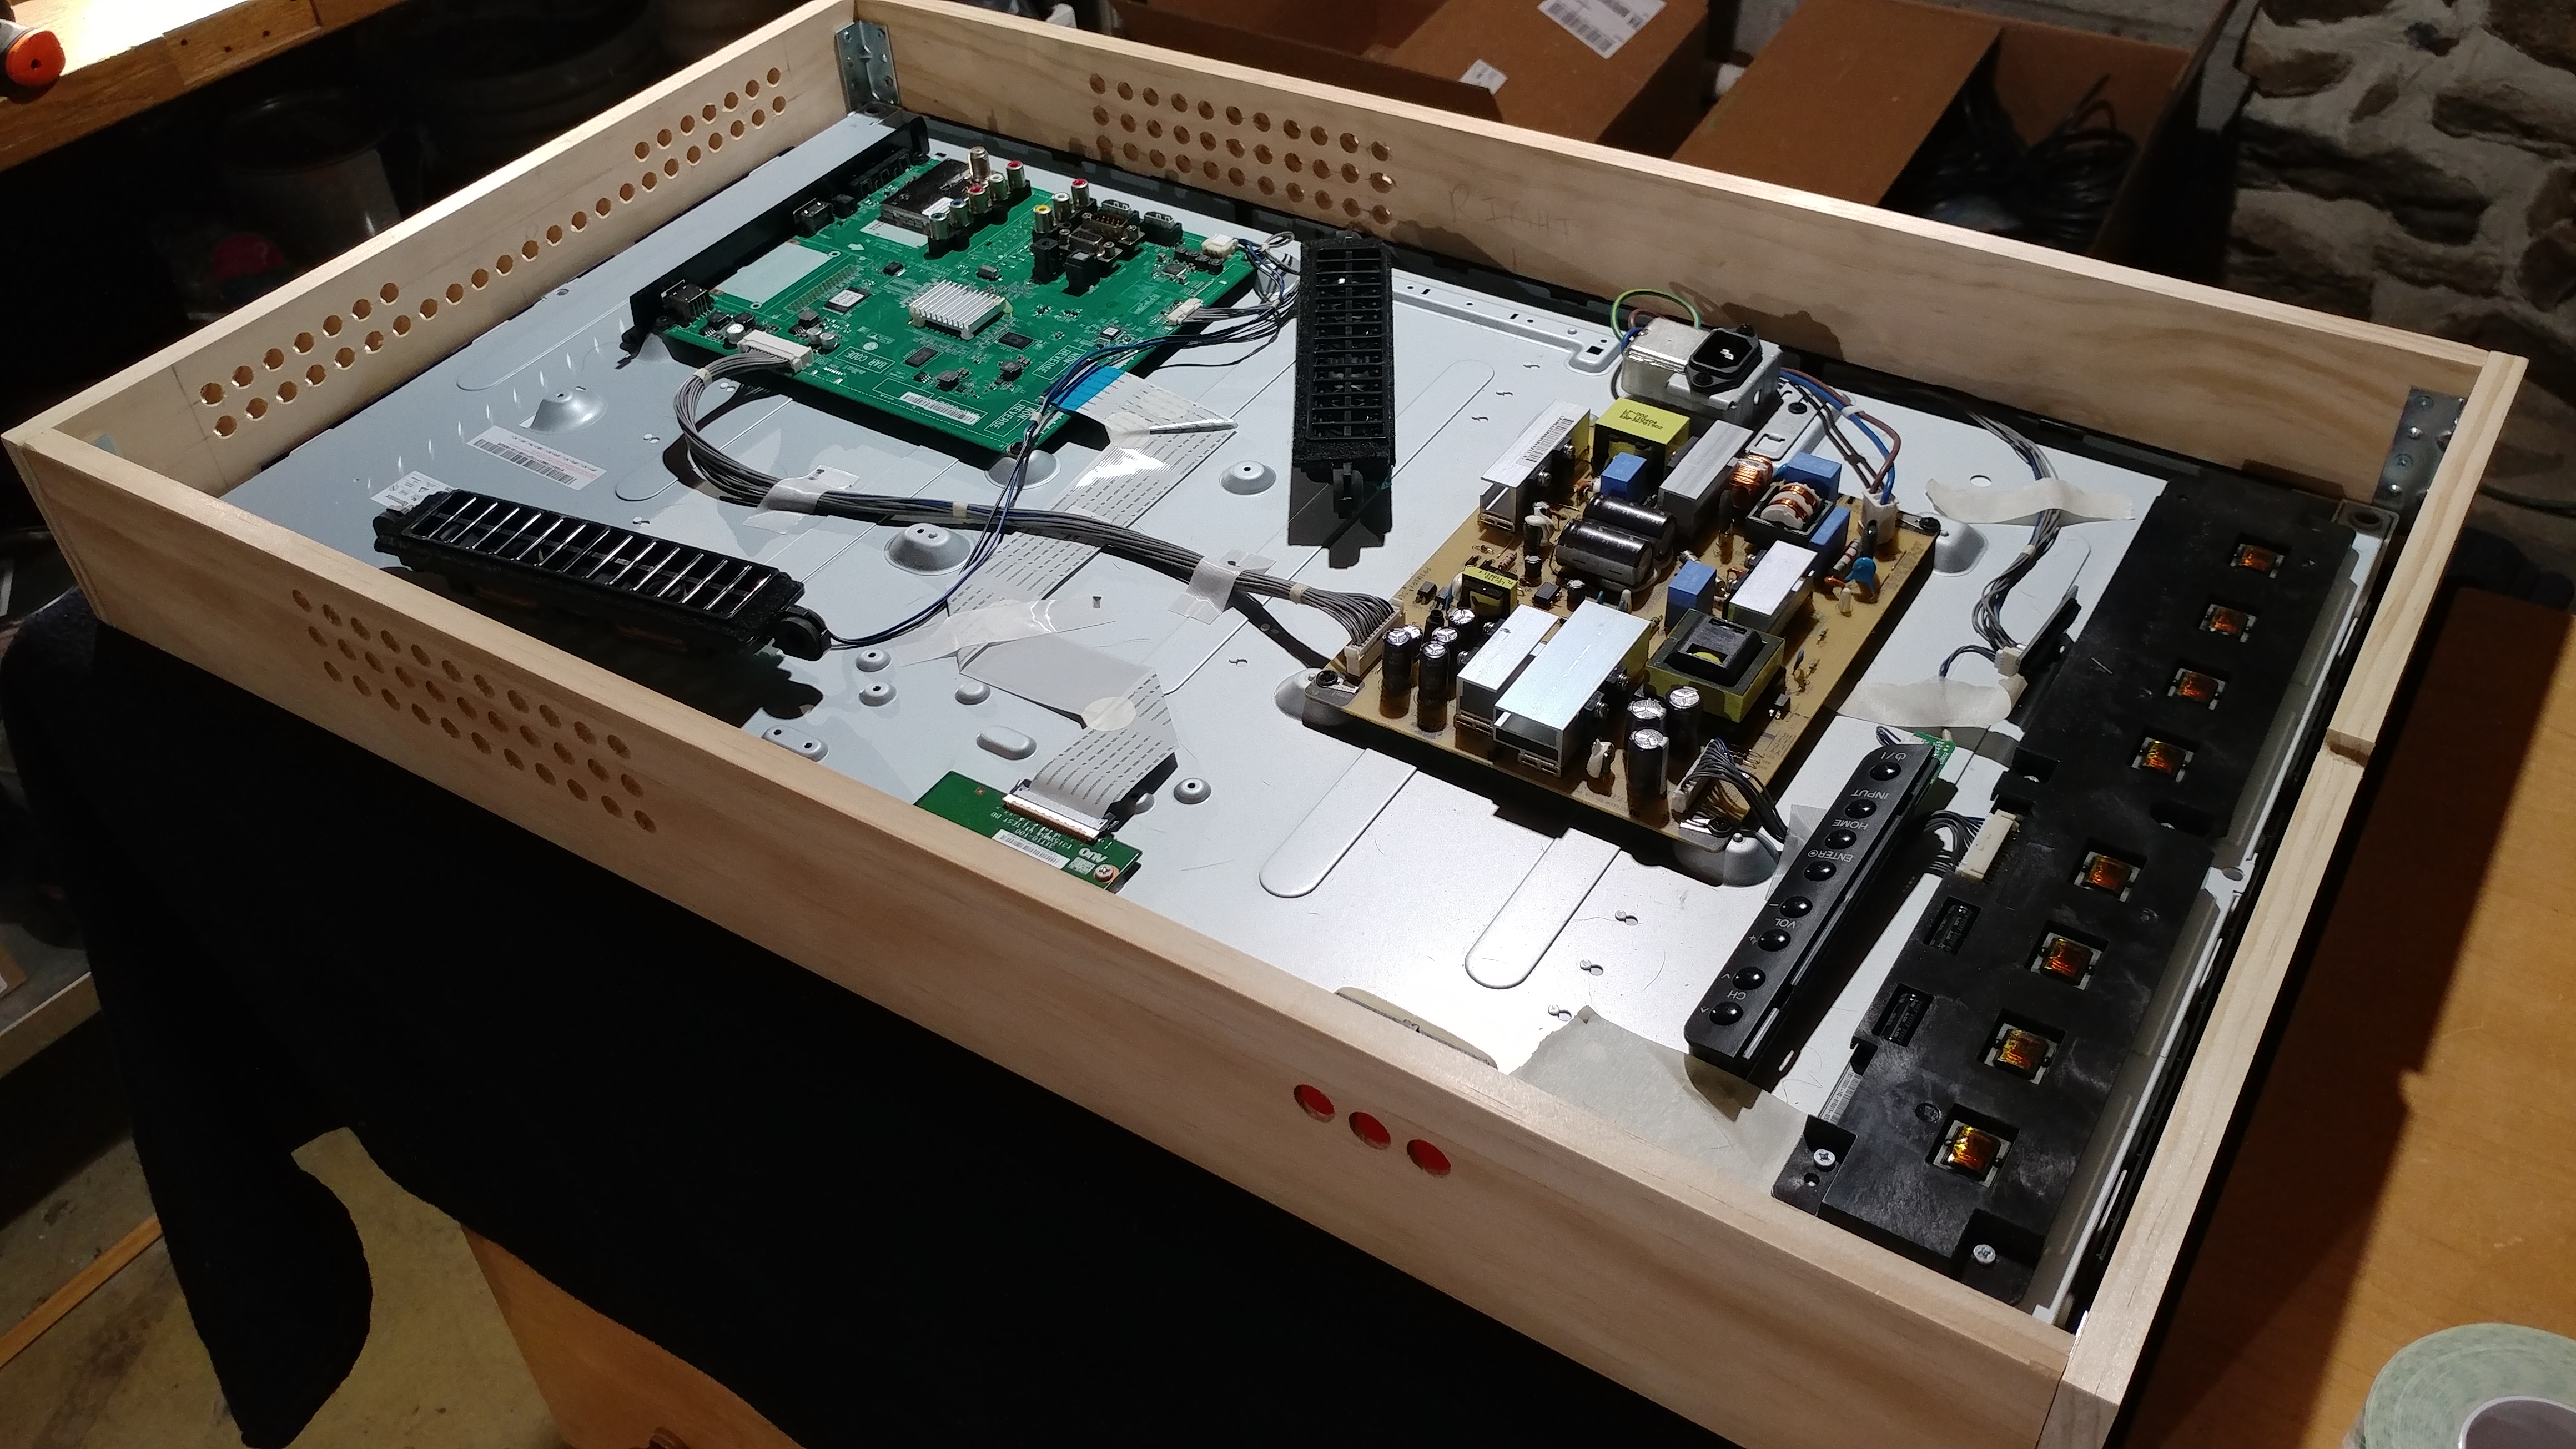
I found some extra trim pieces in the basement (left by the previous home owner) and glued them to the box frame with some strong wood glue to create a front facade. The mirror glass will ultimately be sandwiched between the front facade and the TV chassis.
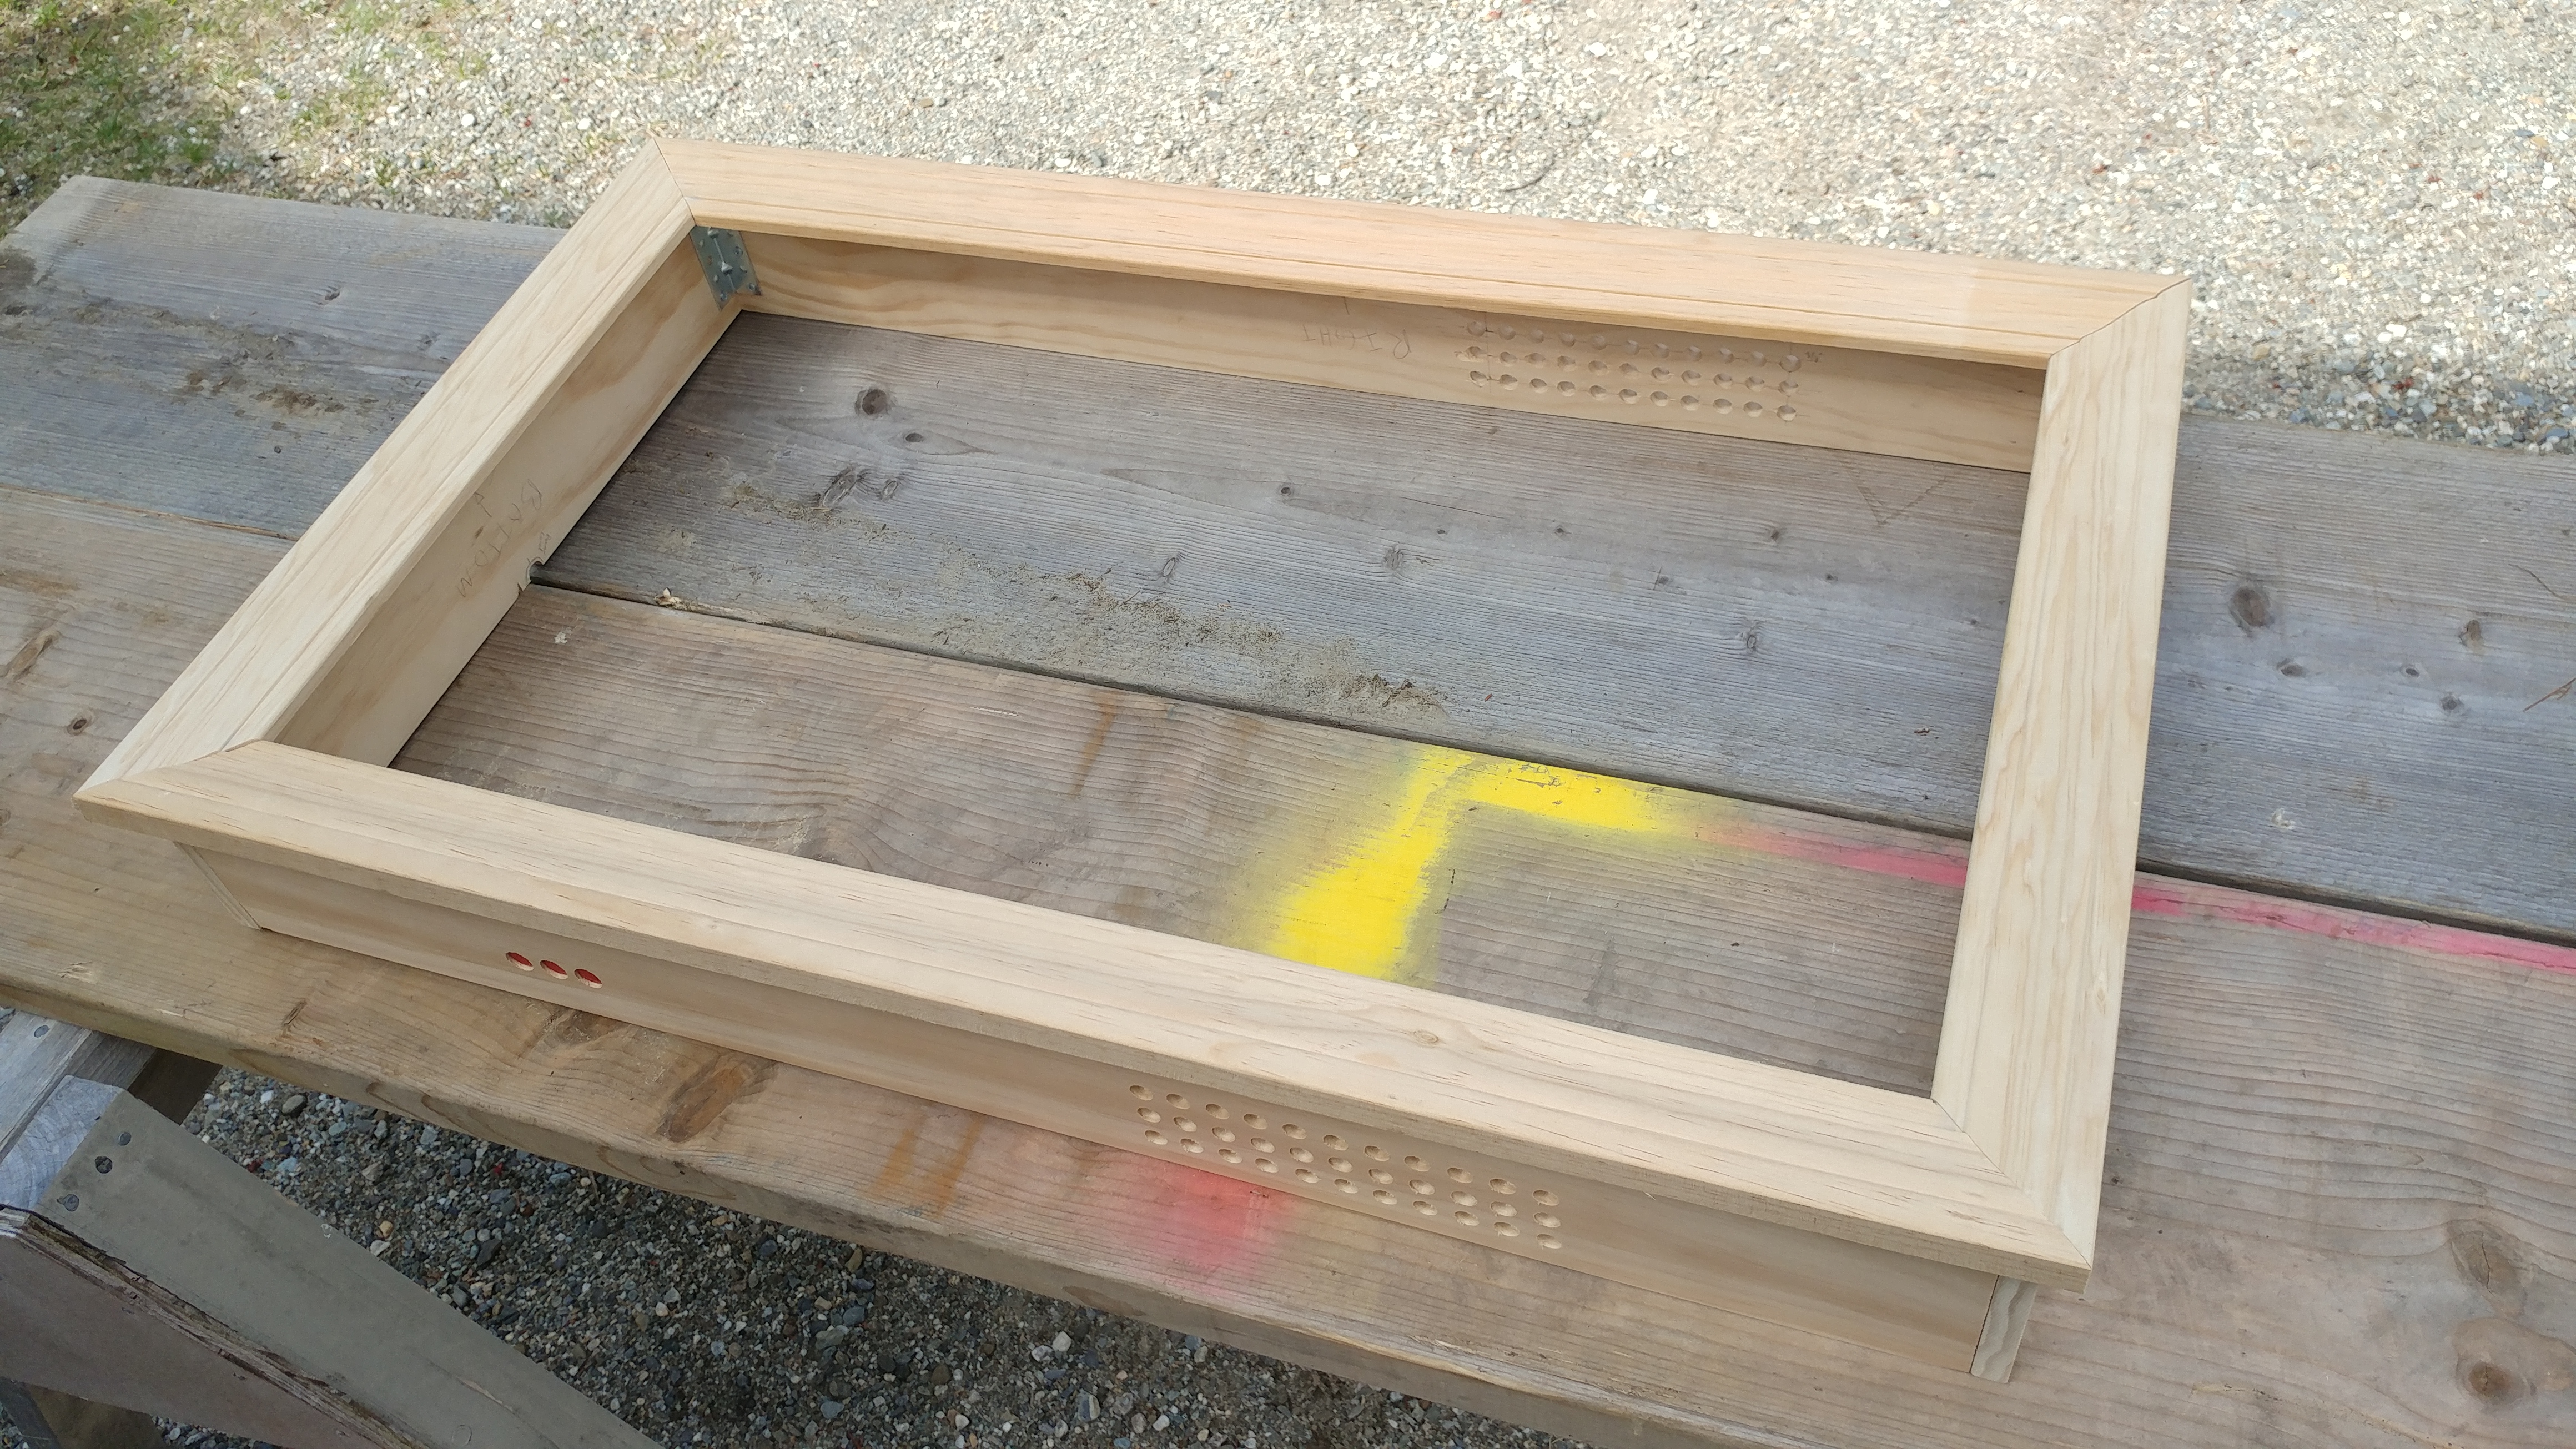
I also wanted a place to mount a passive infrared (PIR) sensor to the mirror so that I could program some screen wake/sleep behavior. I ended up using a large hole saw to cut slightly more than half a circle out of a scrap piece of wood. I then drilled a hole in that piece big enough for the PIR sensor to peek through.
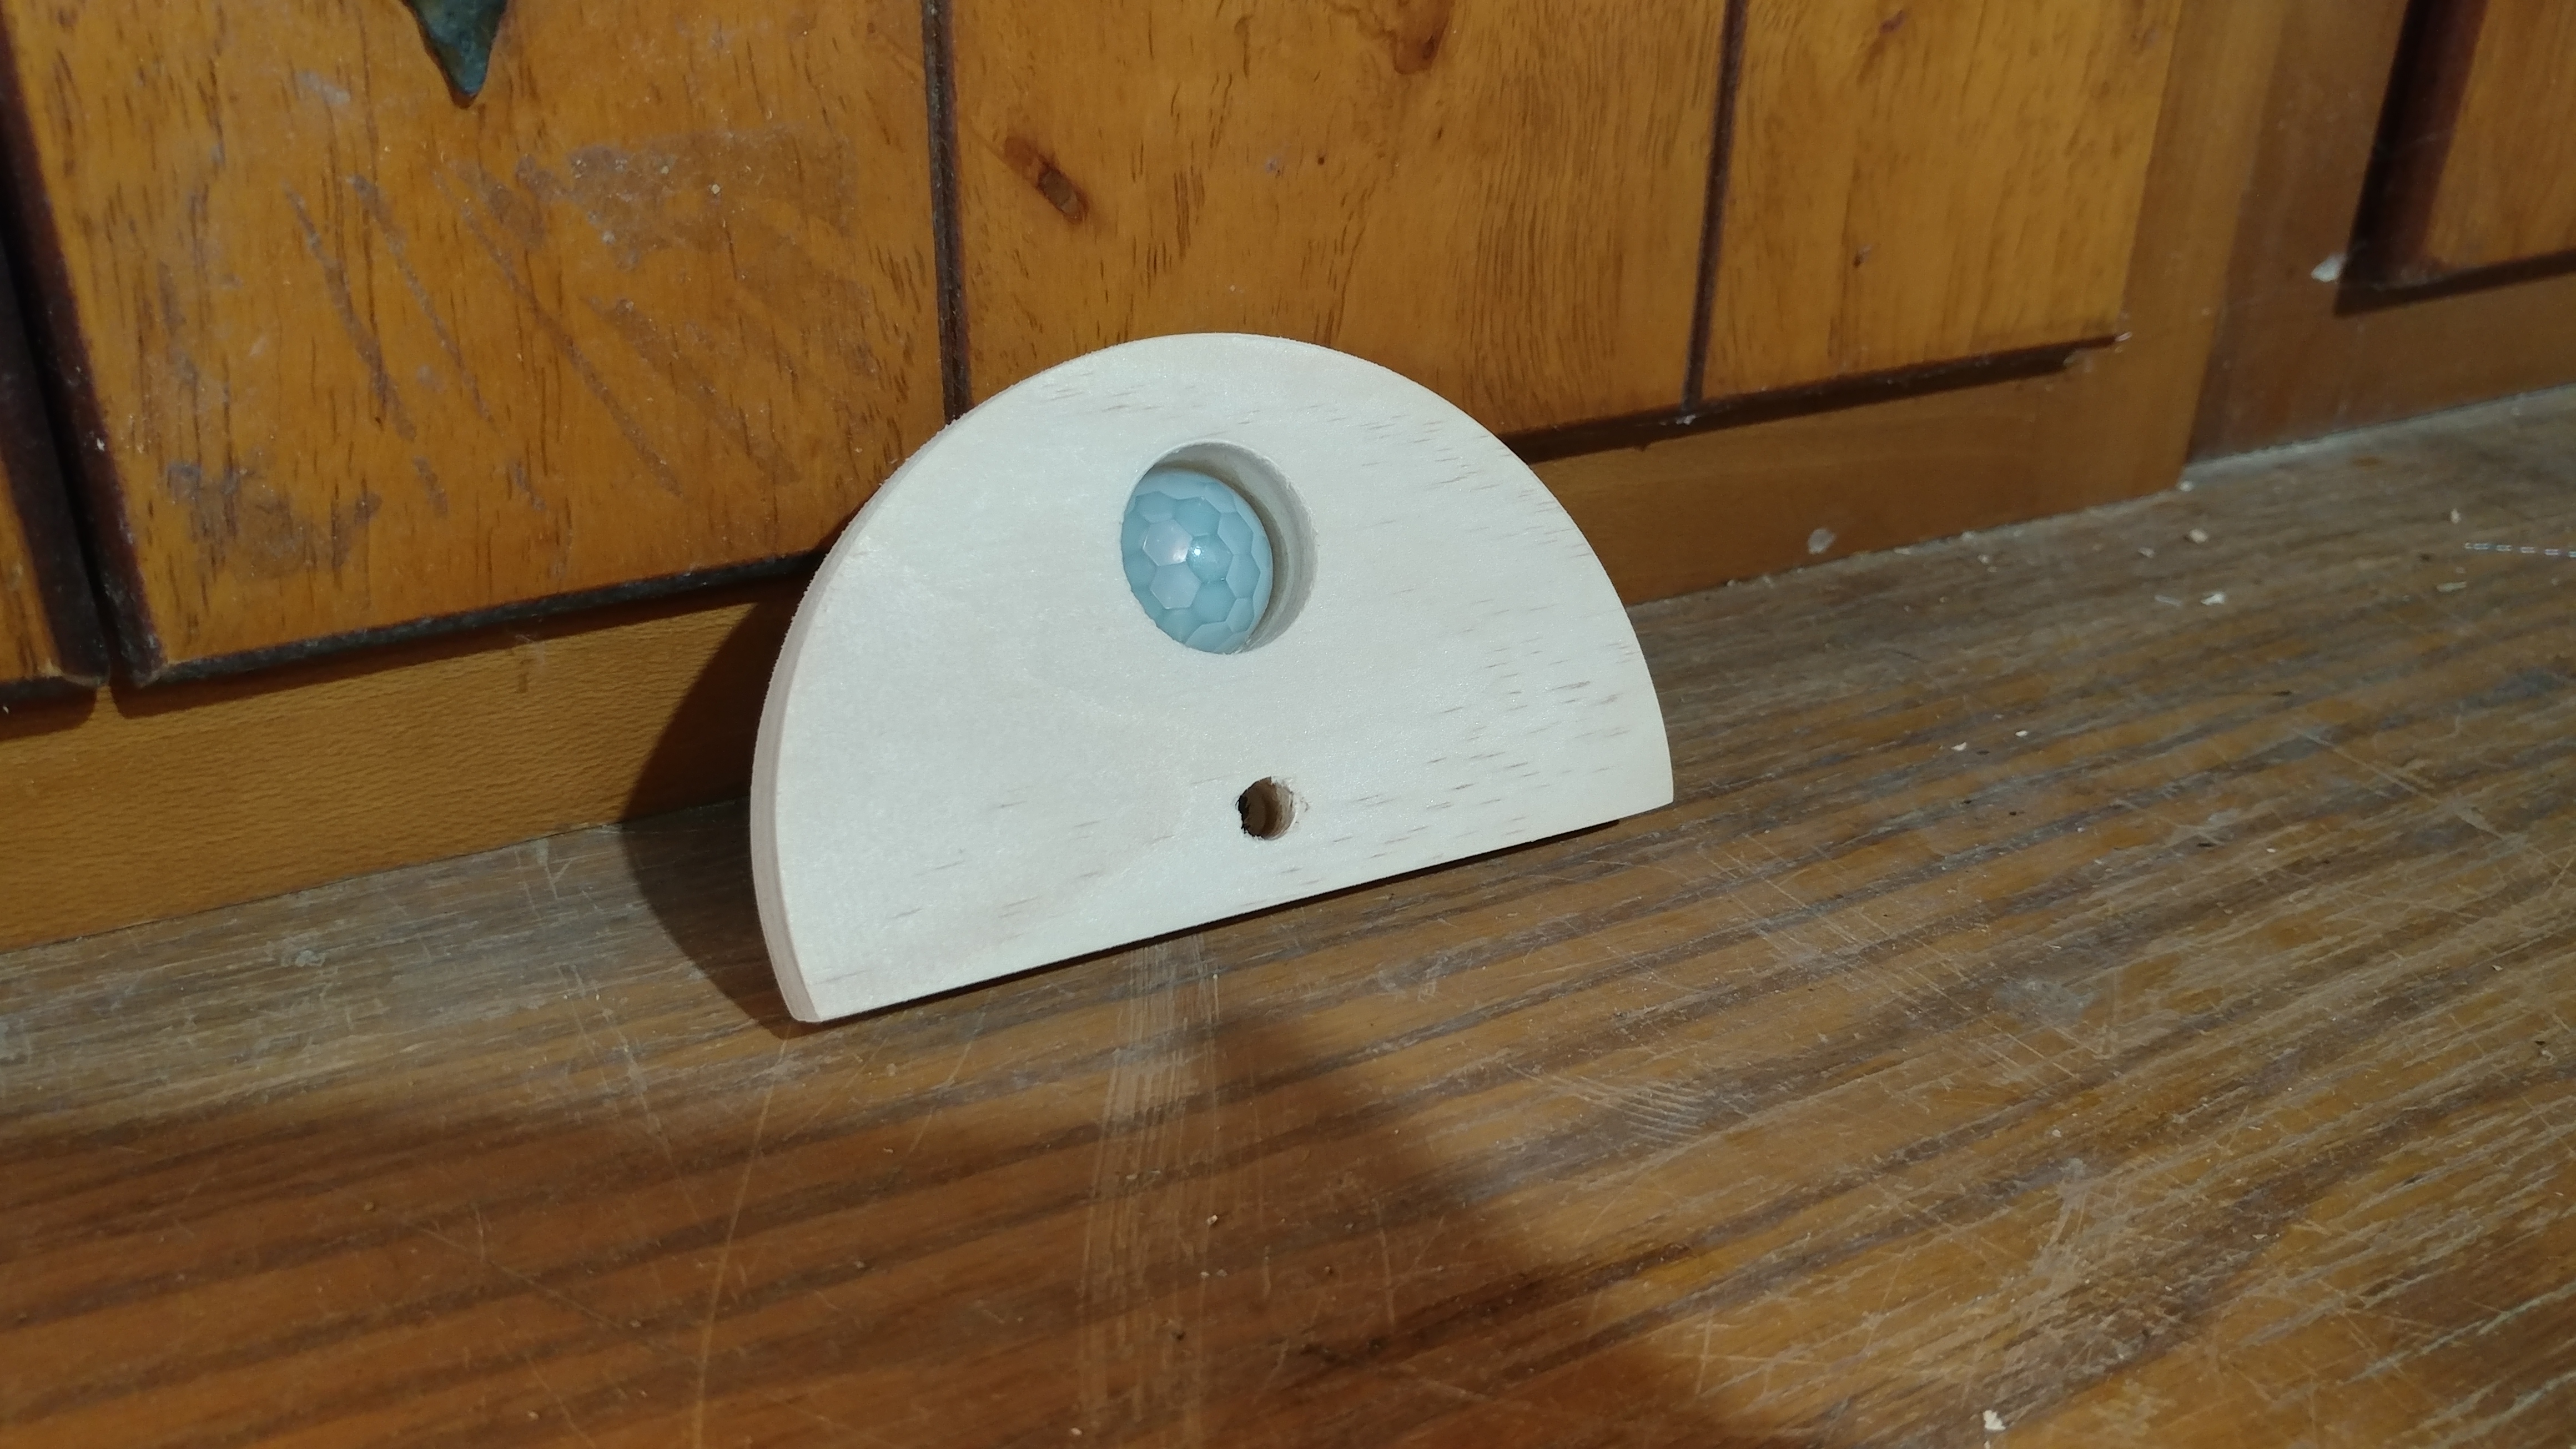
I glued the PIR mount to the top of the box frame behind the facade and after two coats of wood stain the frame was looking pretty good!

Two-Way Mirror Glass
So far, I spent very little on parts and materials. The electronic components were all laying around as was most of the wood, screws, glue, etc. However, the cost of the project went up considerably once the mirror glass came into the picture.
I needed a custom cut piece of two-way mirror glass to match the dimensions of the TV and box frame, which ended up being 17.75" x 30". The cheapest source I could find was Two Way Mirrors and a ¼" thick piece ran me a little over $250, but they were able to match my dimensions exactly and their customer service was great.
The mirror glass actually shattered during shipping the first time but Krista and James at Two Way Mirrors were nice enough to send me a replacement at no charge (which arrived without issue).
This glass is rated as 70% reflective and 11% transparent. So, the mirror will reflect 70% of the light from the room back to the viewer and 11% of the light from the TV display will pass through the glass and be visible to anyone on the other side.
Putting It All Together
I placed the glass in the box frame so that it rested on the backside of the front facade. From there I lowered the TV chassis onto the glass, sandwiching it in place. I used four more corner brackets to keep it all together (one at each corner).
At this point, things came together pretty quickly:
- Installed the Raspberry Pi in a case and secured it to the TV chassis with Velcro so it could be easily removed for servicing.
- Ran an HDMI cable from the Raspberry Pi to the TV’s HDMI input.
- Attached a mini power strip to the inside of the box frame with double-sided tape and ran the power cord out the hole I made in the bottom of the frame.
- Connected the TV and Raspberry Pi power cords to the power strip.
I had to use a right-angle AC power cord for the TV to keep everything inside the box frame. Even still, the tip of the plug sticks out a few millimeters above the edges of the frame, so I put a piece of adhesive felt on it to avoid damaging my wall when mounted.
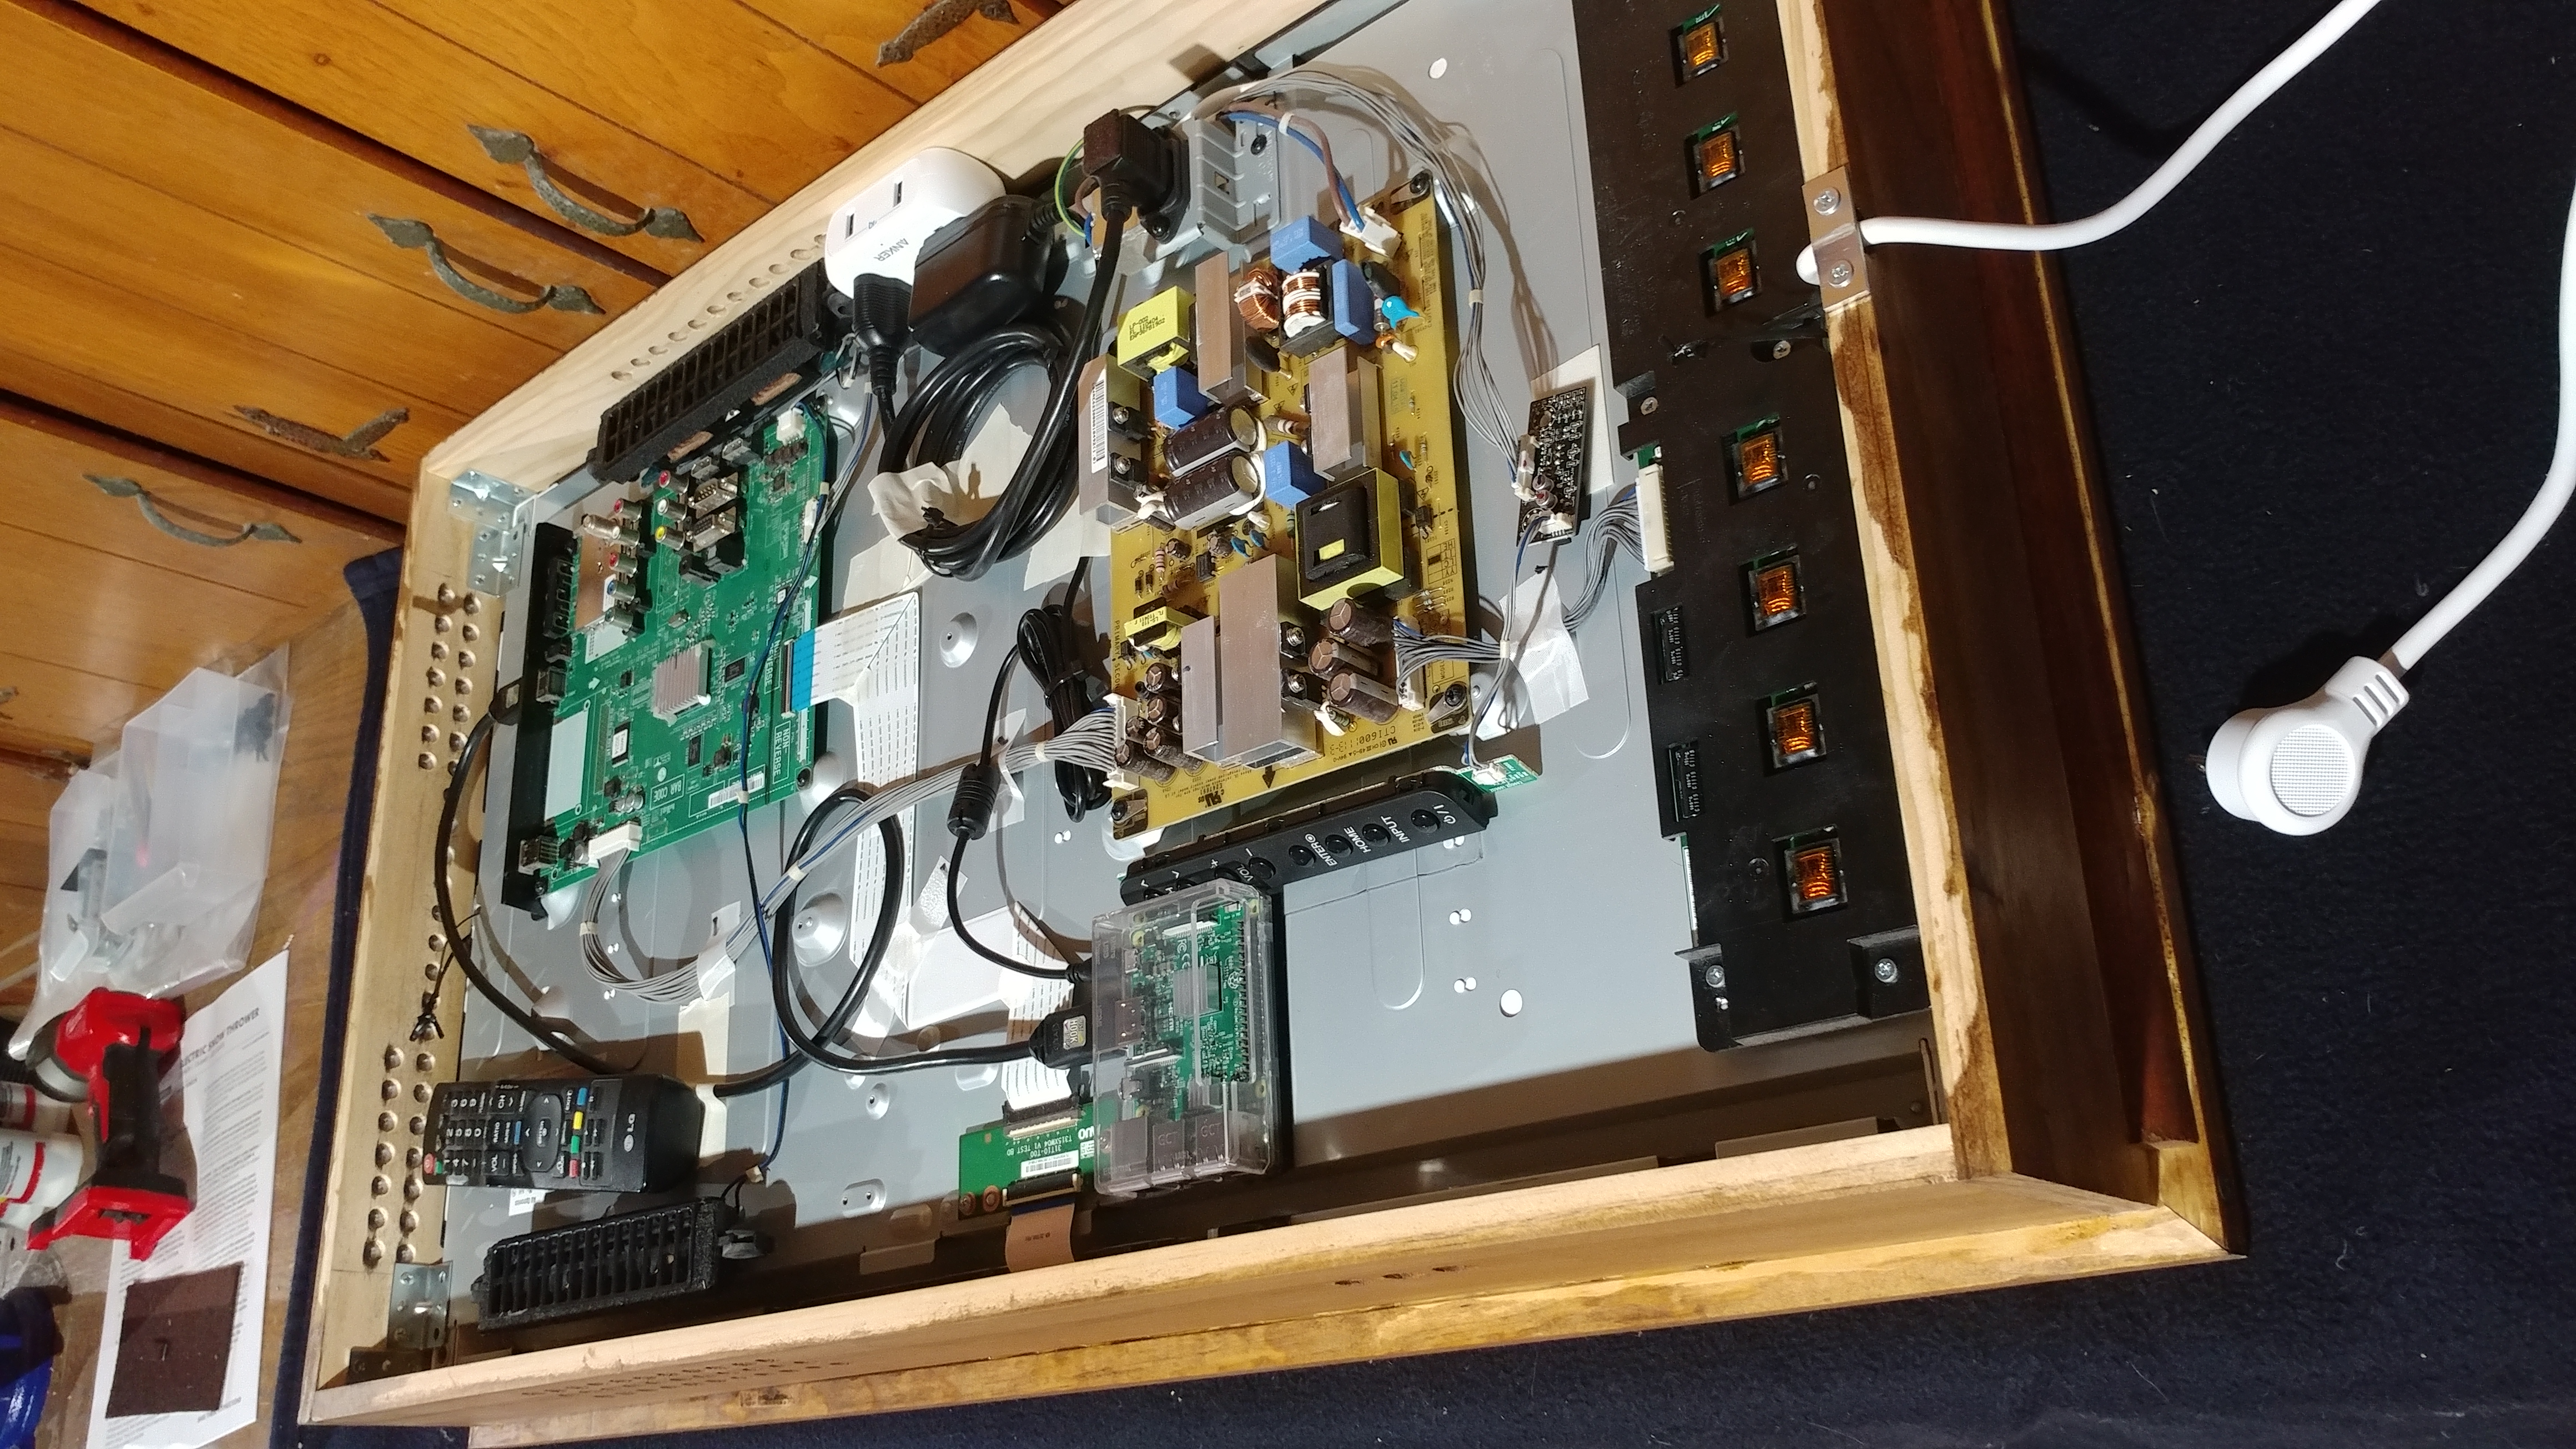
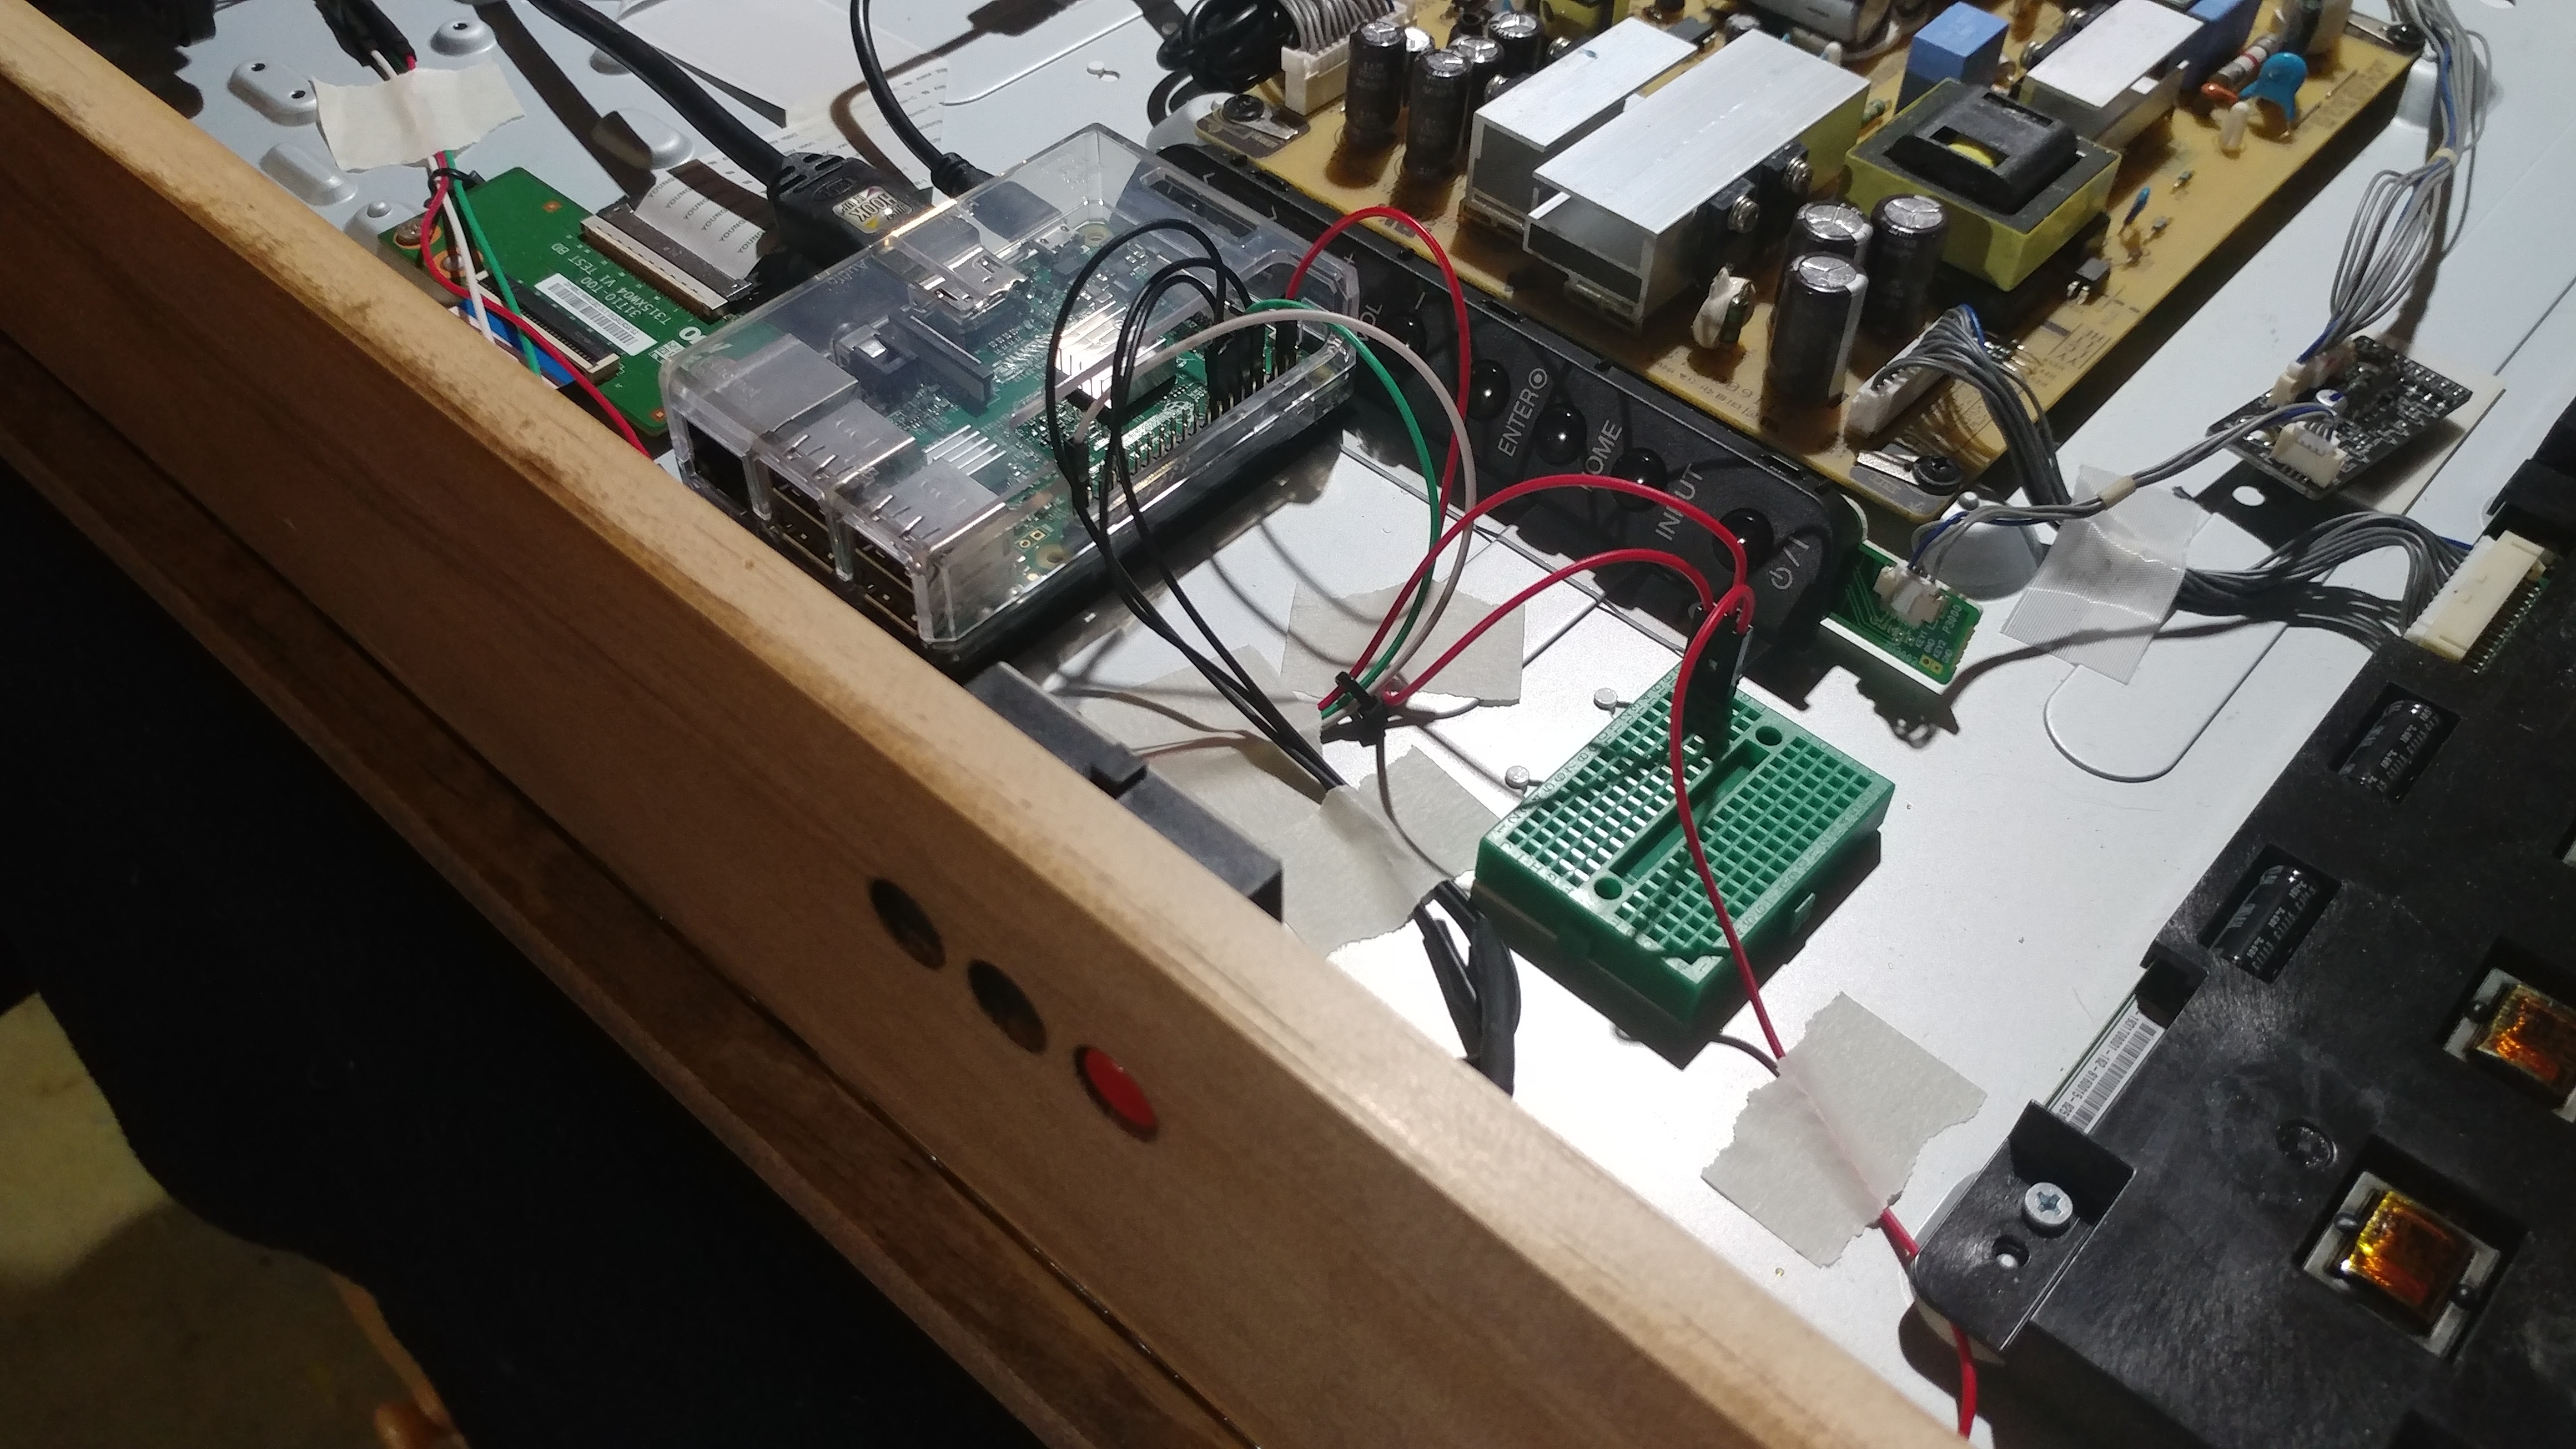
Finally, I wired three buttons and the PIR sensor to the Raspberry Pi’s GPIO pins 4, 17, 27, and 26, respectively. I was too lazy to do any soldering so I just used some jumper wires and a little bread board.
Final thoughts
I am definitely not a woodworker. But overall, I was very happy with how the frame turned out. The trim I used for the front facade makes it look a little old-timey, but I don’t mind since it matches the motif of the rest of our house. For mounting hardware, I ended up using a heavy duty picture frame mounting kit which is rating for 70 lbs. The whole Magic Mirror weighs about 30 lbs, and most of that is the mirror glass.
I really liked that through a combination of Wi-Fi and a tiny power strip that I was able to have just a single cord power cord emerging from what otherwise looks like a regular mirror. Some day I may route that cord inside the wall for an even cleaner look.
One thing I struggled with for longer than I care to admit was how I was going to secure the TV chassis to the box frame. There were no screw holes in the chassis I could take advantage of and I was worried that I was going to need to drill a hole and potentially damage some internal component I couldn’t see. The solution was to sandwich the TV chassis and mirror glass between the front facade and the corner brackets on the inside of the frame. So, there are actually no fasteners holding any of these pieces together—it is held together statically. This turned out to be quite sturdy, though. I haven’t had any structural issues in the 8 months it has been mounted to the wall.
Because the mirror glass I purchased was only 11% transparent (there are more expensive options that are more transparent) I needed to set the TV’s brightness to 100% for text to be legible in daylight, which isn’t great for energy usage. But more on this in my next post.