
Jeff Keller
May 6, 2021
PC Build 2020
If you want to see more than specs and pictures, scroll down further or use the table of contents to get to the full story behind this build.
Specs
When I build a new PC I try to re-use as many components as possible, but for this build I upgraded everything except for the storage drives.
Main Components
- AMD Ryzen 9 5950X CPU
- MSI Ventus 3X Nvidia RTX 3090 GPU
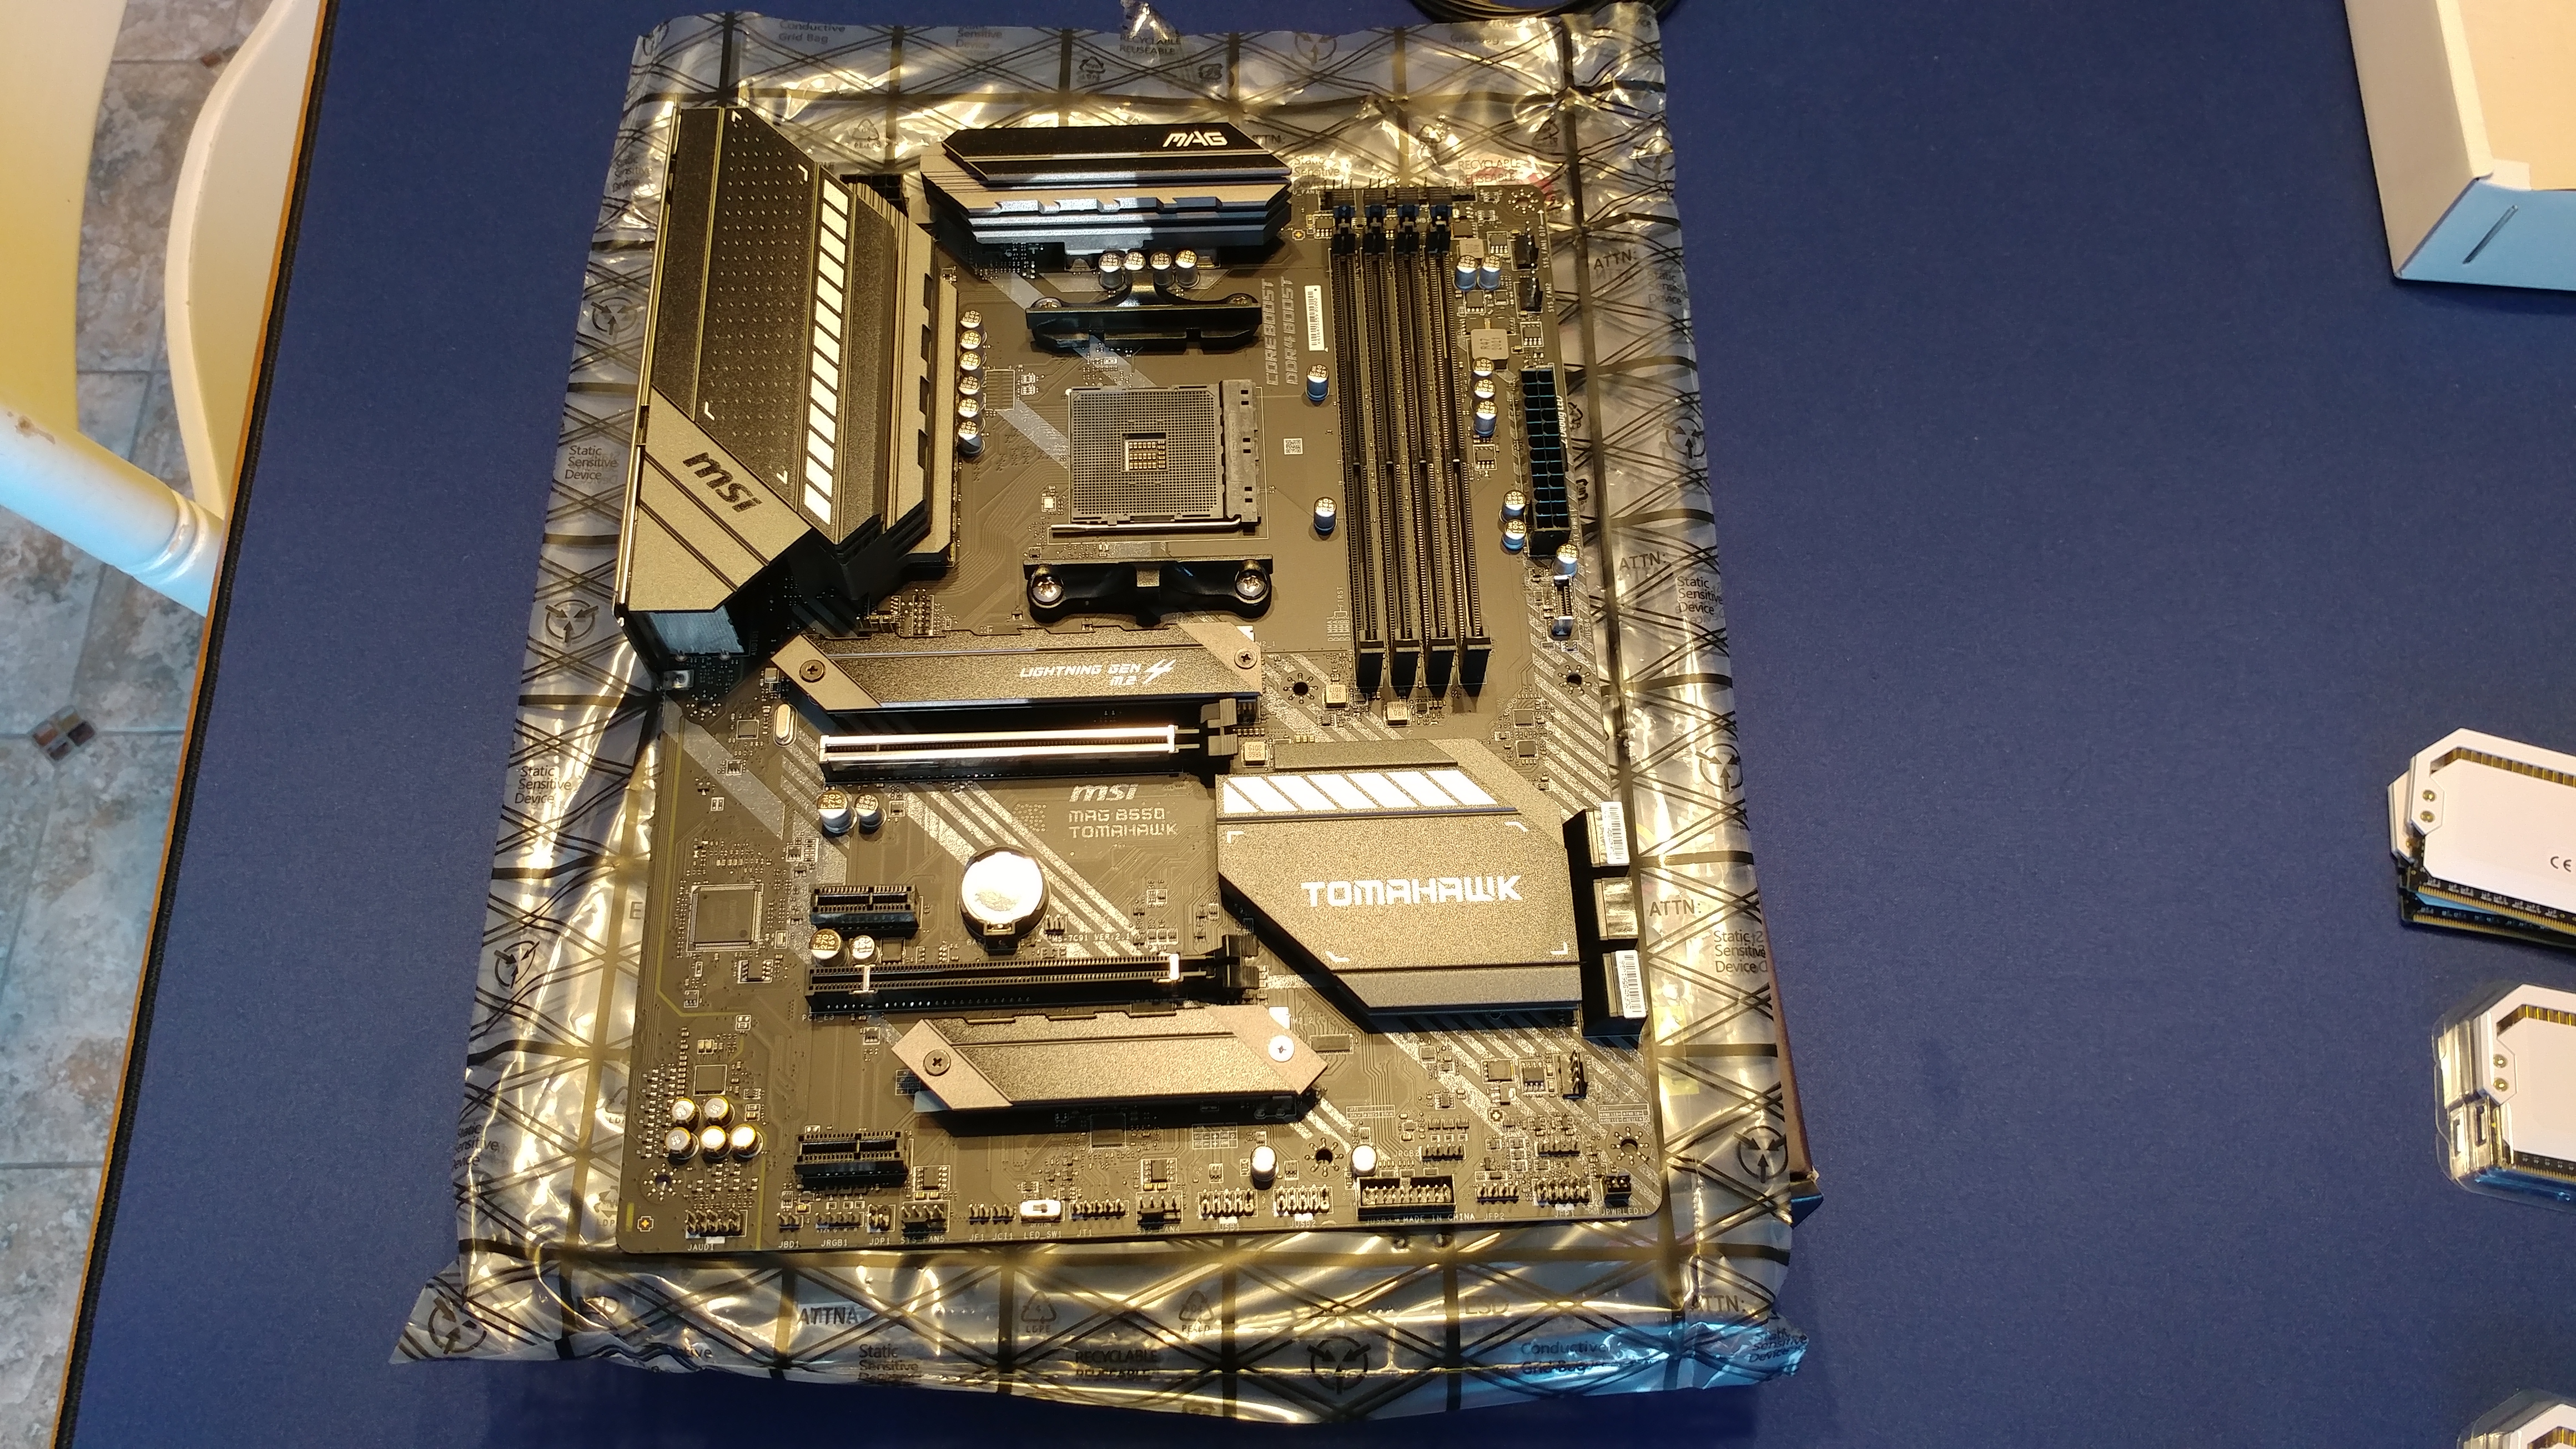
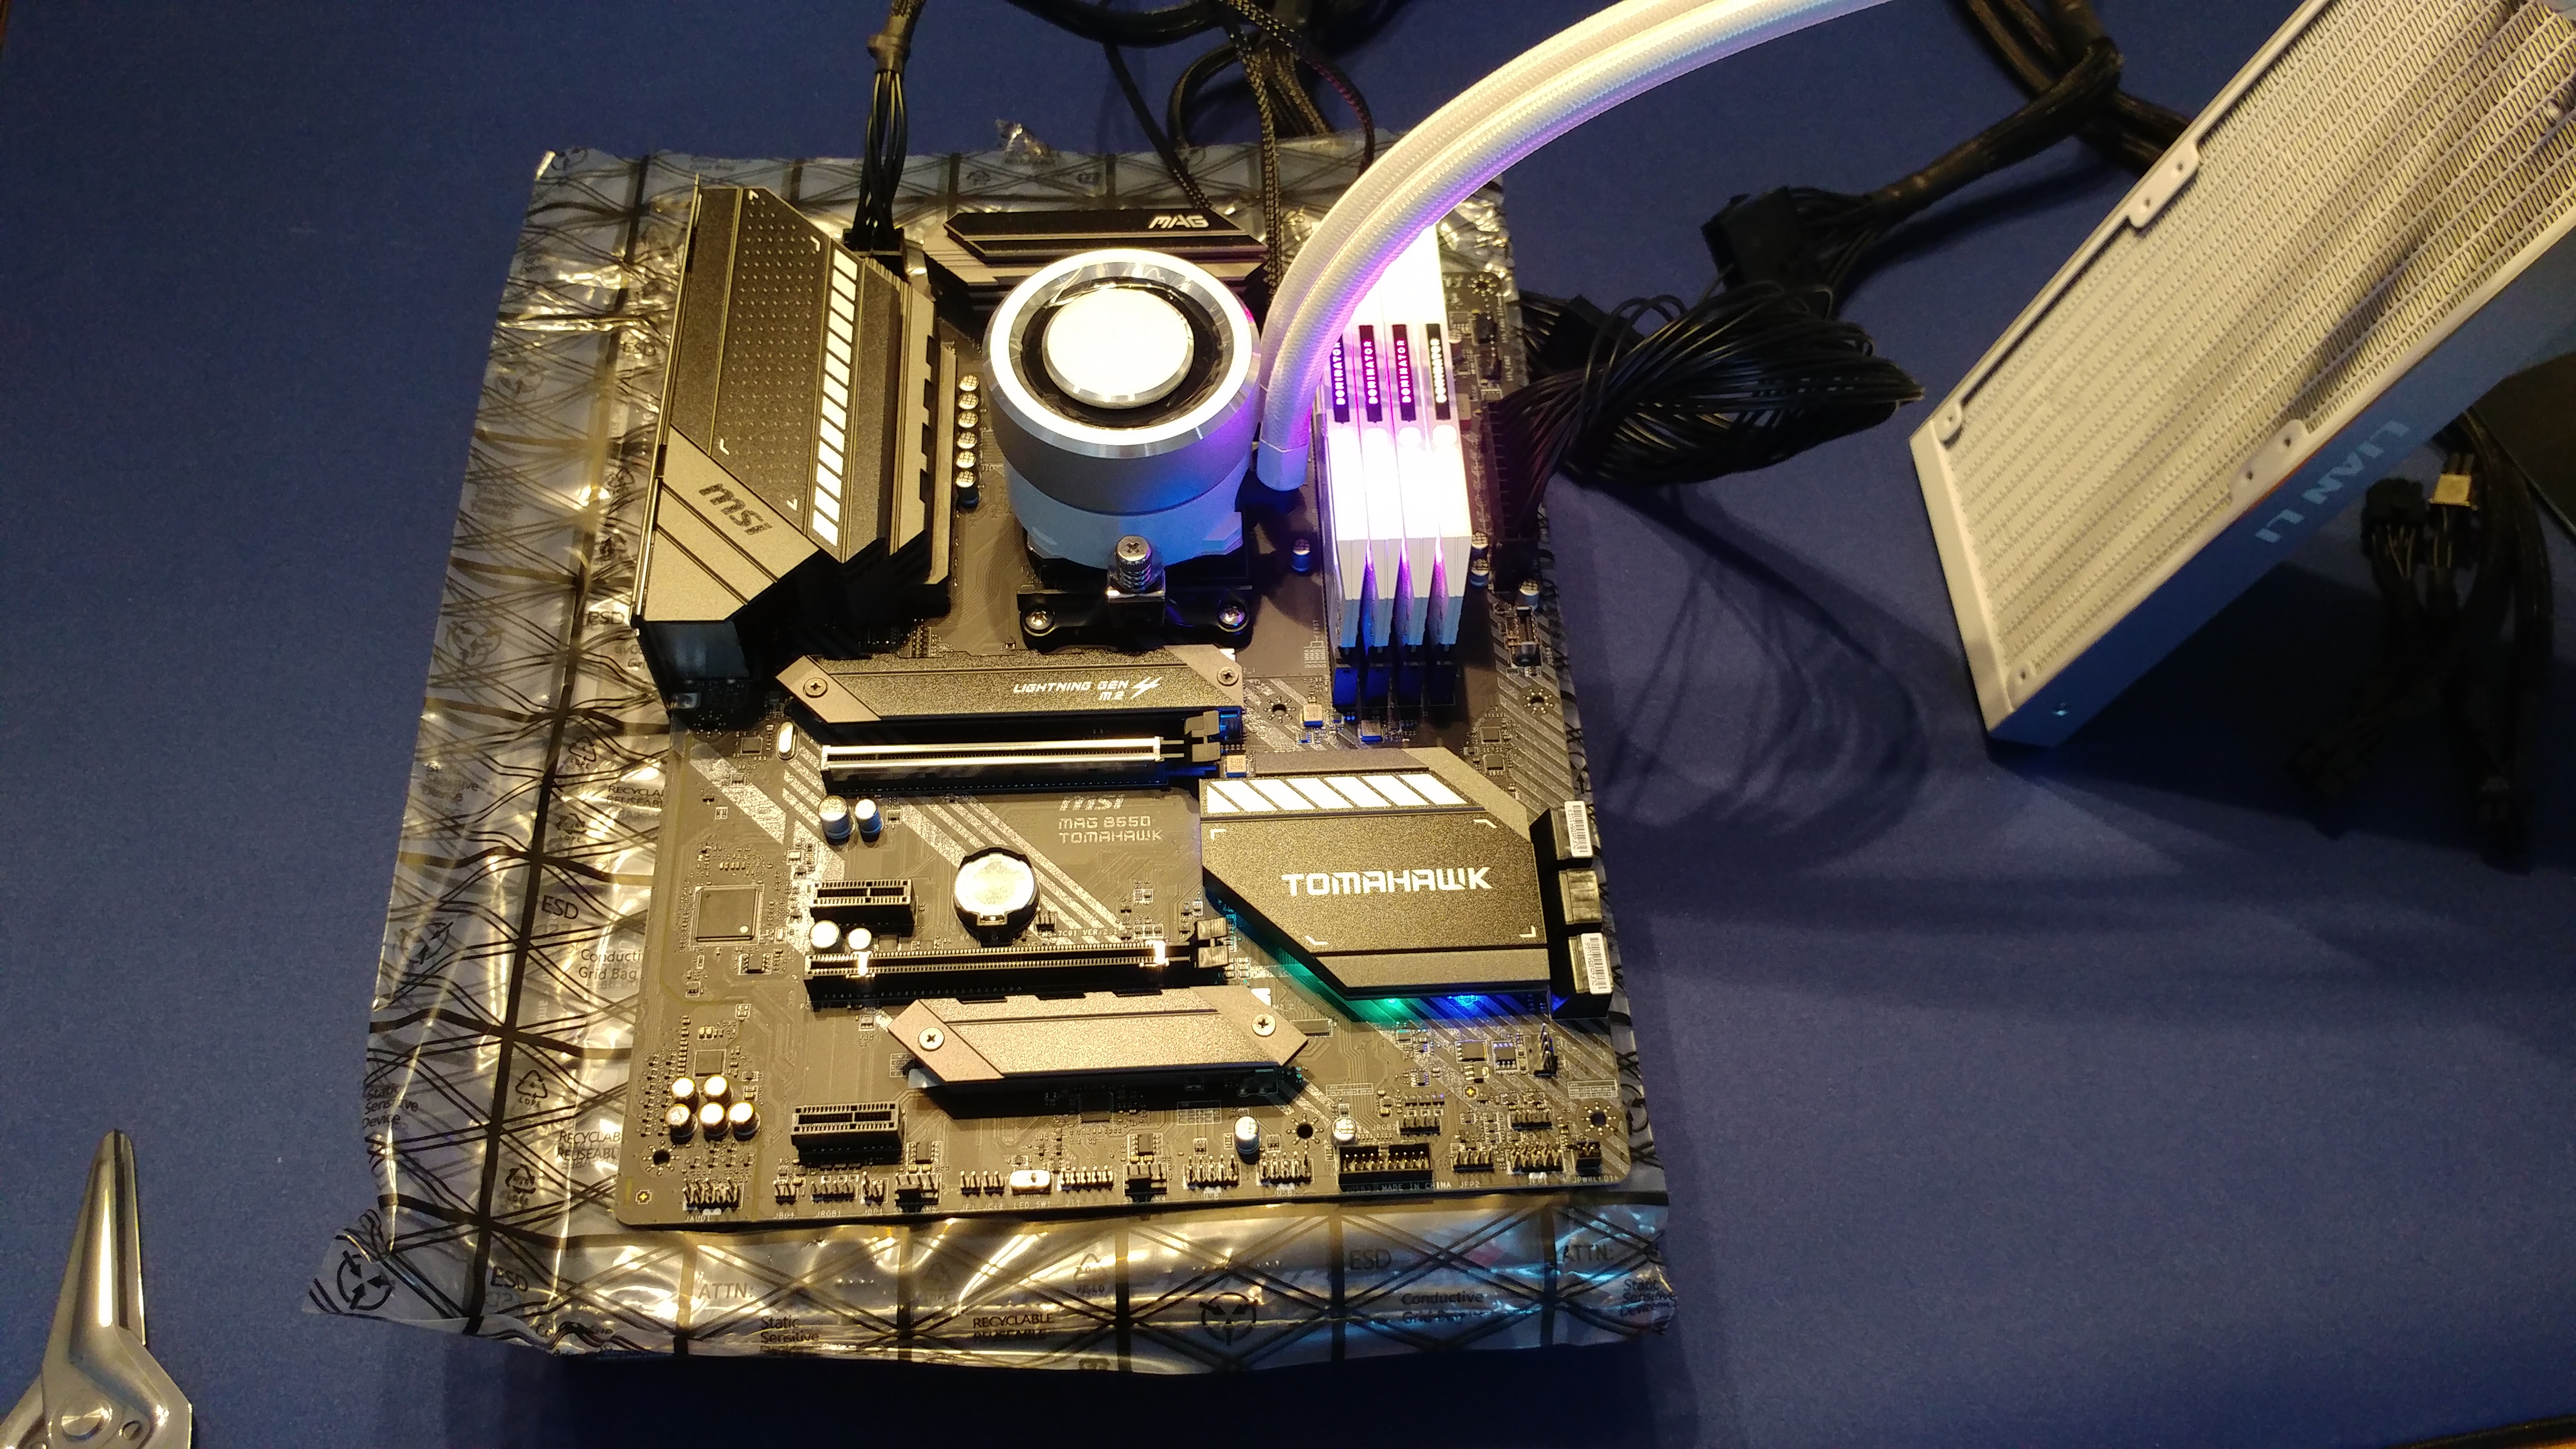
- MSI MAG B550 Tomahawk motherboard
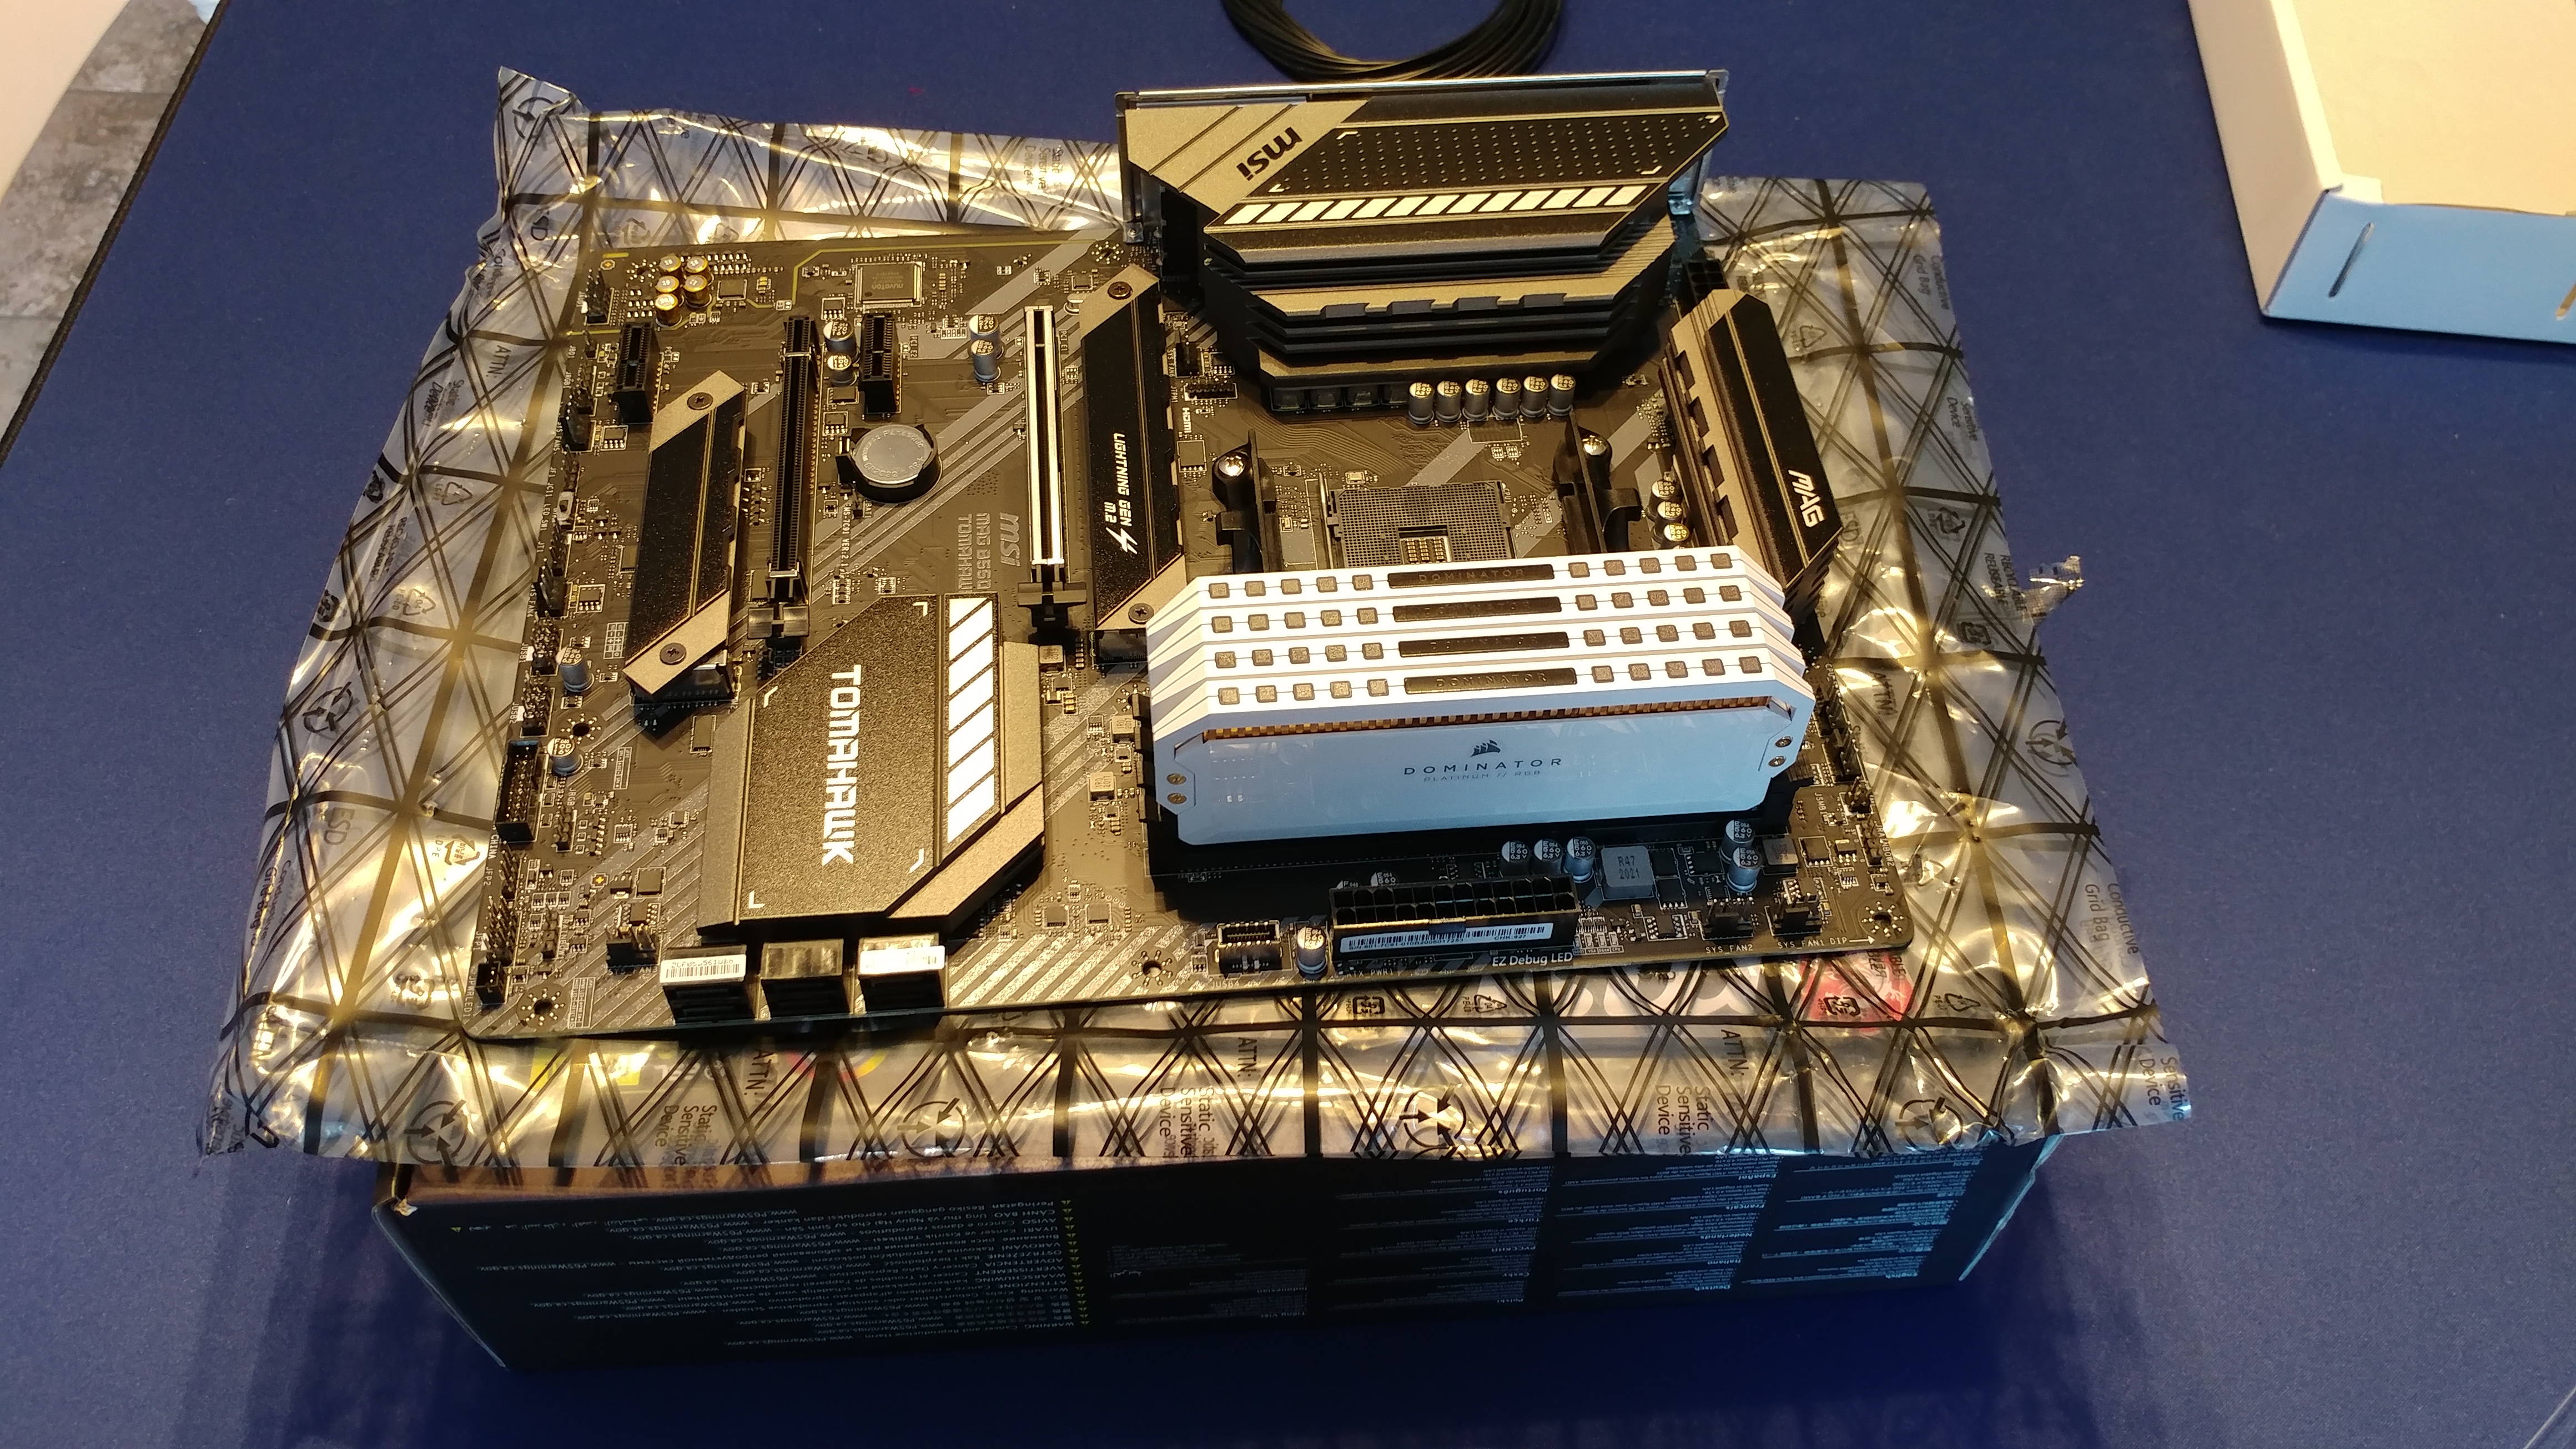
- Corsair Dominator Platinum RAM 32GB (4x8GB) DDR4 3200 MT/s @ CL16
- EVGA SuperNOVA 550 GM 80+ Gold 550W power supply (x2)
- Lian Li White O11 Dynamic MINI case
Storage
- Samsung 970 EVO NVMe 1TB SSD (Linux)
- Samsung 850 EVO 2.5" 1TB SSD (Windows)
- SanDisk Plus 240GB SSD (backups)
Fans and Cooling
- Lian Li White Galahad 240mm AIO CPU liquid cooler
- Lian Li White UNI SL120 fans (x8)
- Lian Li White UNI SL140 fans (x2)
Other
- Lian Li Strimer Plus 24- and 2x8-pin aRGB power cables
- Corsair iCUE Lighting Node Pro RGB controller
- upHere G276ARGB GPU brace
- CableMod sleeved USB and fan header cables (white)
- Raspberry Pi 3 Model A+ resource monitor (custom)
Gallery
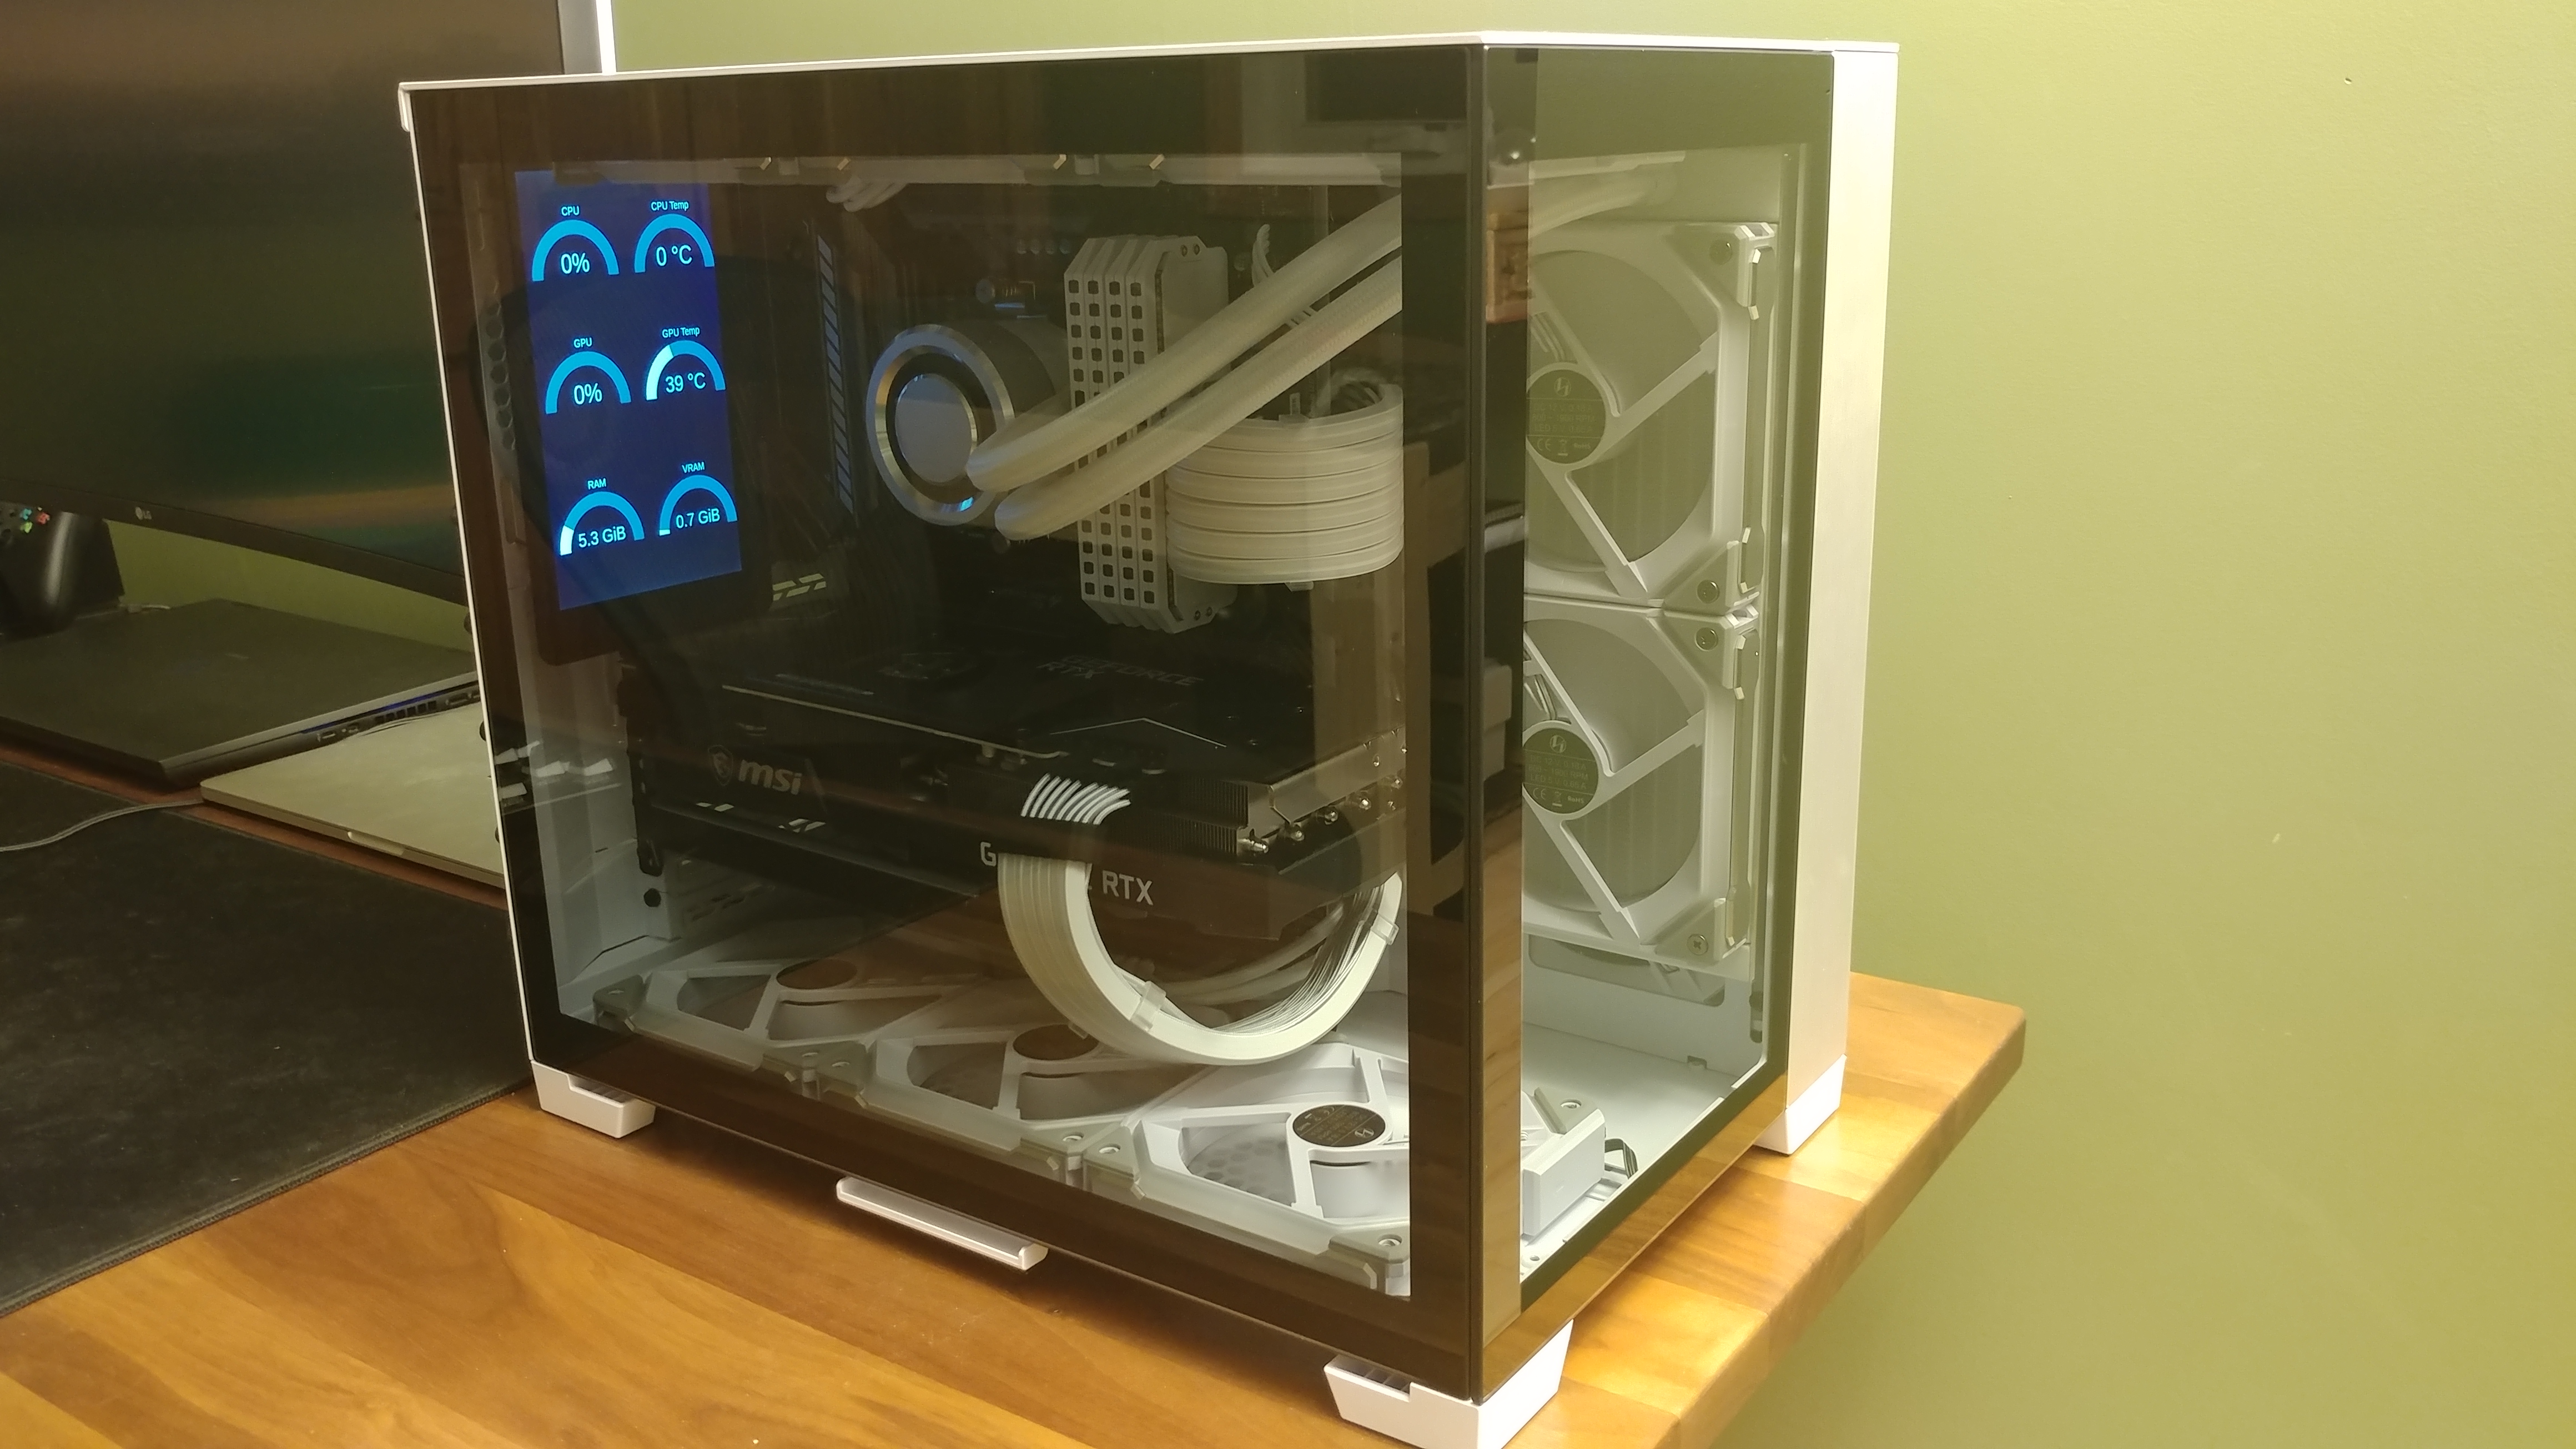
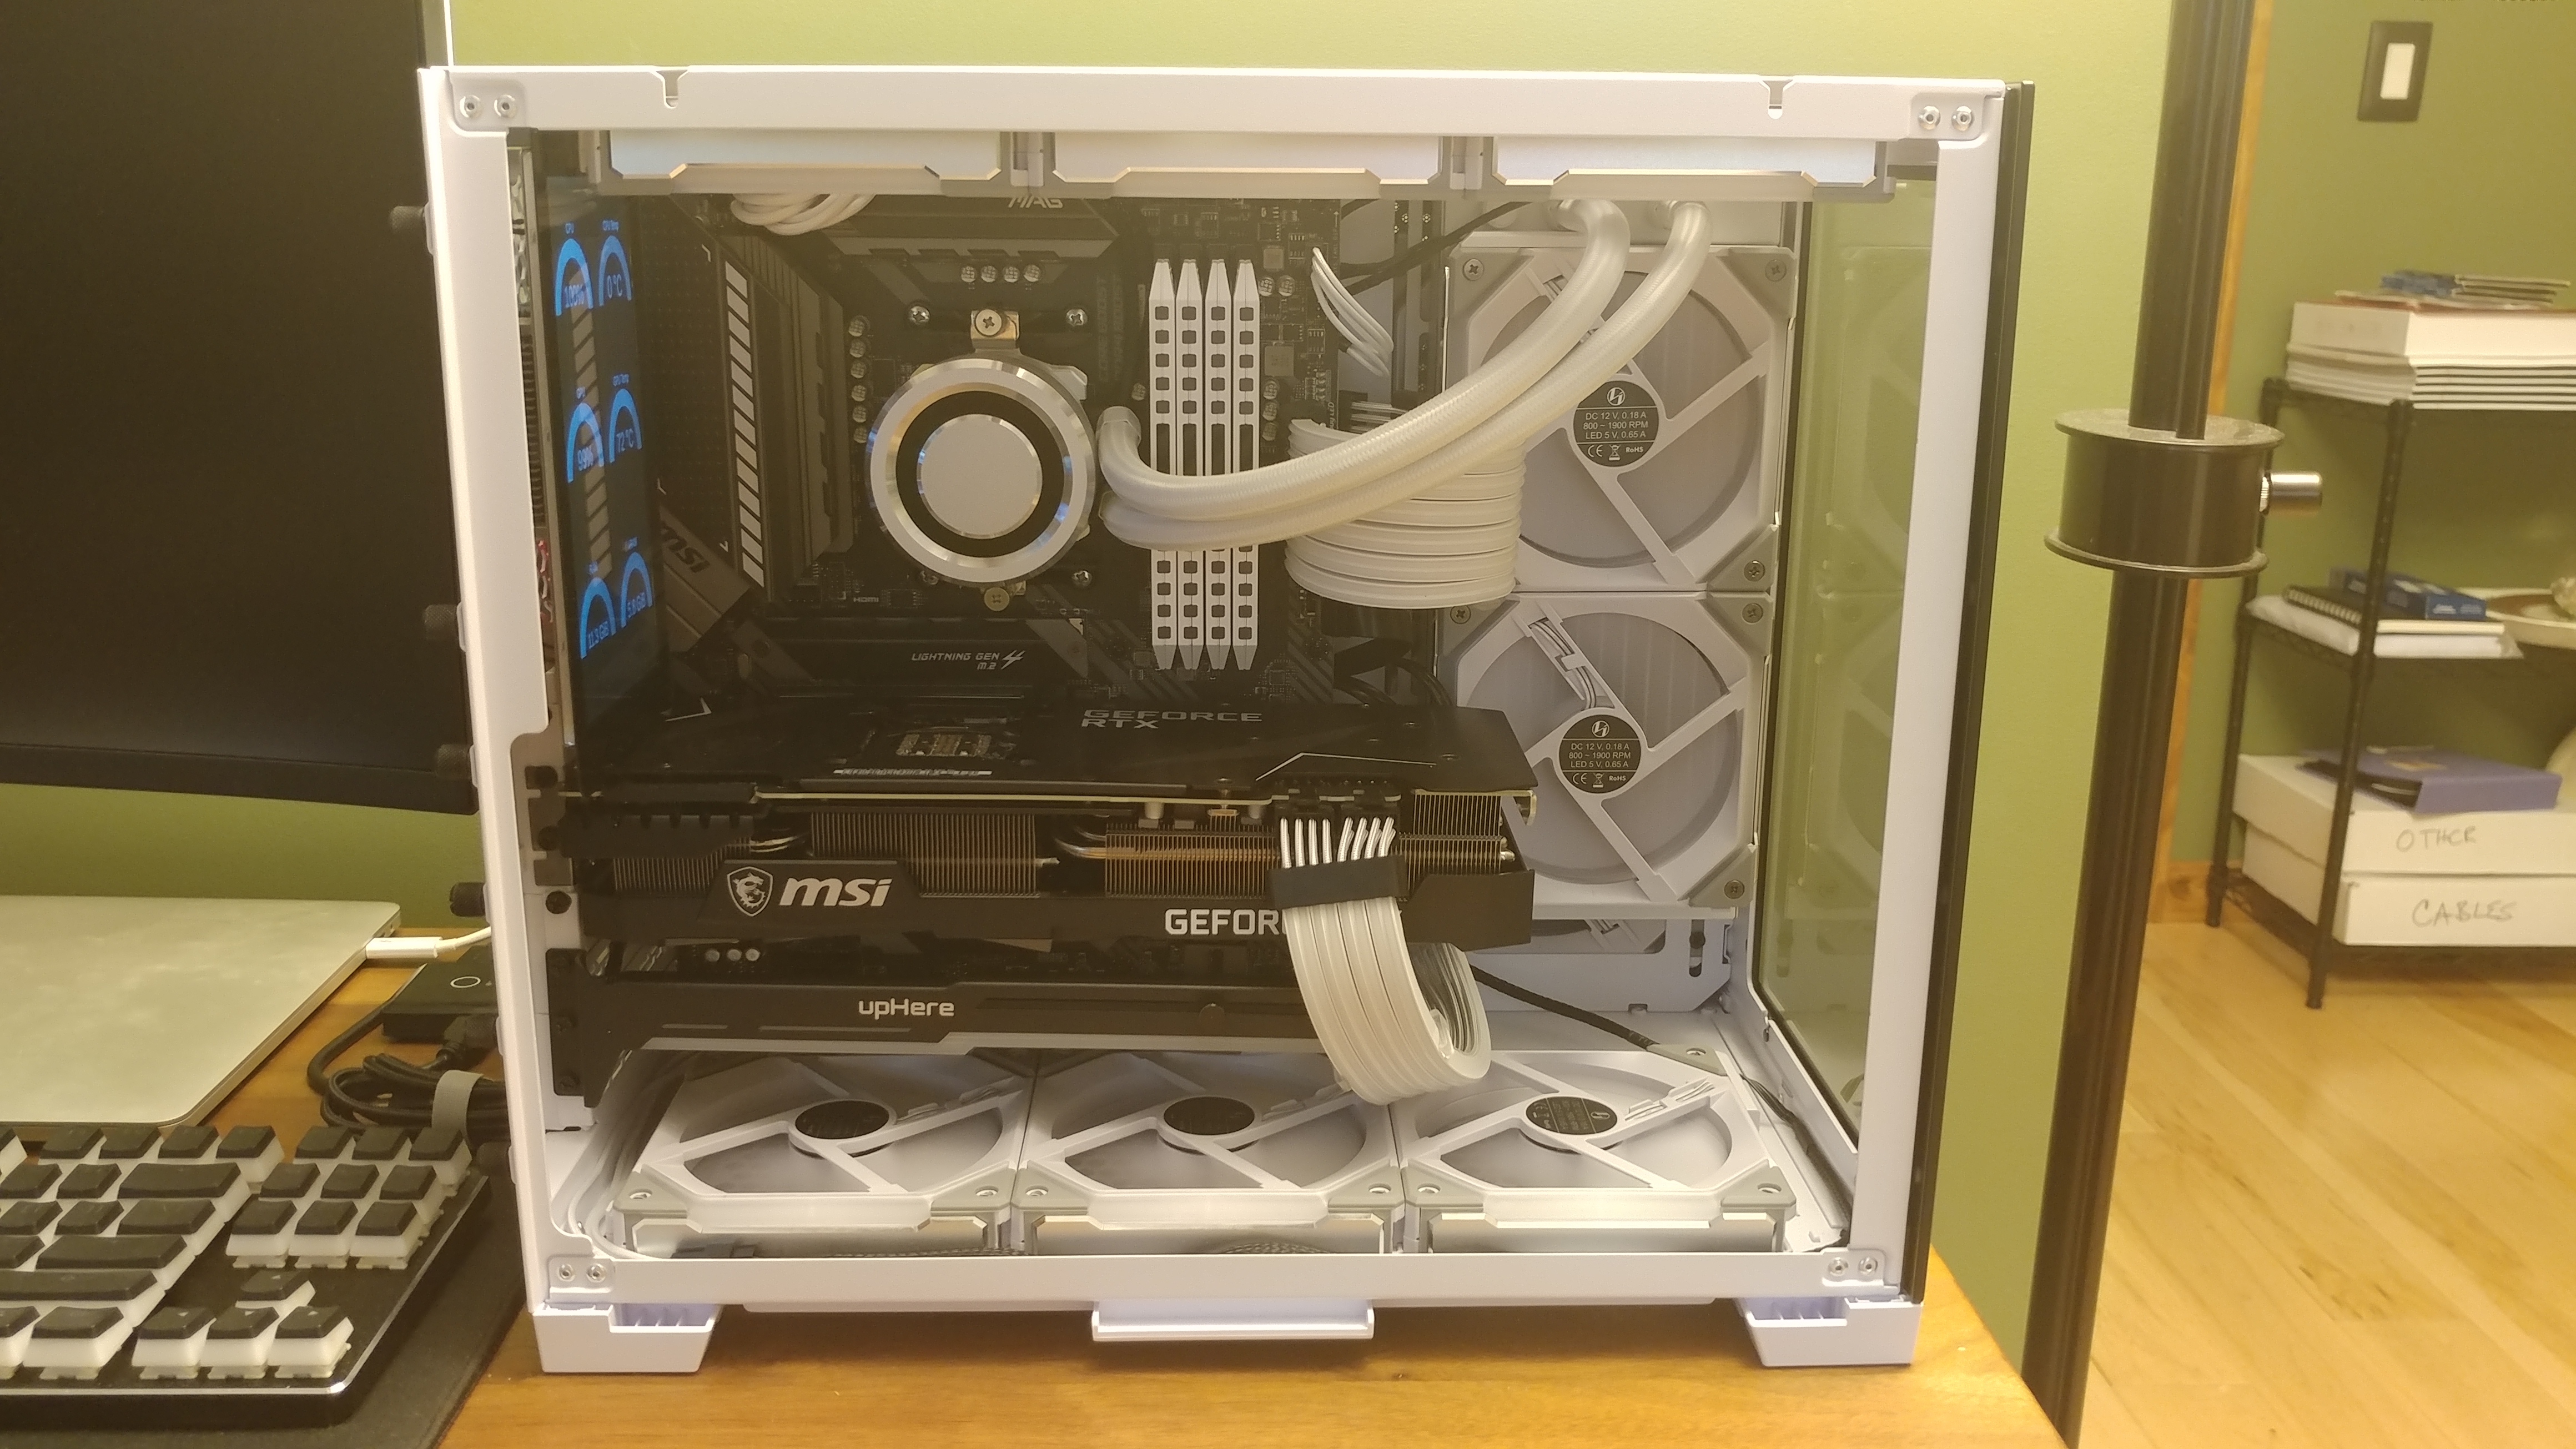
The complete build. The screen inside the case is a system monitor I made out of a Raspberry Pi. I plan to write about this more in a future post so stay tuned!
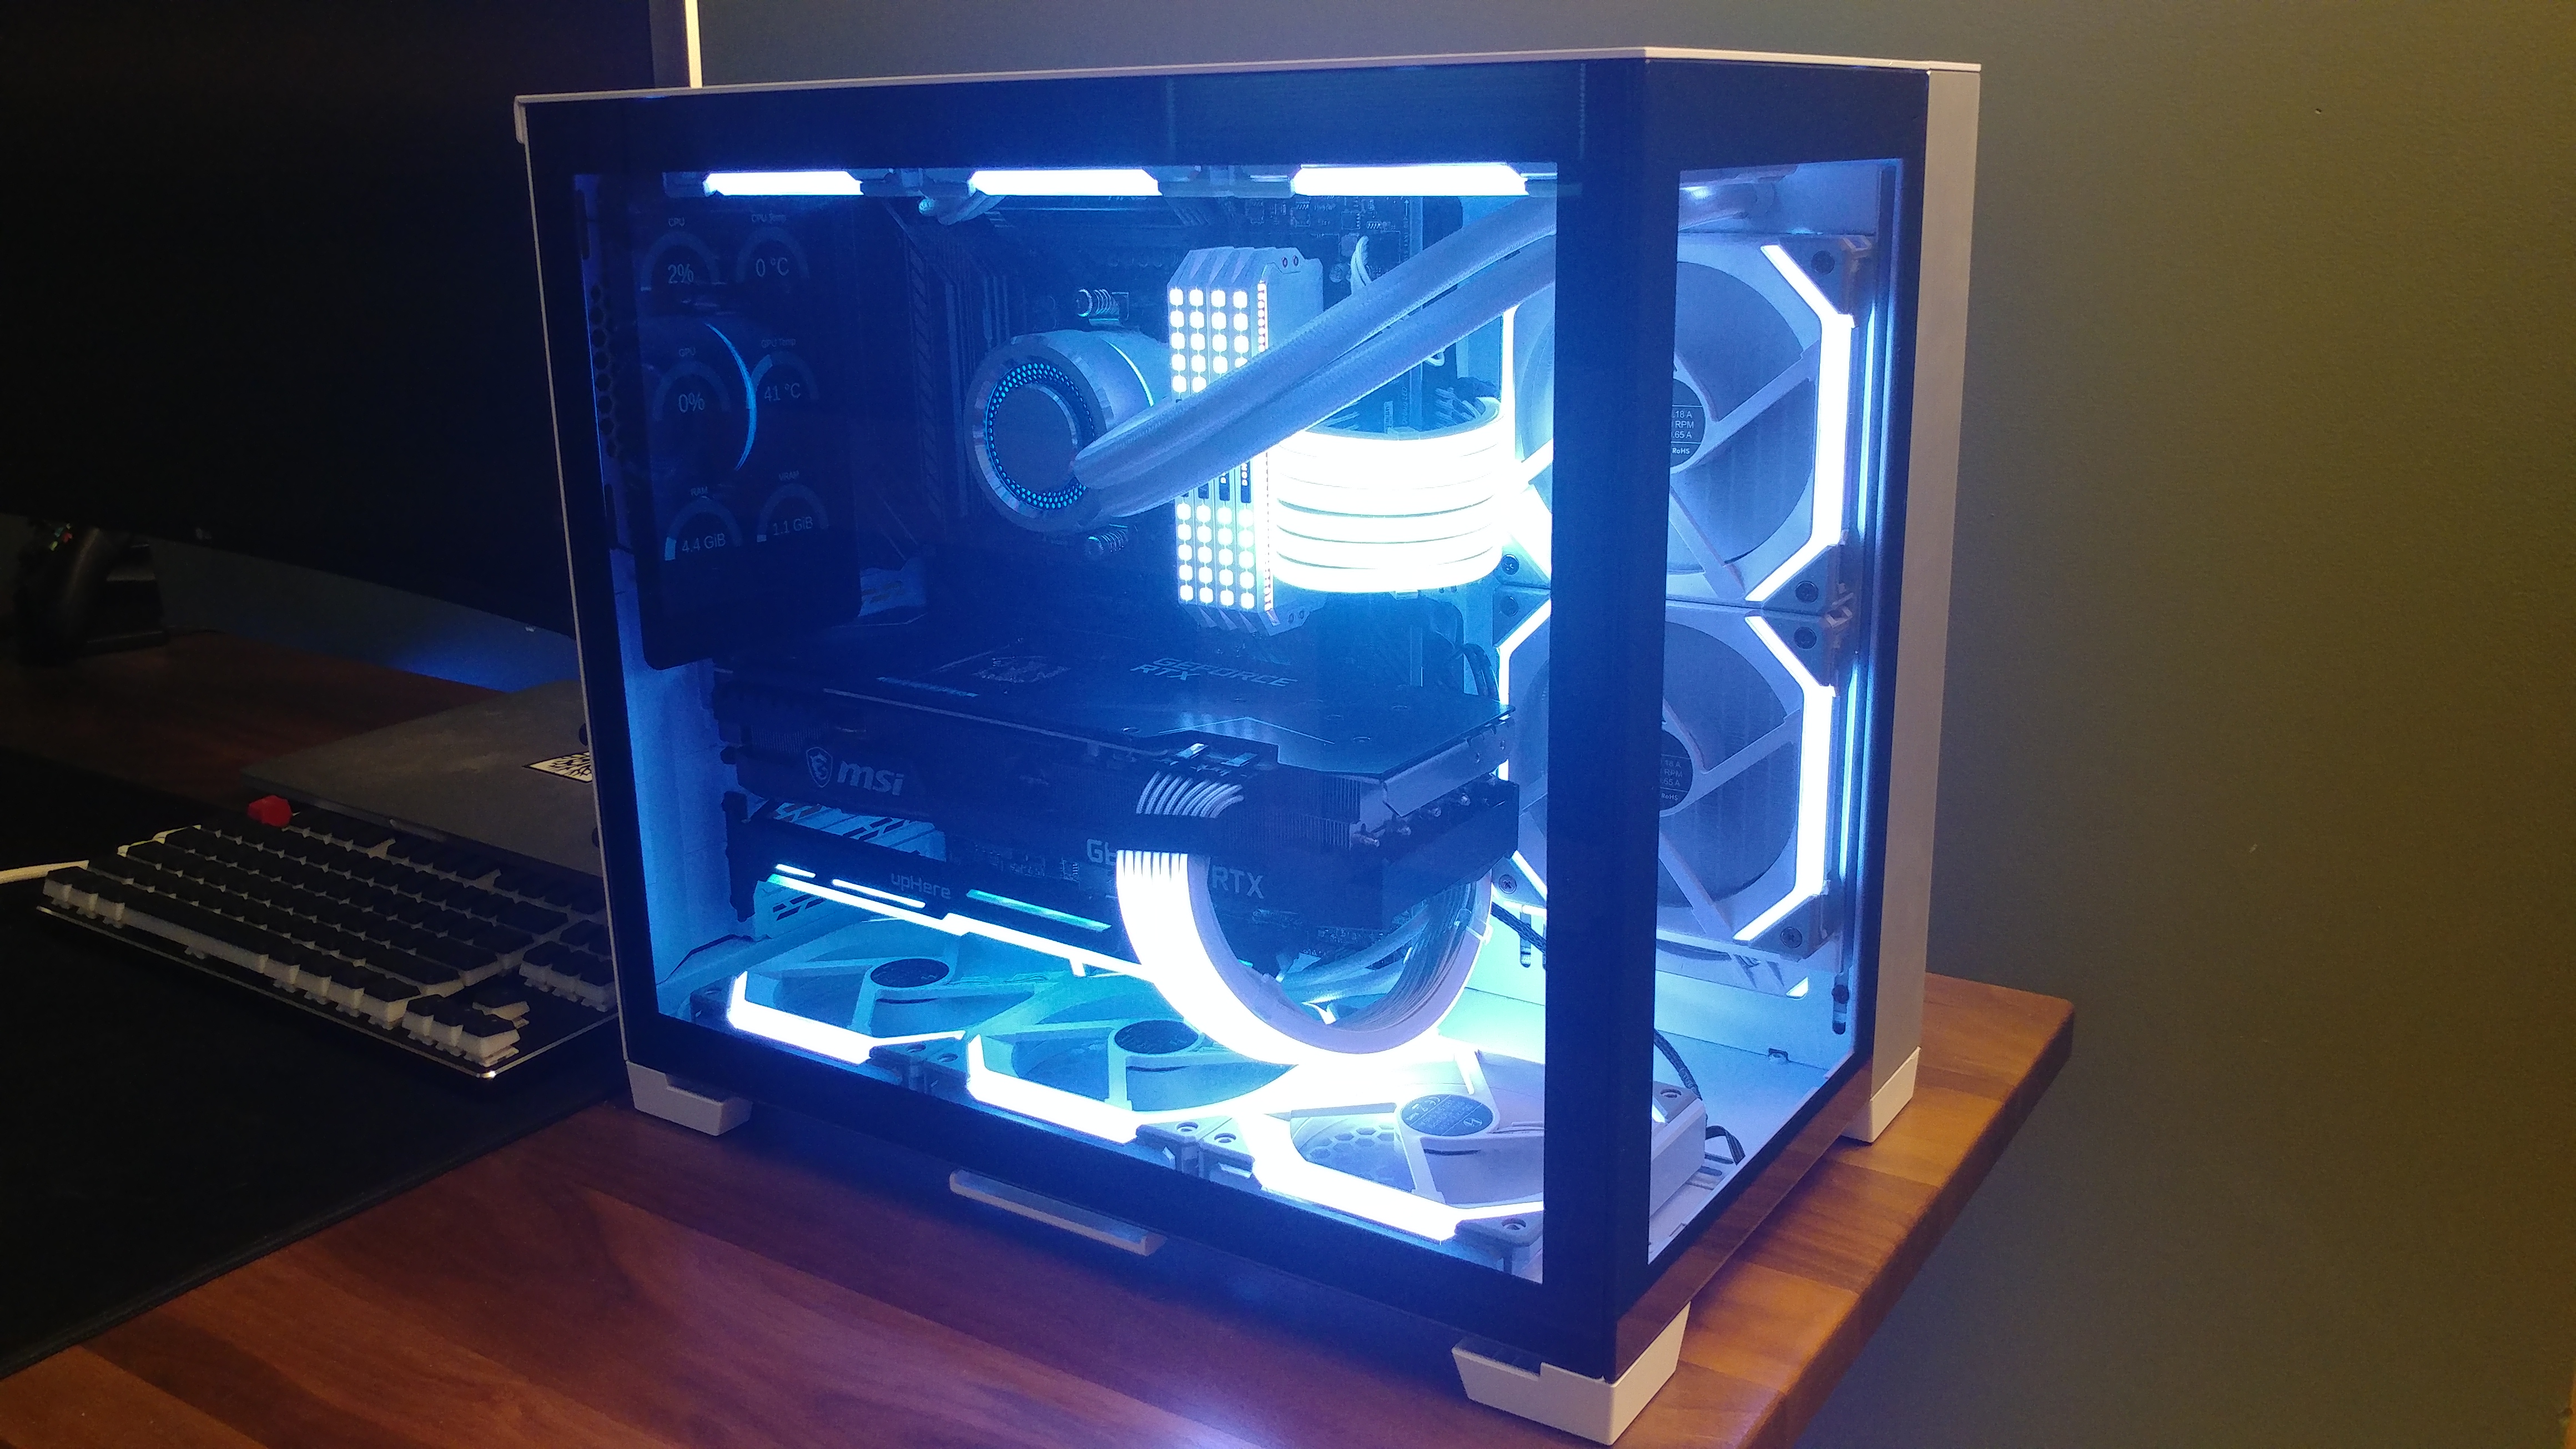
And here it is in all of it’s RGB glory. RGB hardware is still a big mess of connector types, modules, and proprietary junk, but I learned a lot in the process. I plan to write about this more in an upcoming post.
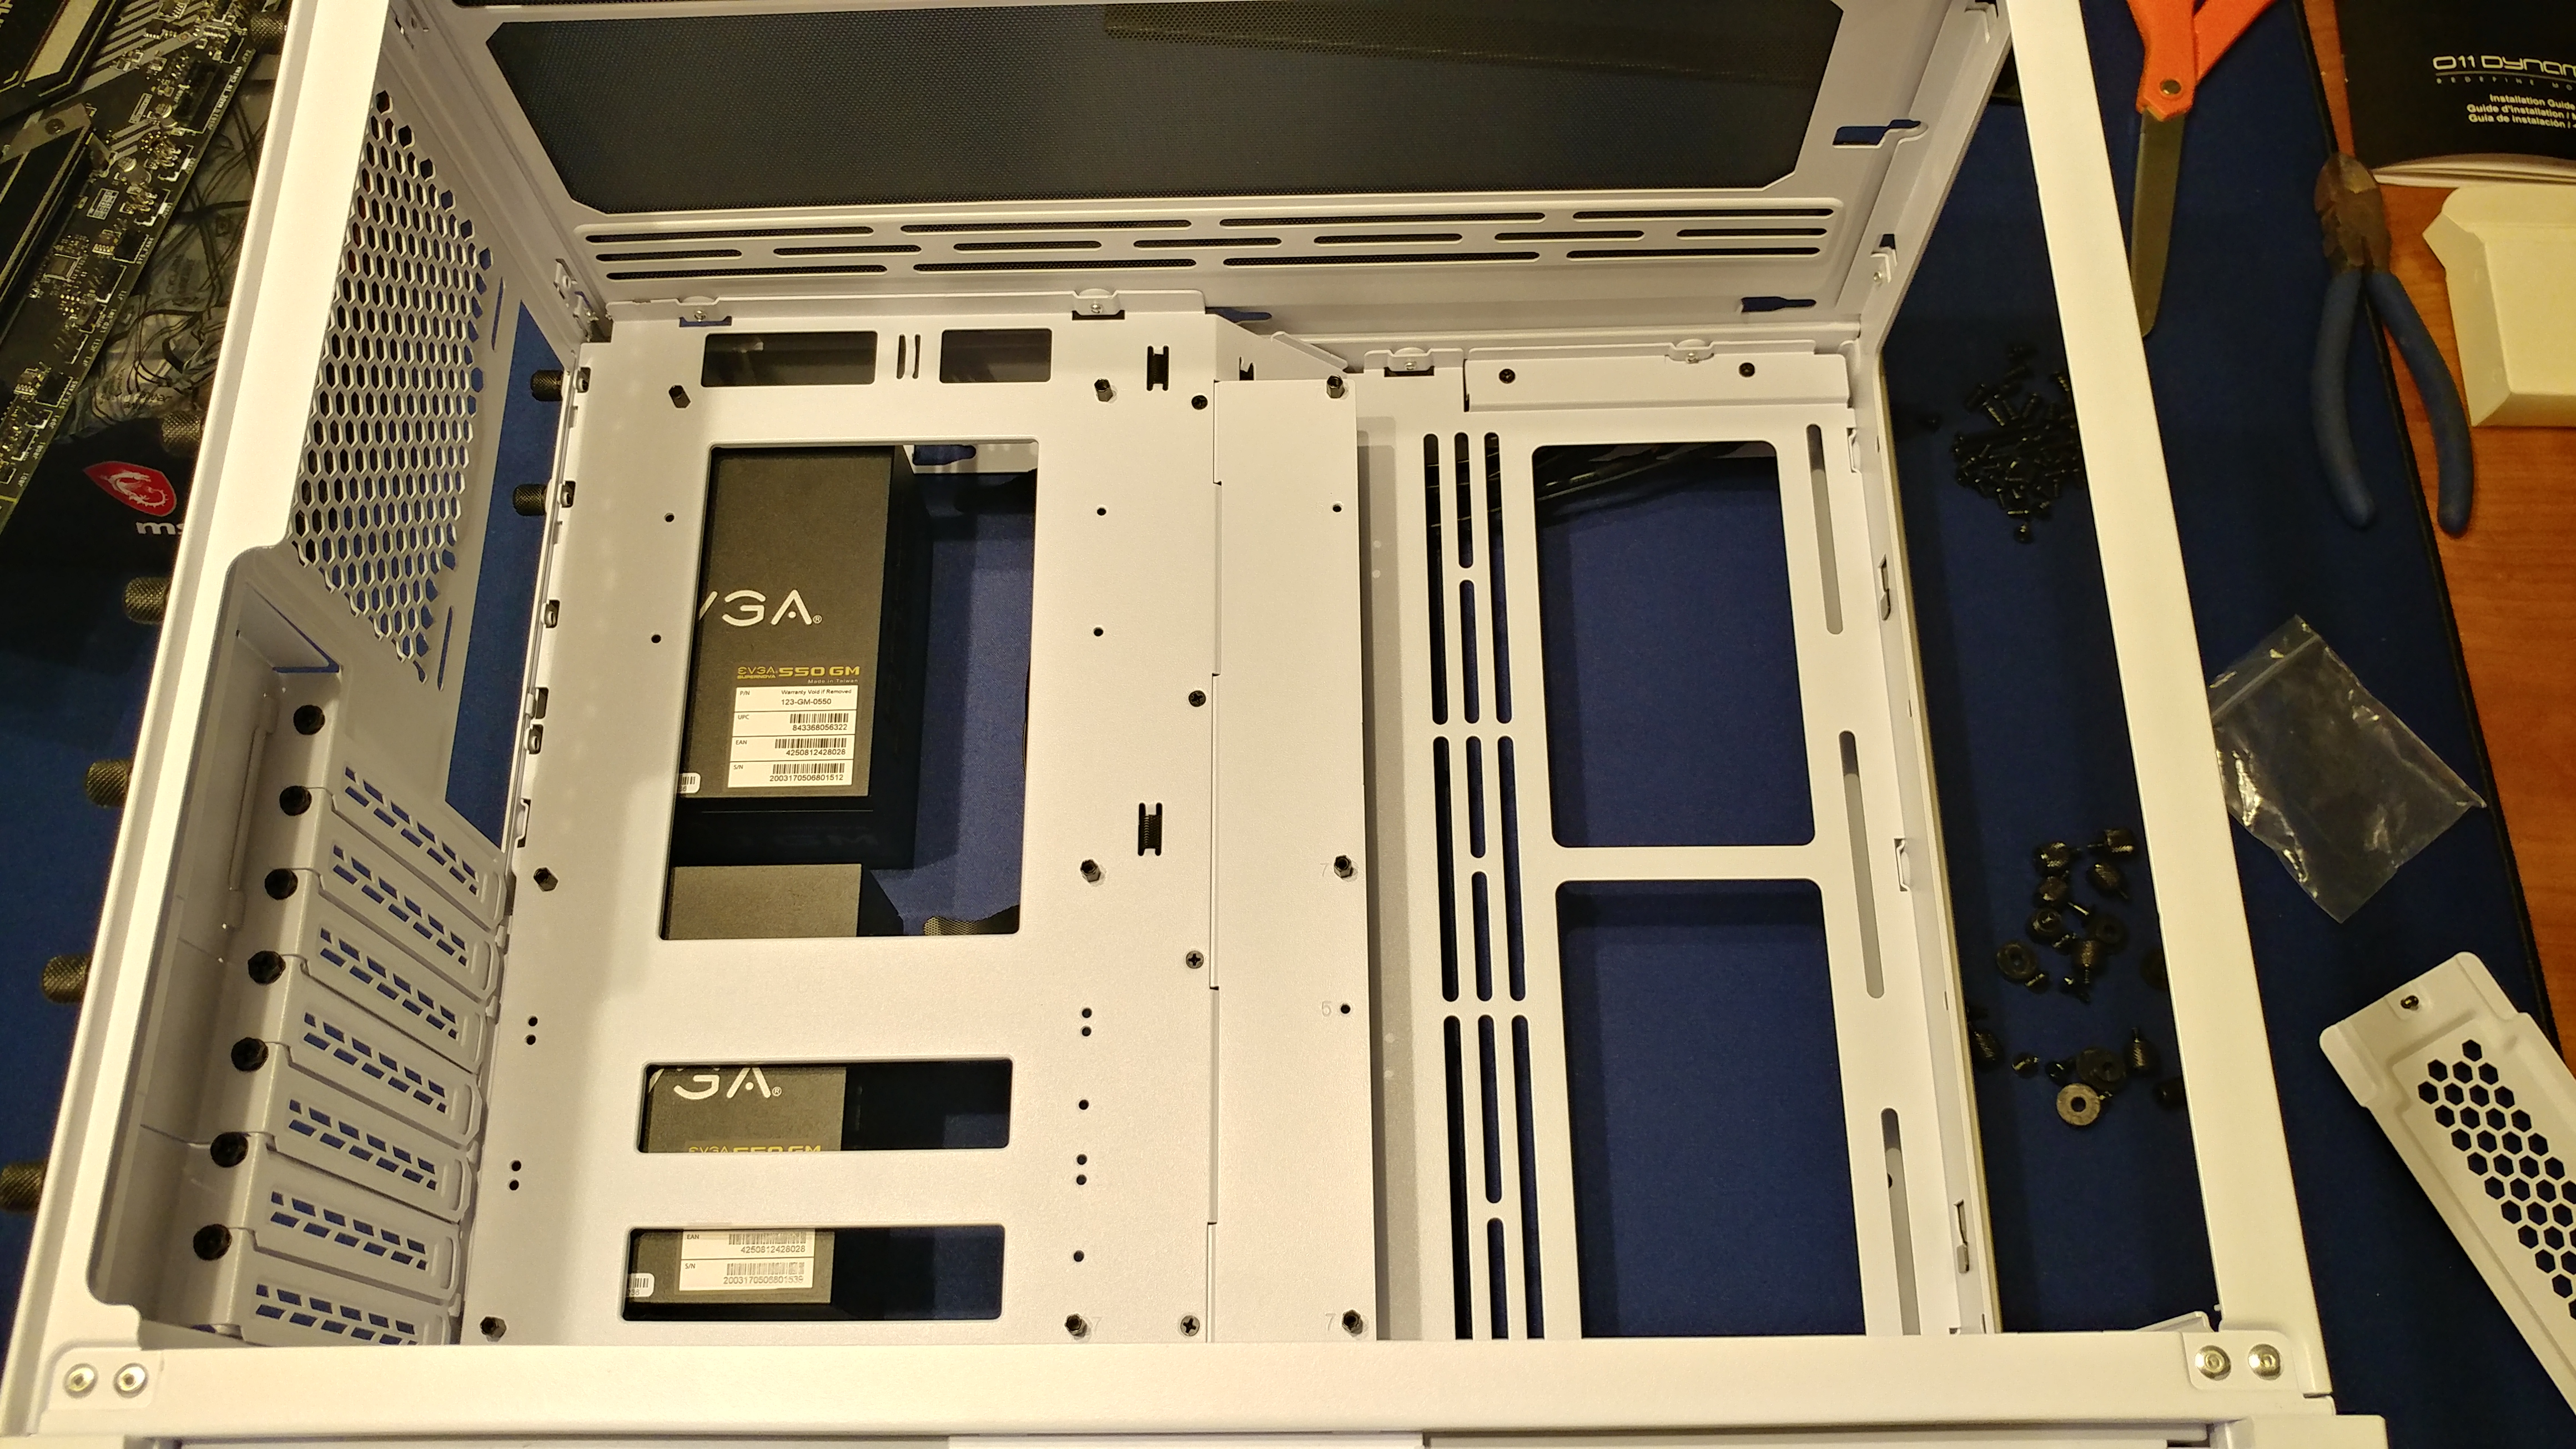
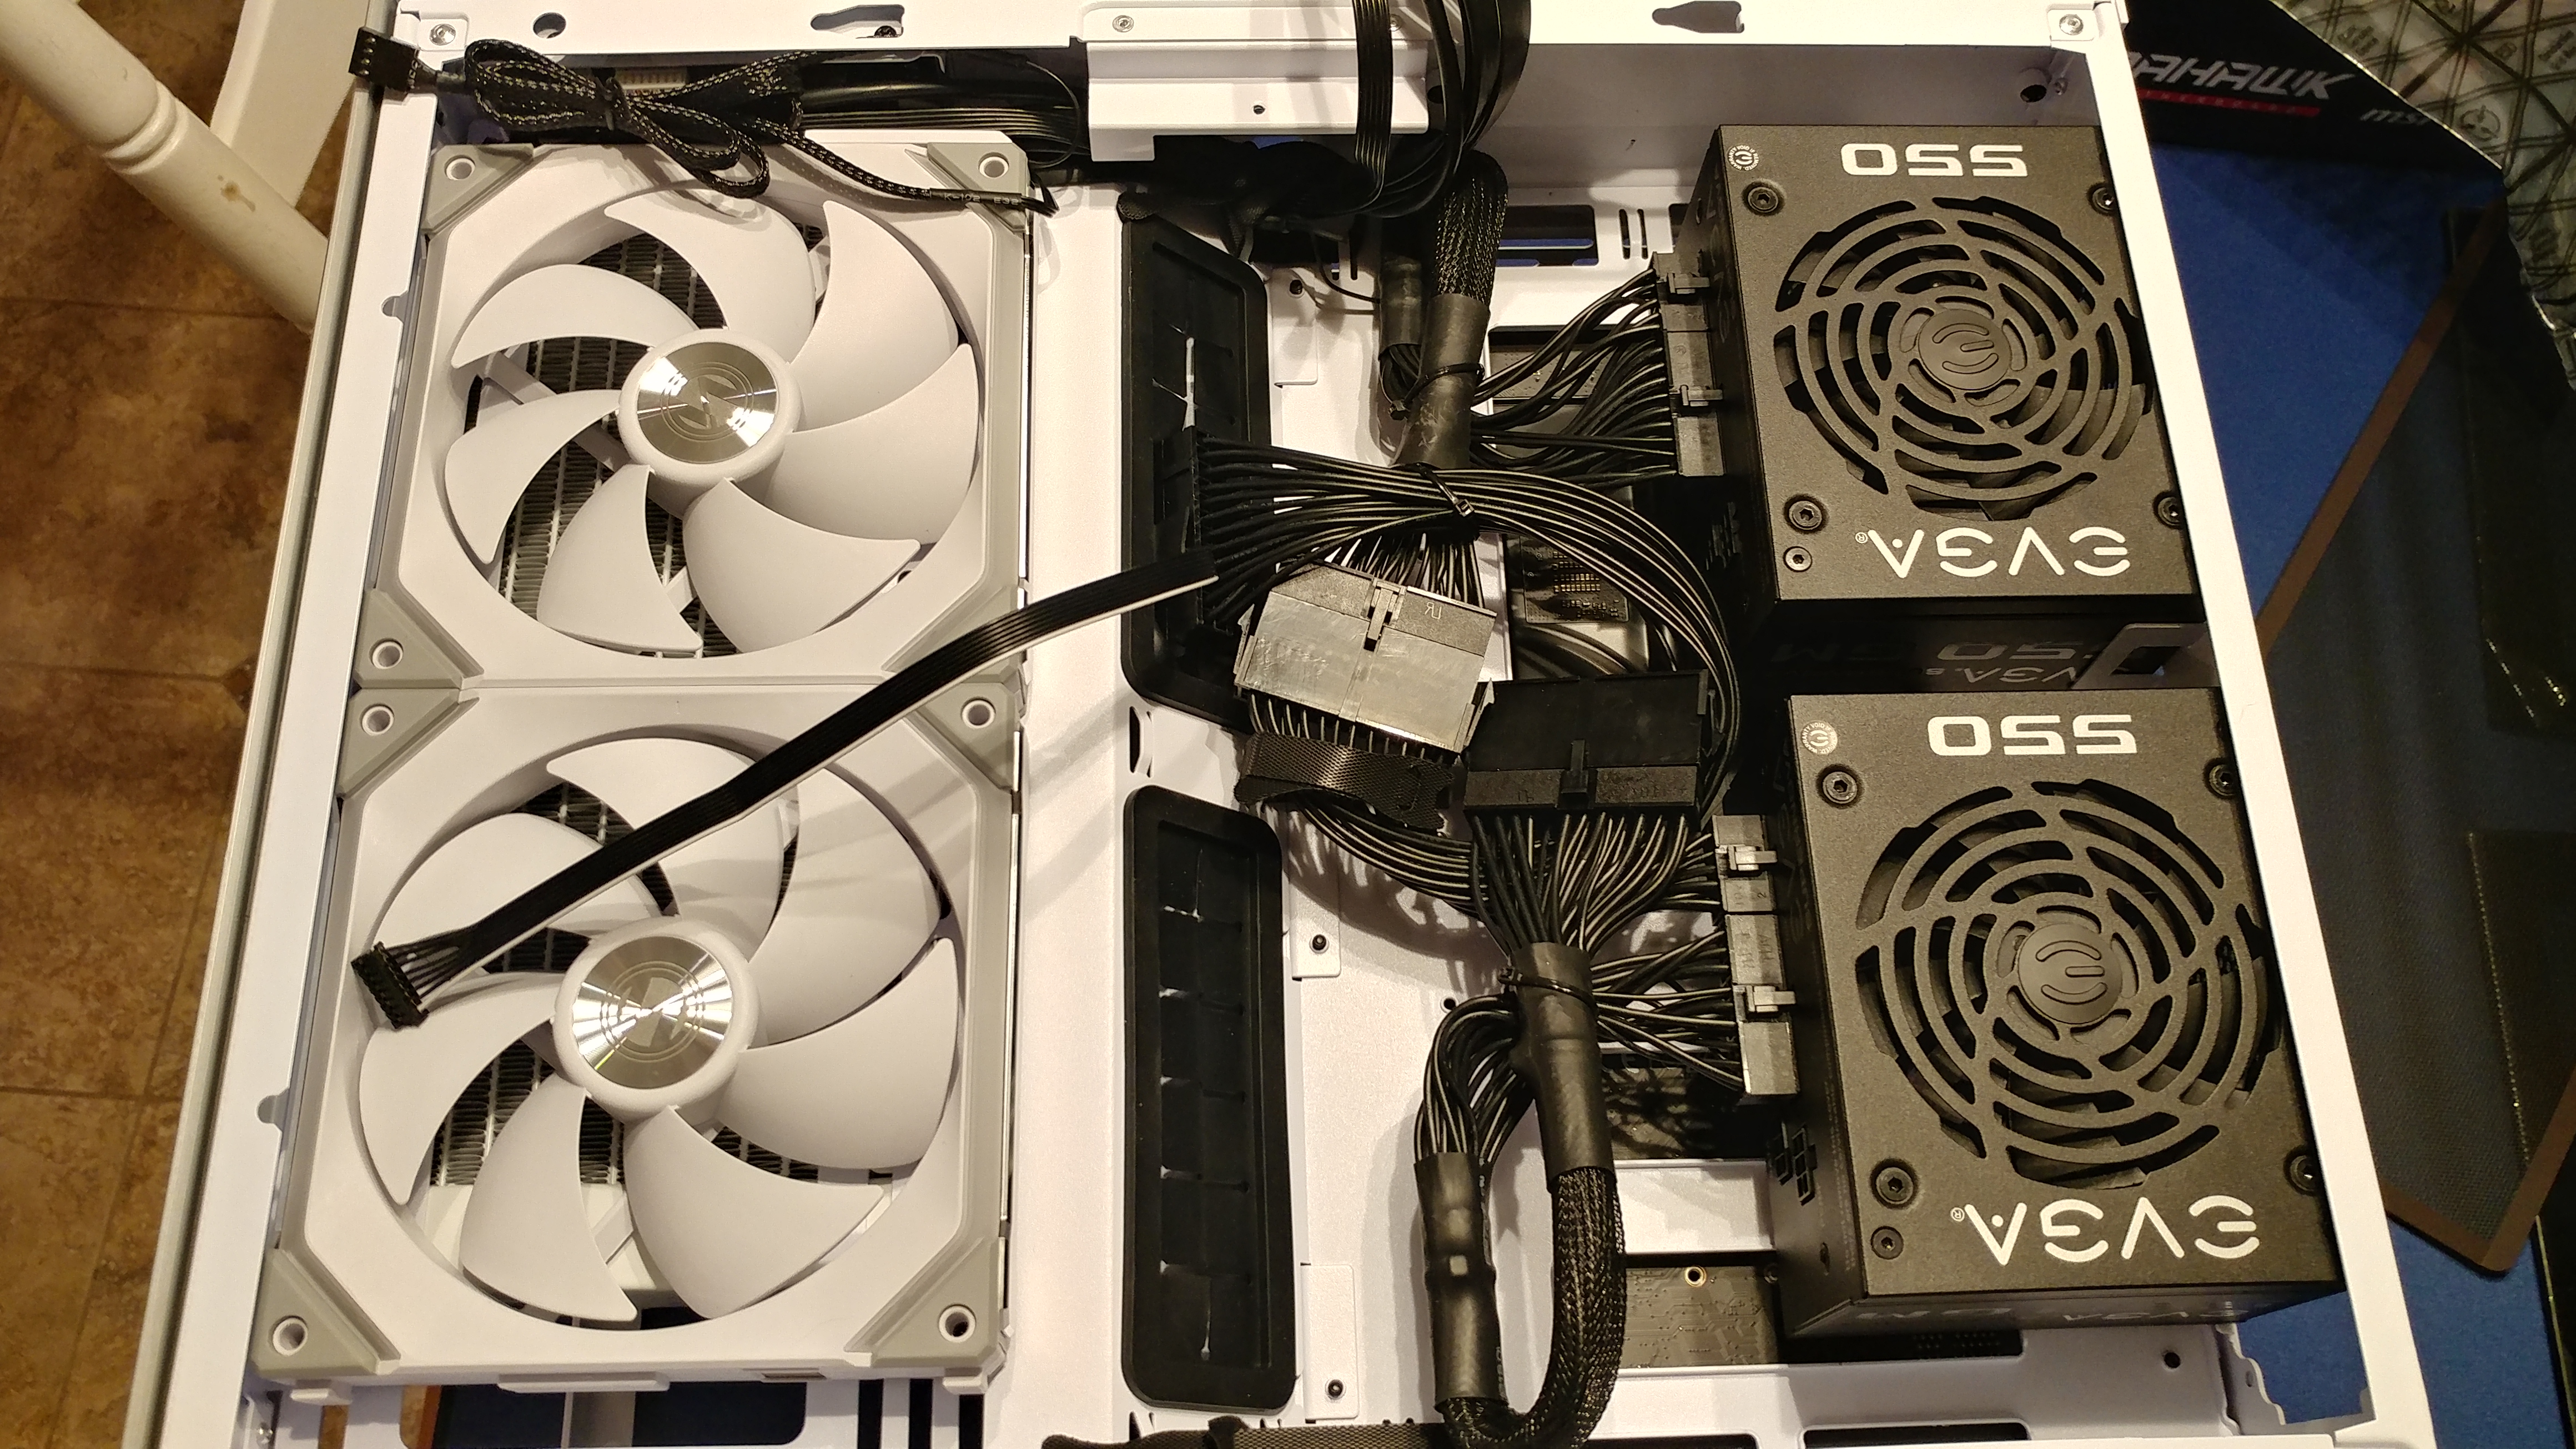
The Lian Li O11 Dynamic Mini case has a rear compartment (rather than a basement) which is accessible by removing the right side panel. The “uglier” components like the power supply, hard drives, and cables will be hidden away back here.
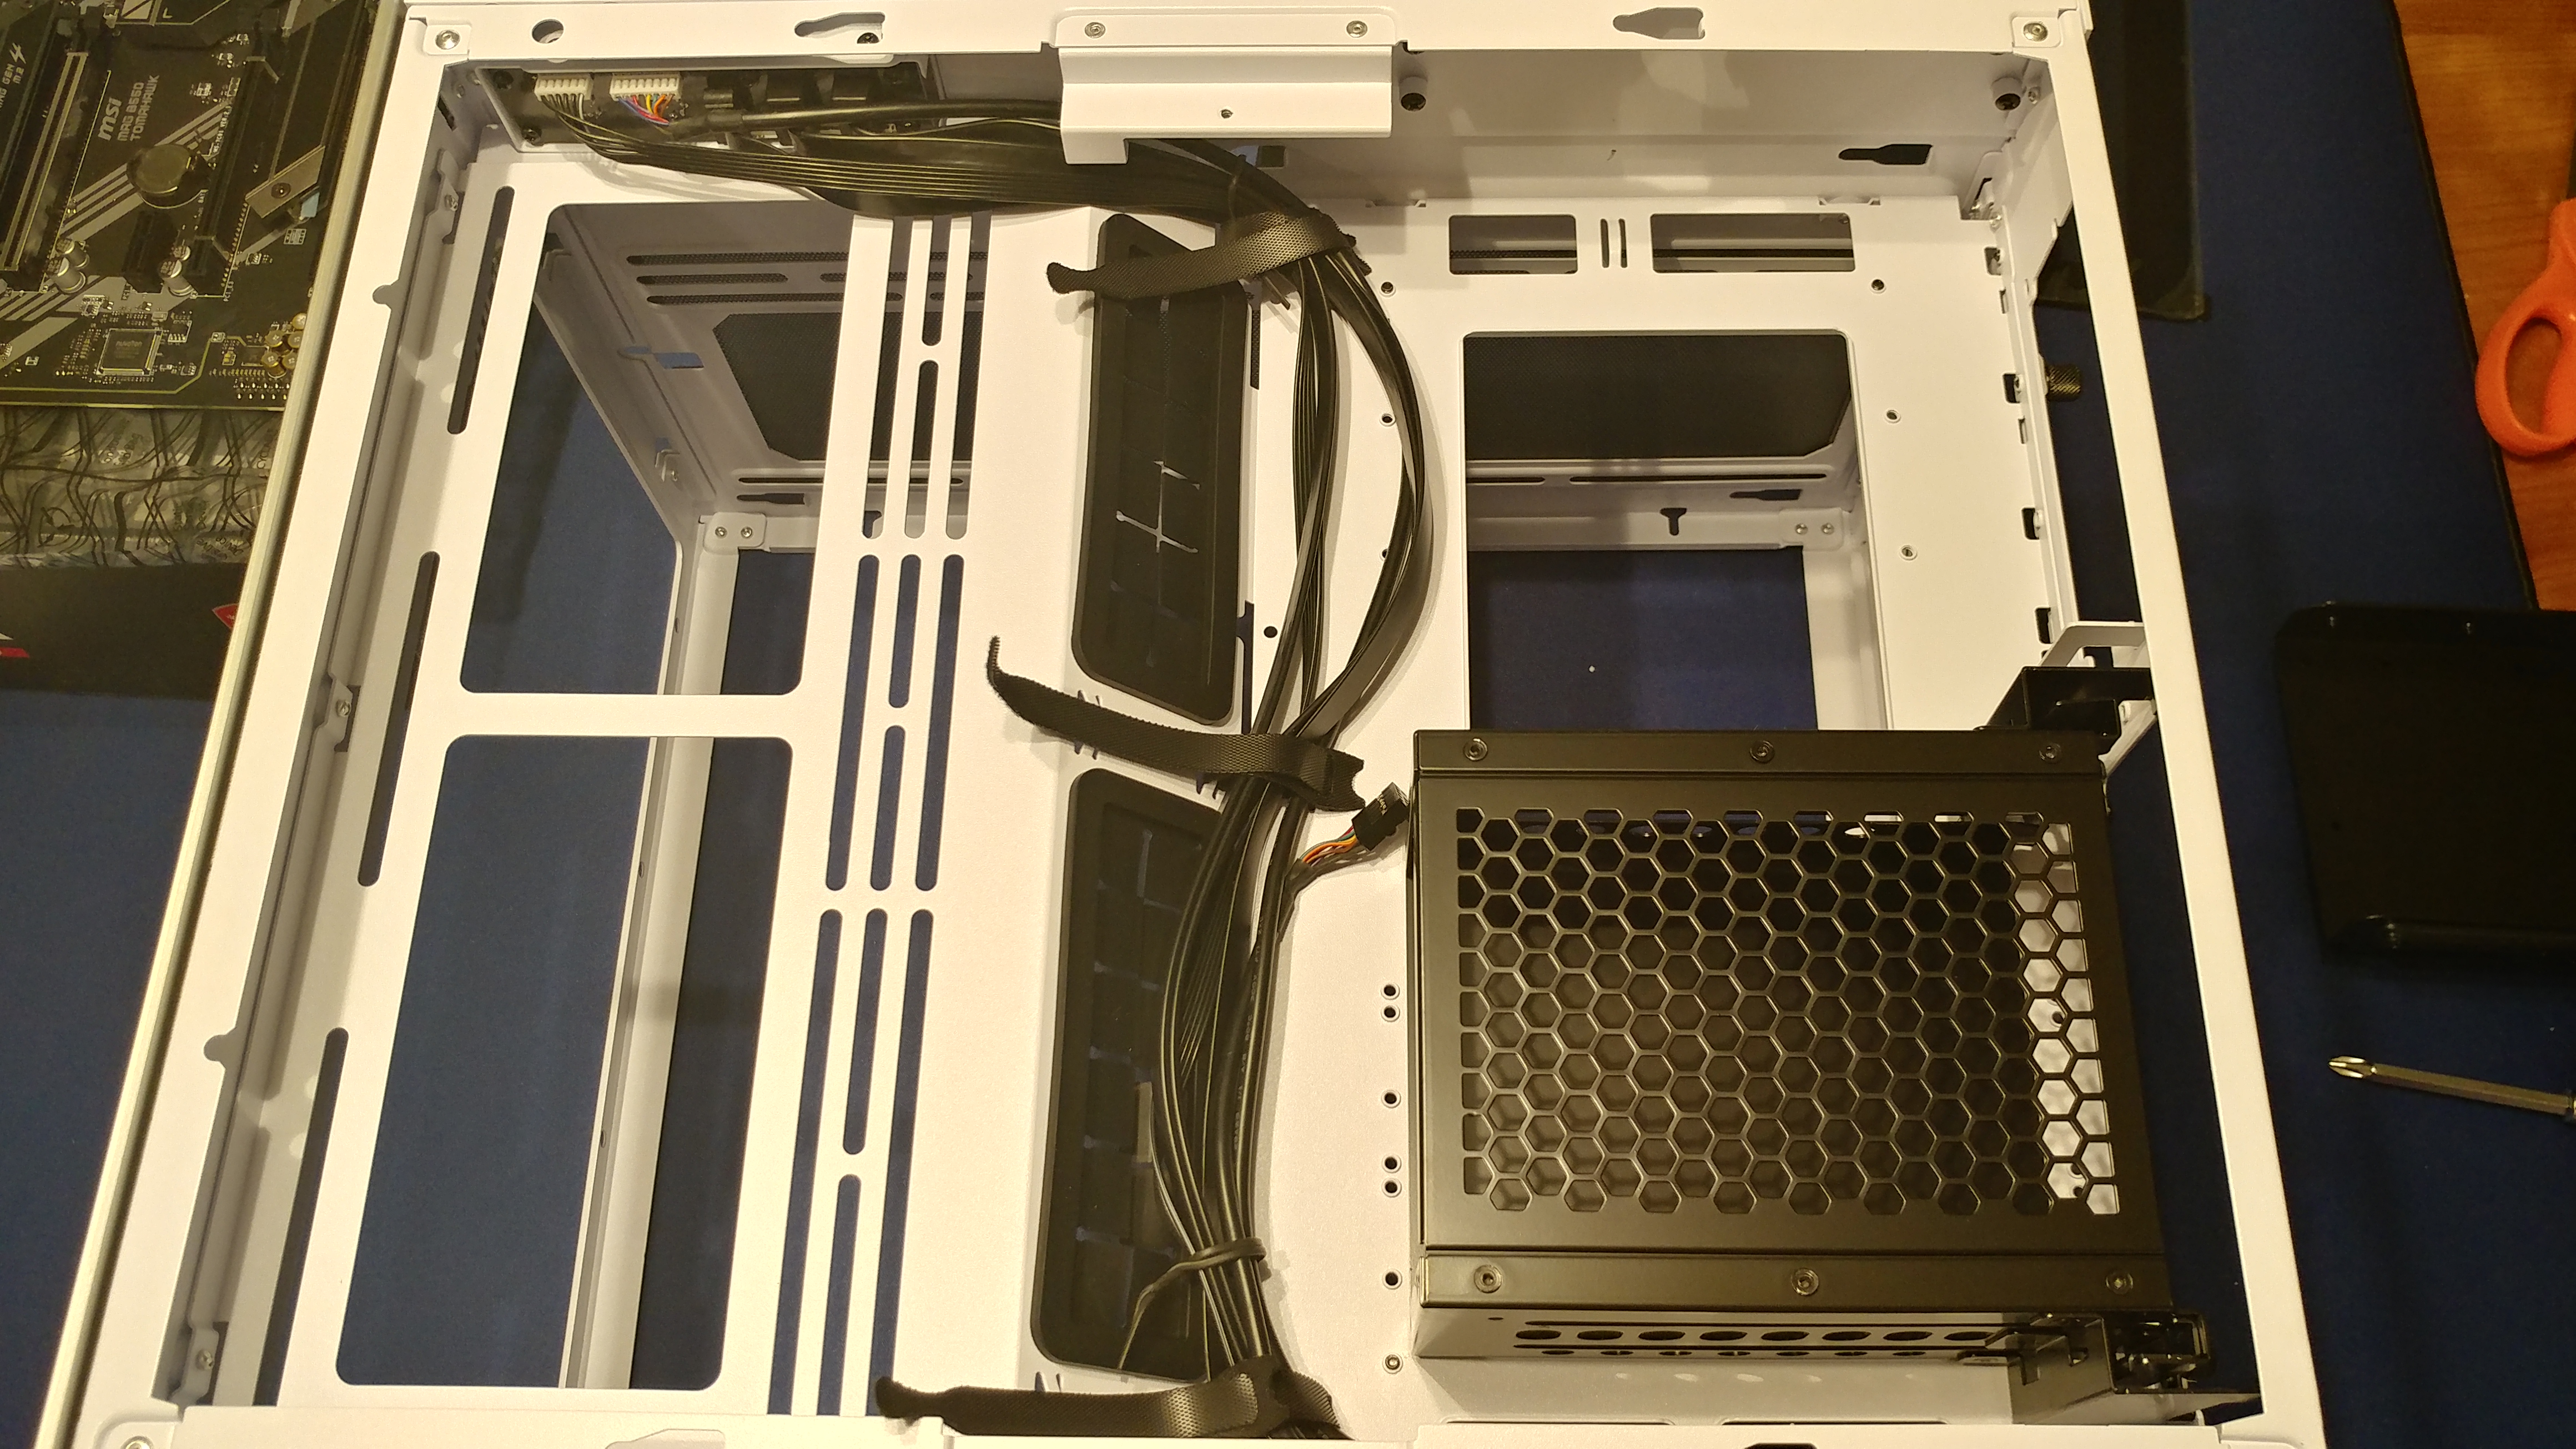
The case is technically a small form factor (SFX) case, though it is still big enough to fit most full-size components. However it only fits SFX and SFX-L power supplies. My drives are all SSDs and NVMes so I removed the hard drive cage to have more room to work.
I opted to use the extra space for a second power supply—a first for me! I plan to cover the details of getting this to work in a separate post, but I am very happy with how it turned out.
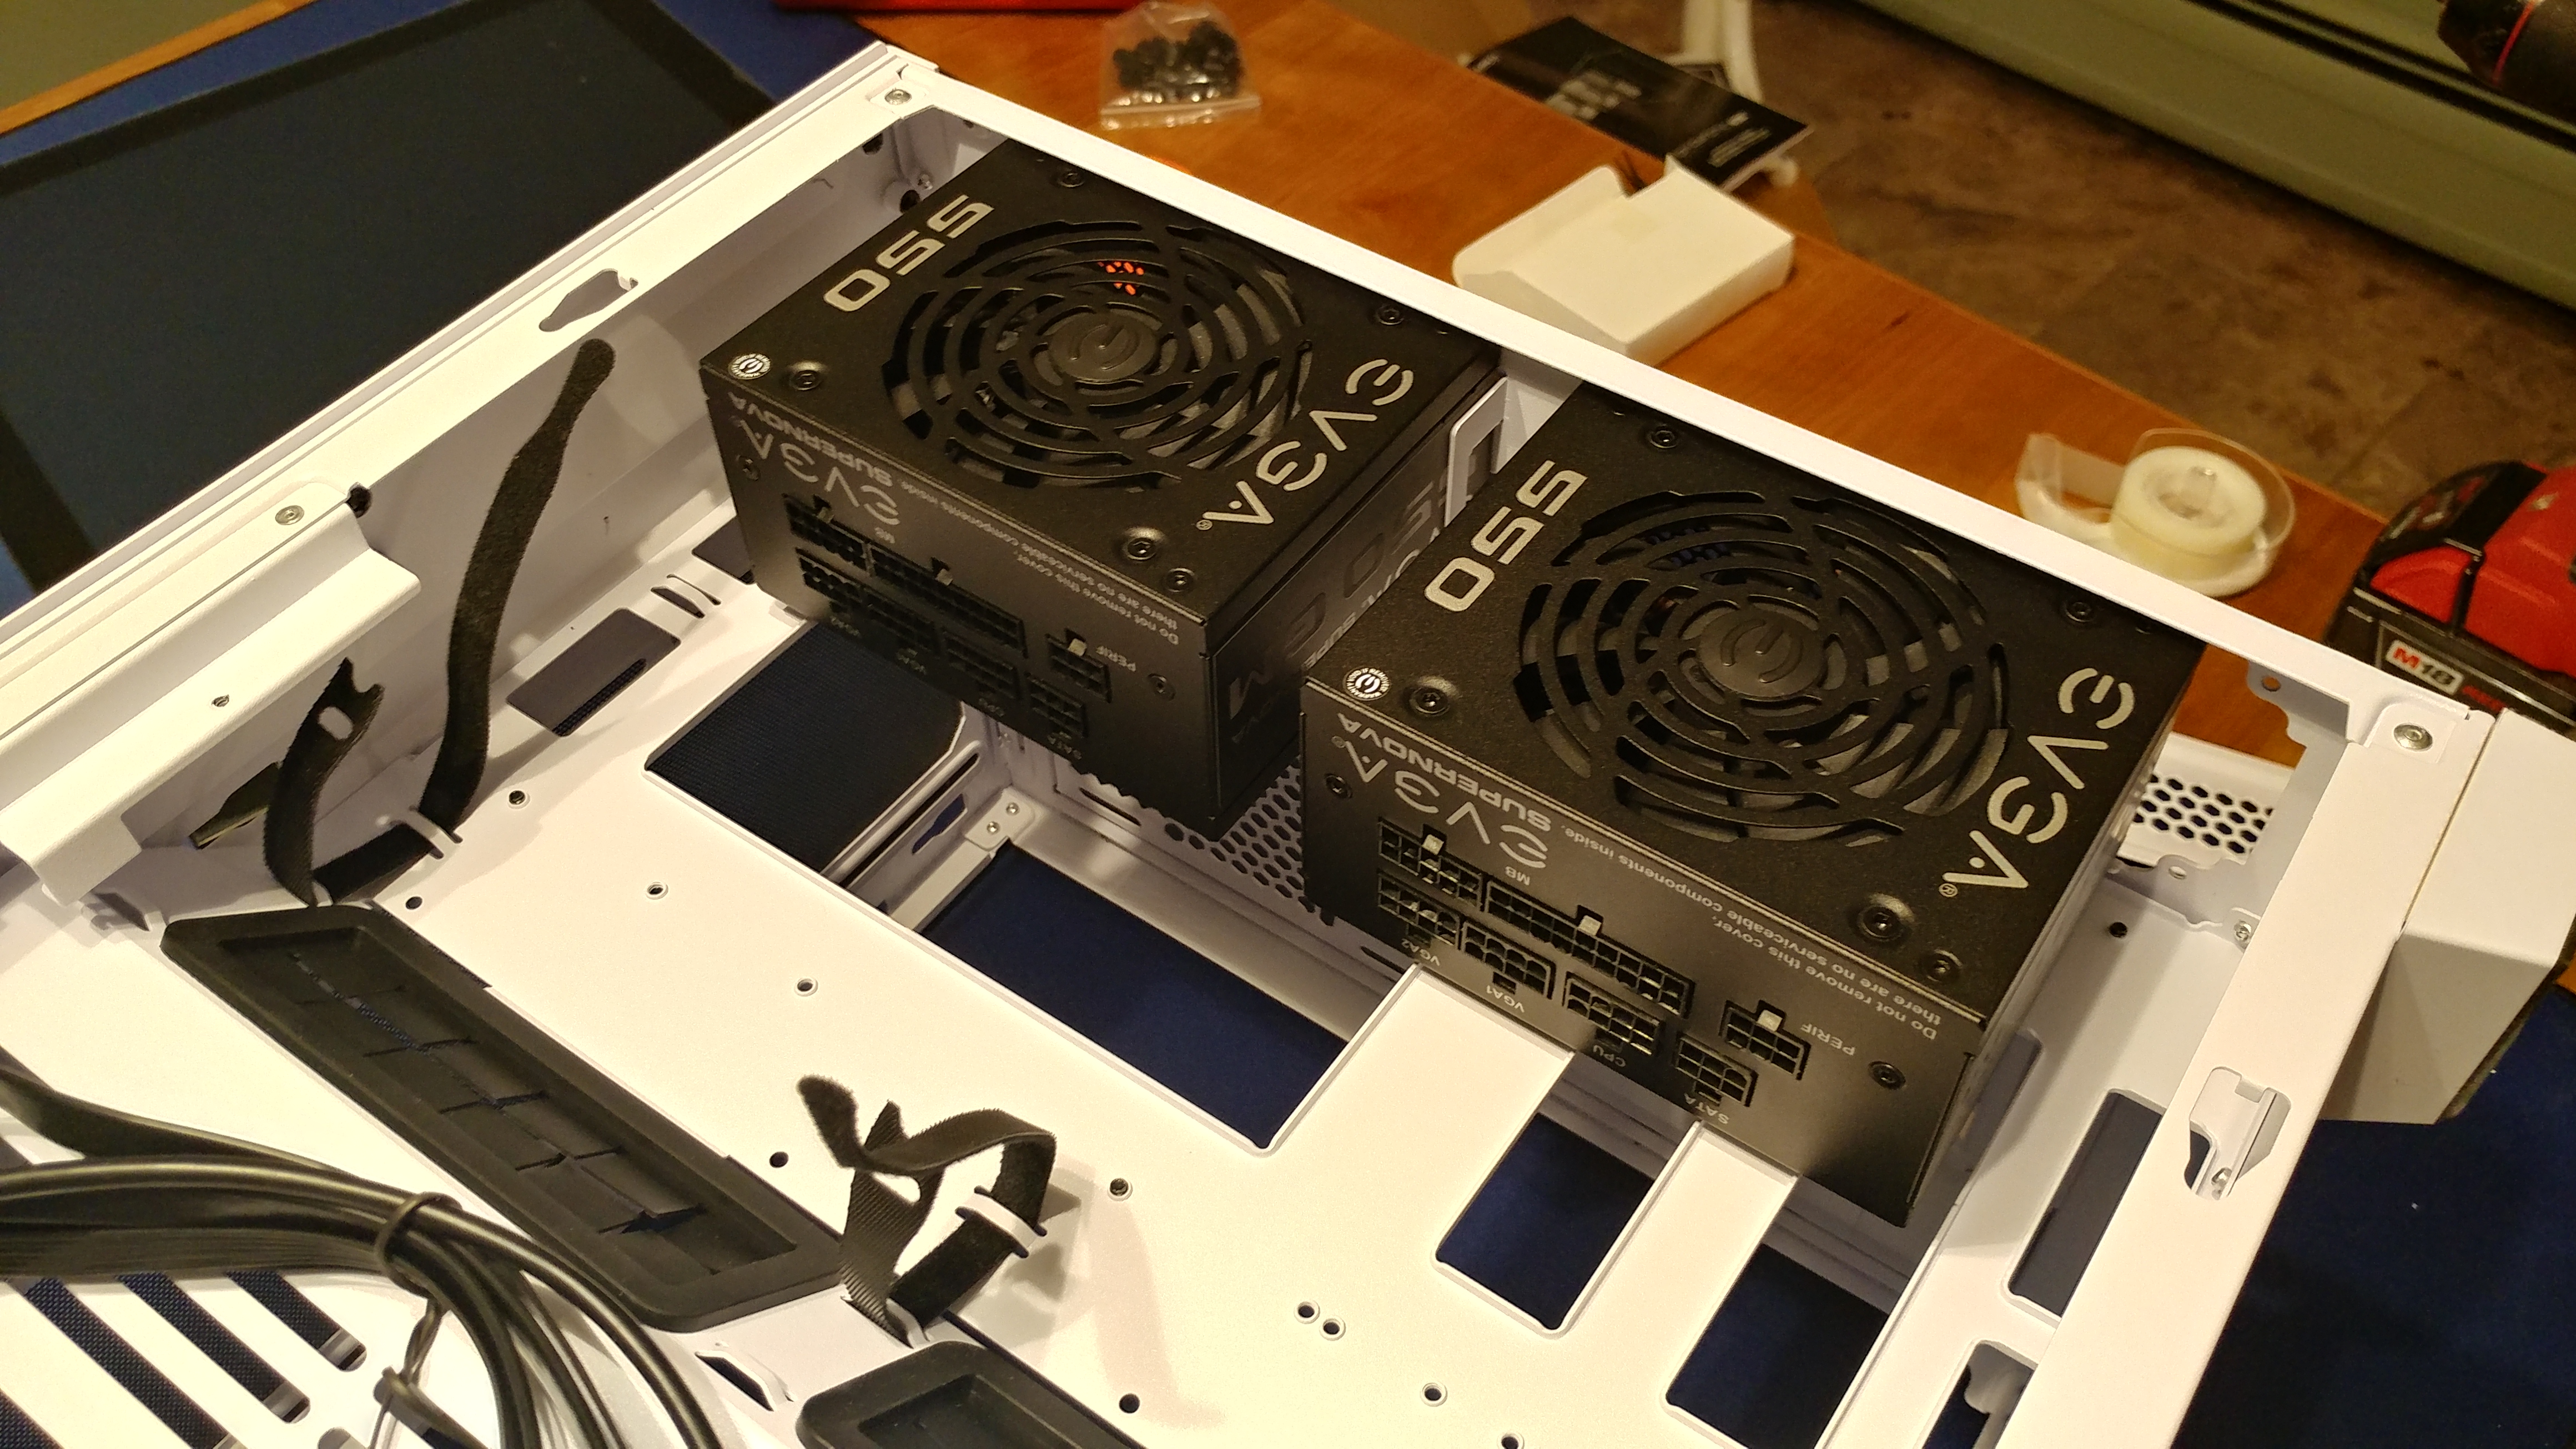
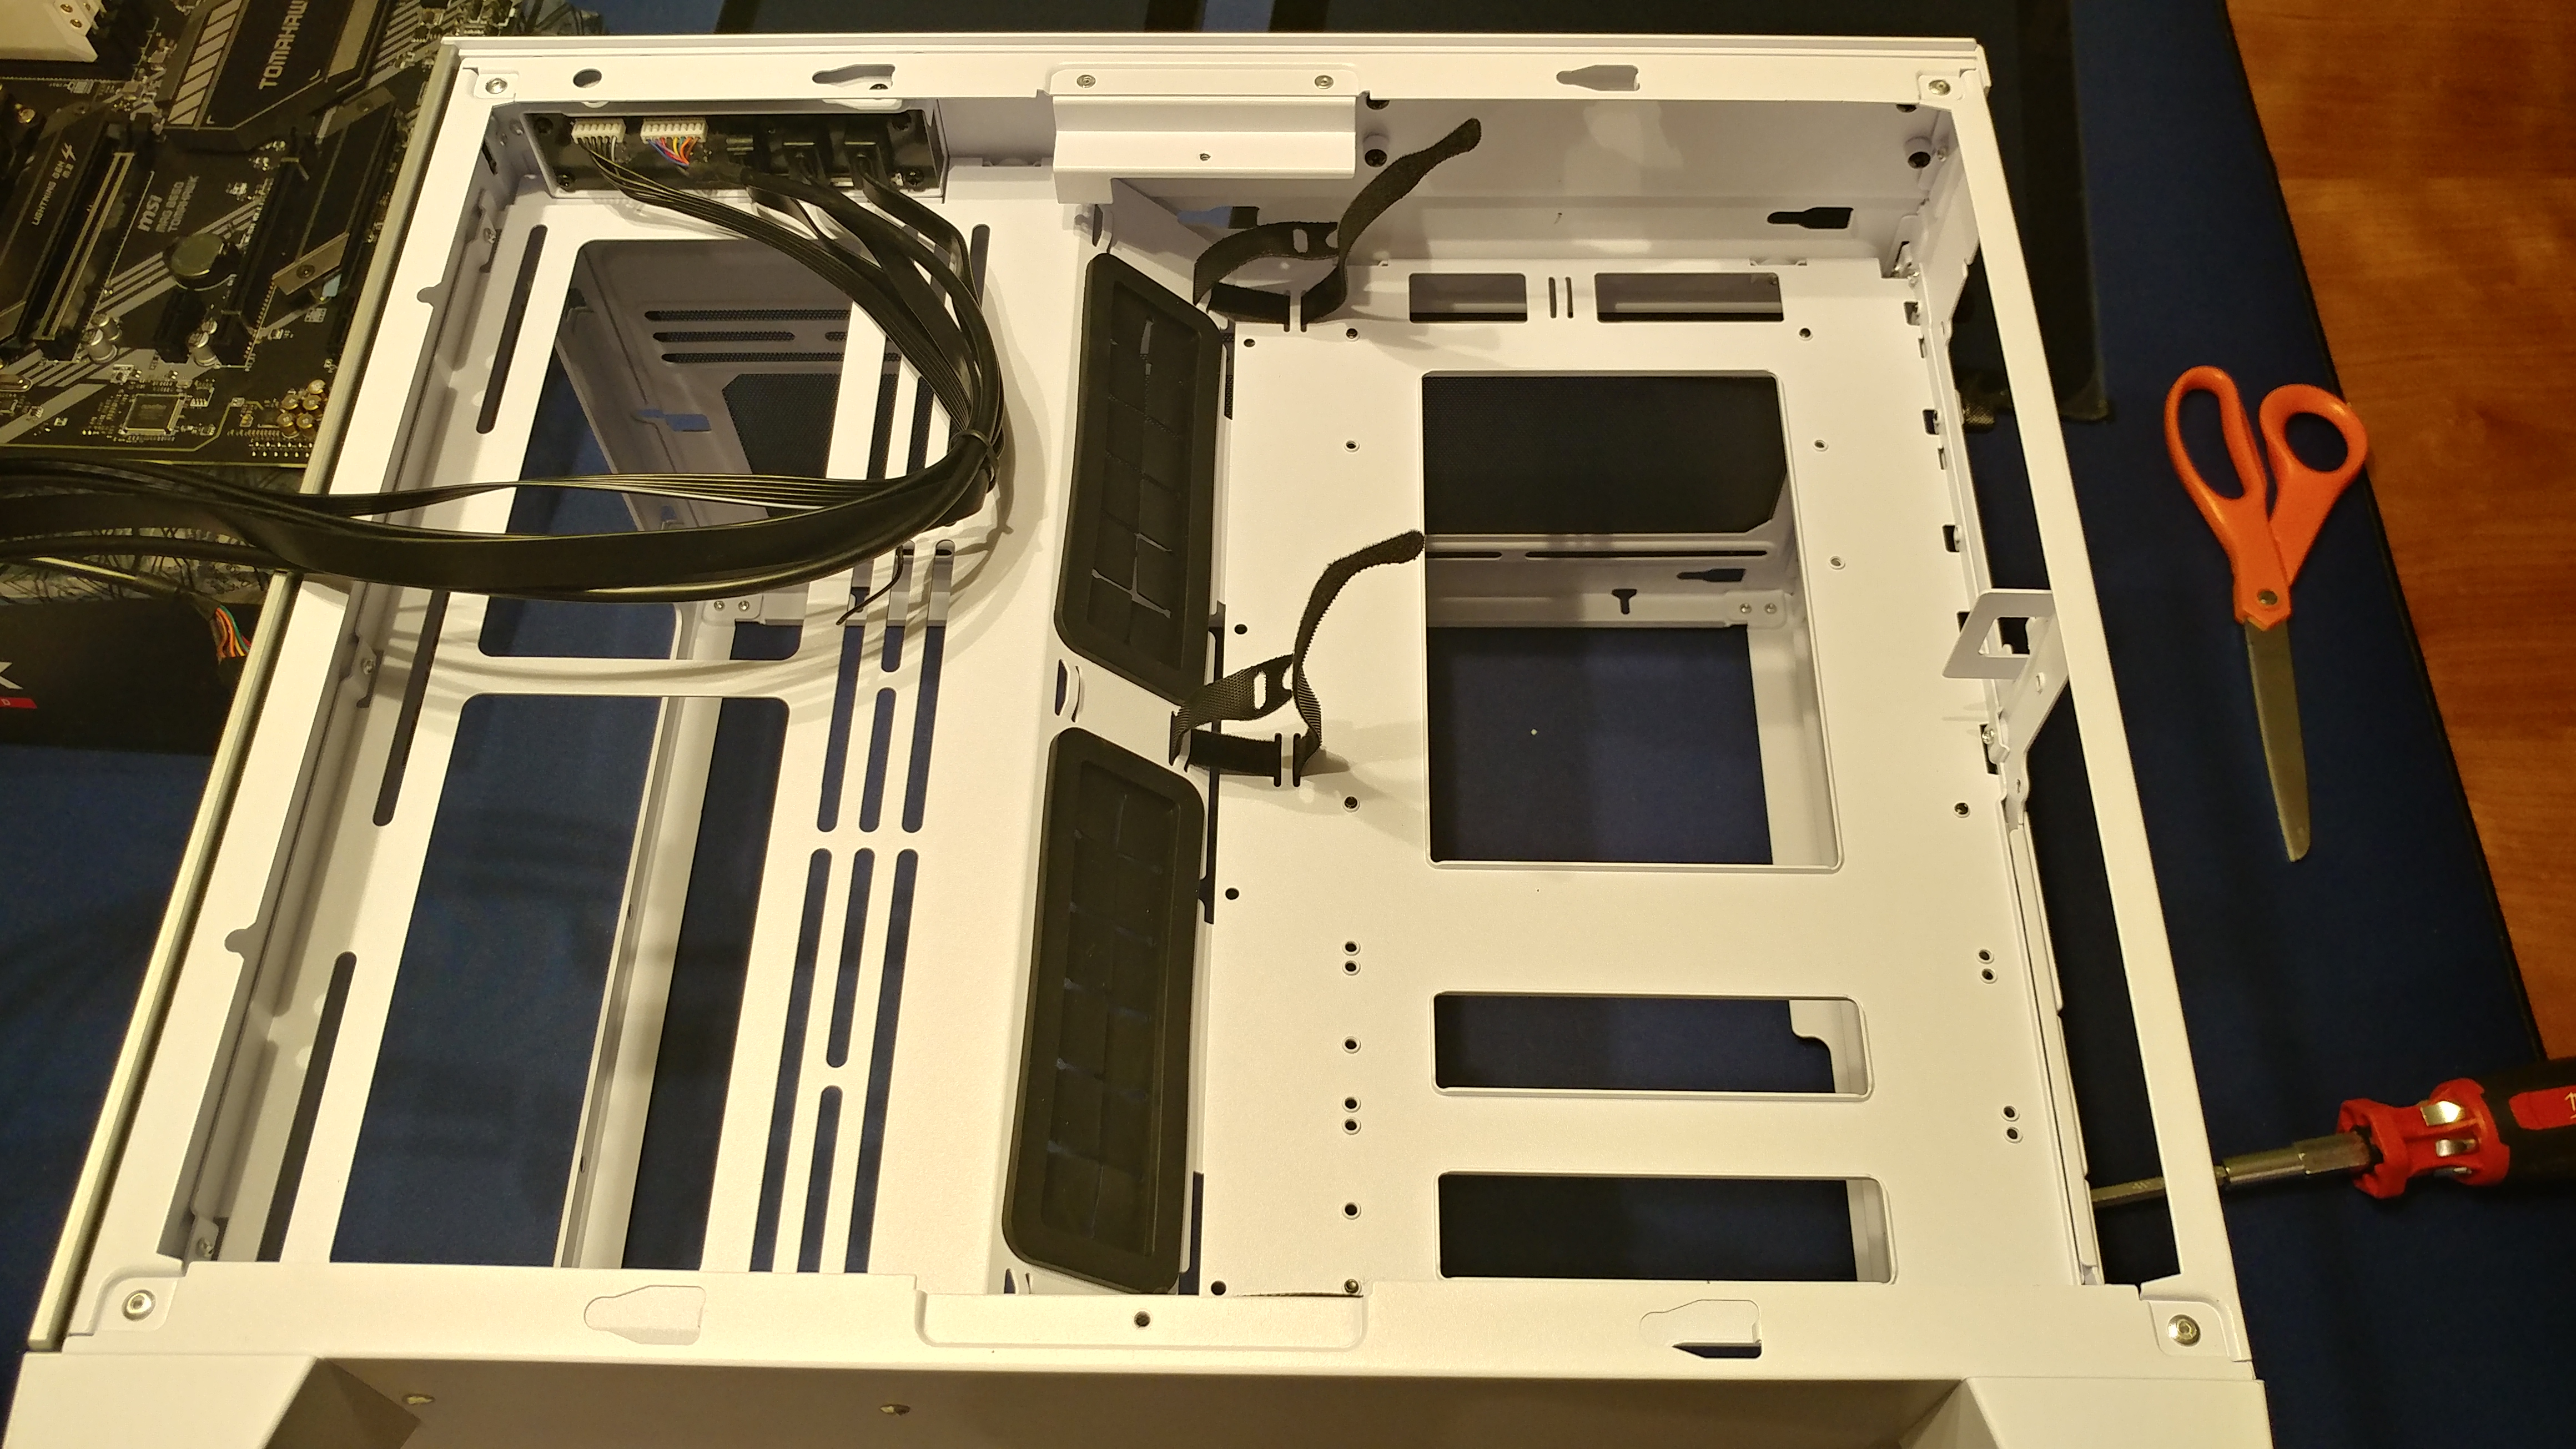
This case can be configured for a variety motherboard sizes and component layouts. I have the motherboard tray extension installed and back panels configured to receive a standard ATX motherboard.
When I purchased the motherboard I was pretty averse to the idea of a chipset fan and only planned to do some light overclocking. I also don’t plan on having any PCI-e Gen 4 storage devices any time soon, so I opted for the MSI B550 Tomahawk.
This is the first time I’ve purchased RAM with such intense heat spreaders or RGB, but I think they look great.
Glamour shot of the coveted Ryzen 9 5950X.

With a pea-sized glob of Arctic Silver thermal paste, I installed the color-matching Lian Li all-in-one (AIO) liquid cooler and did a test boot.
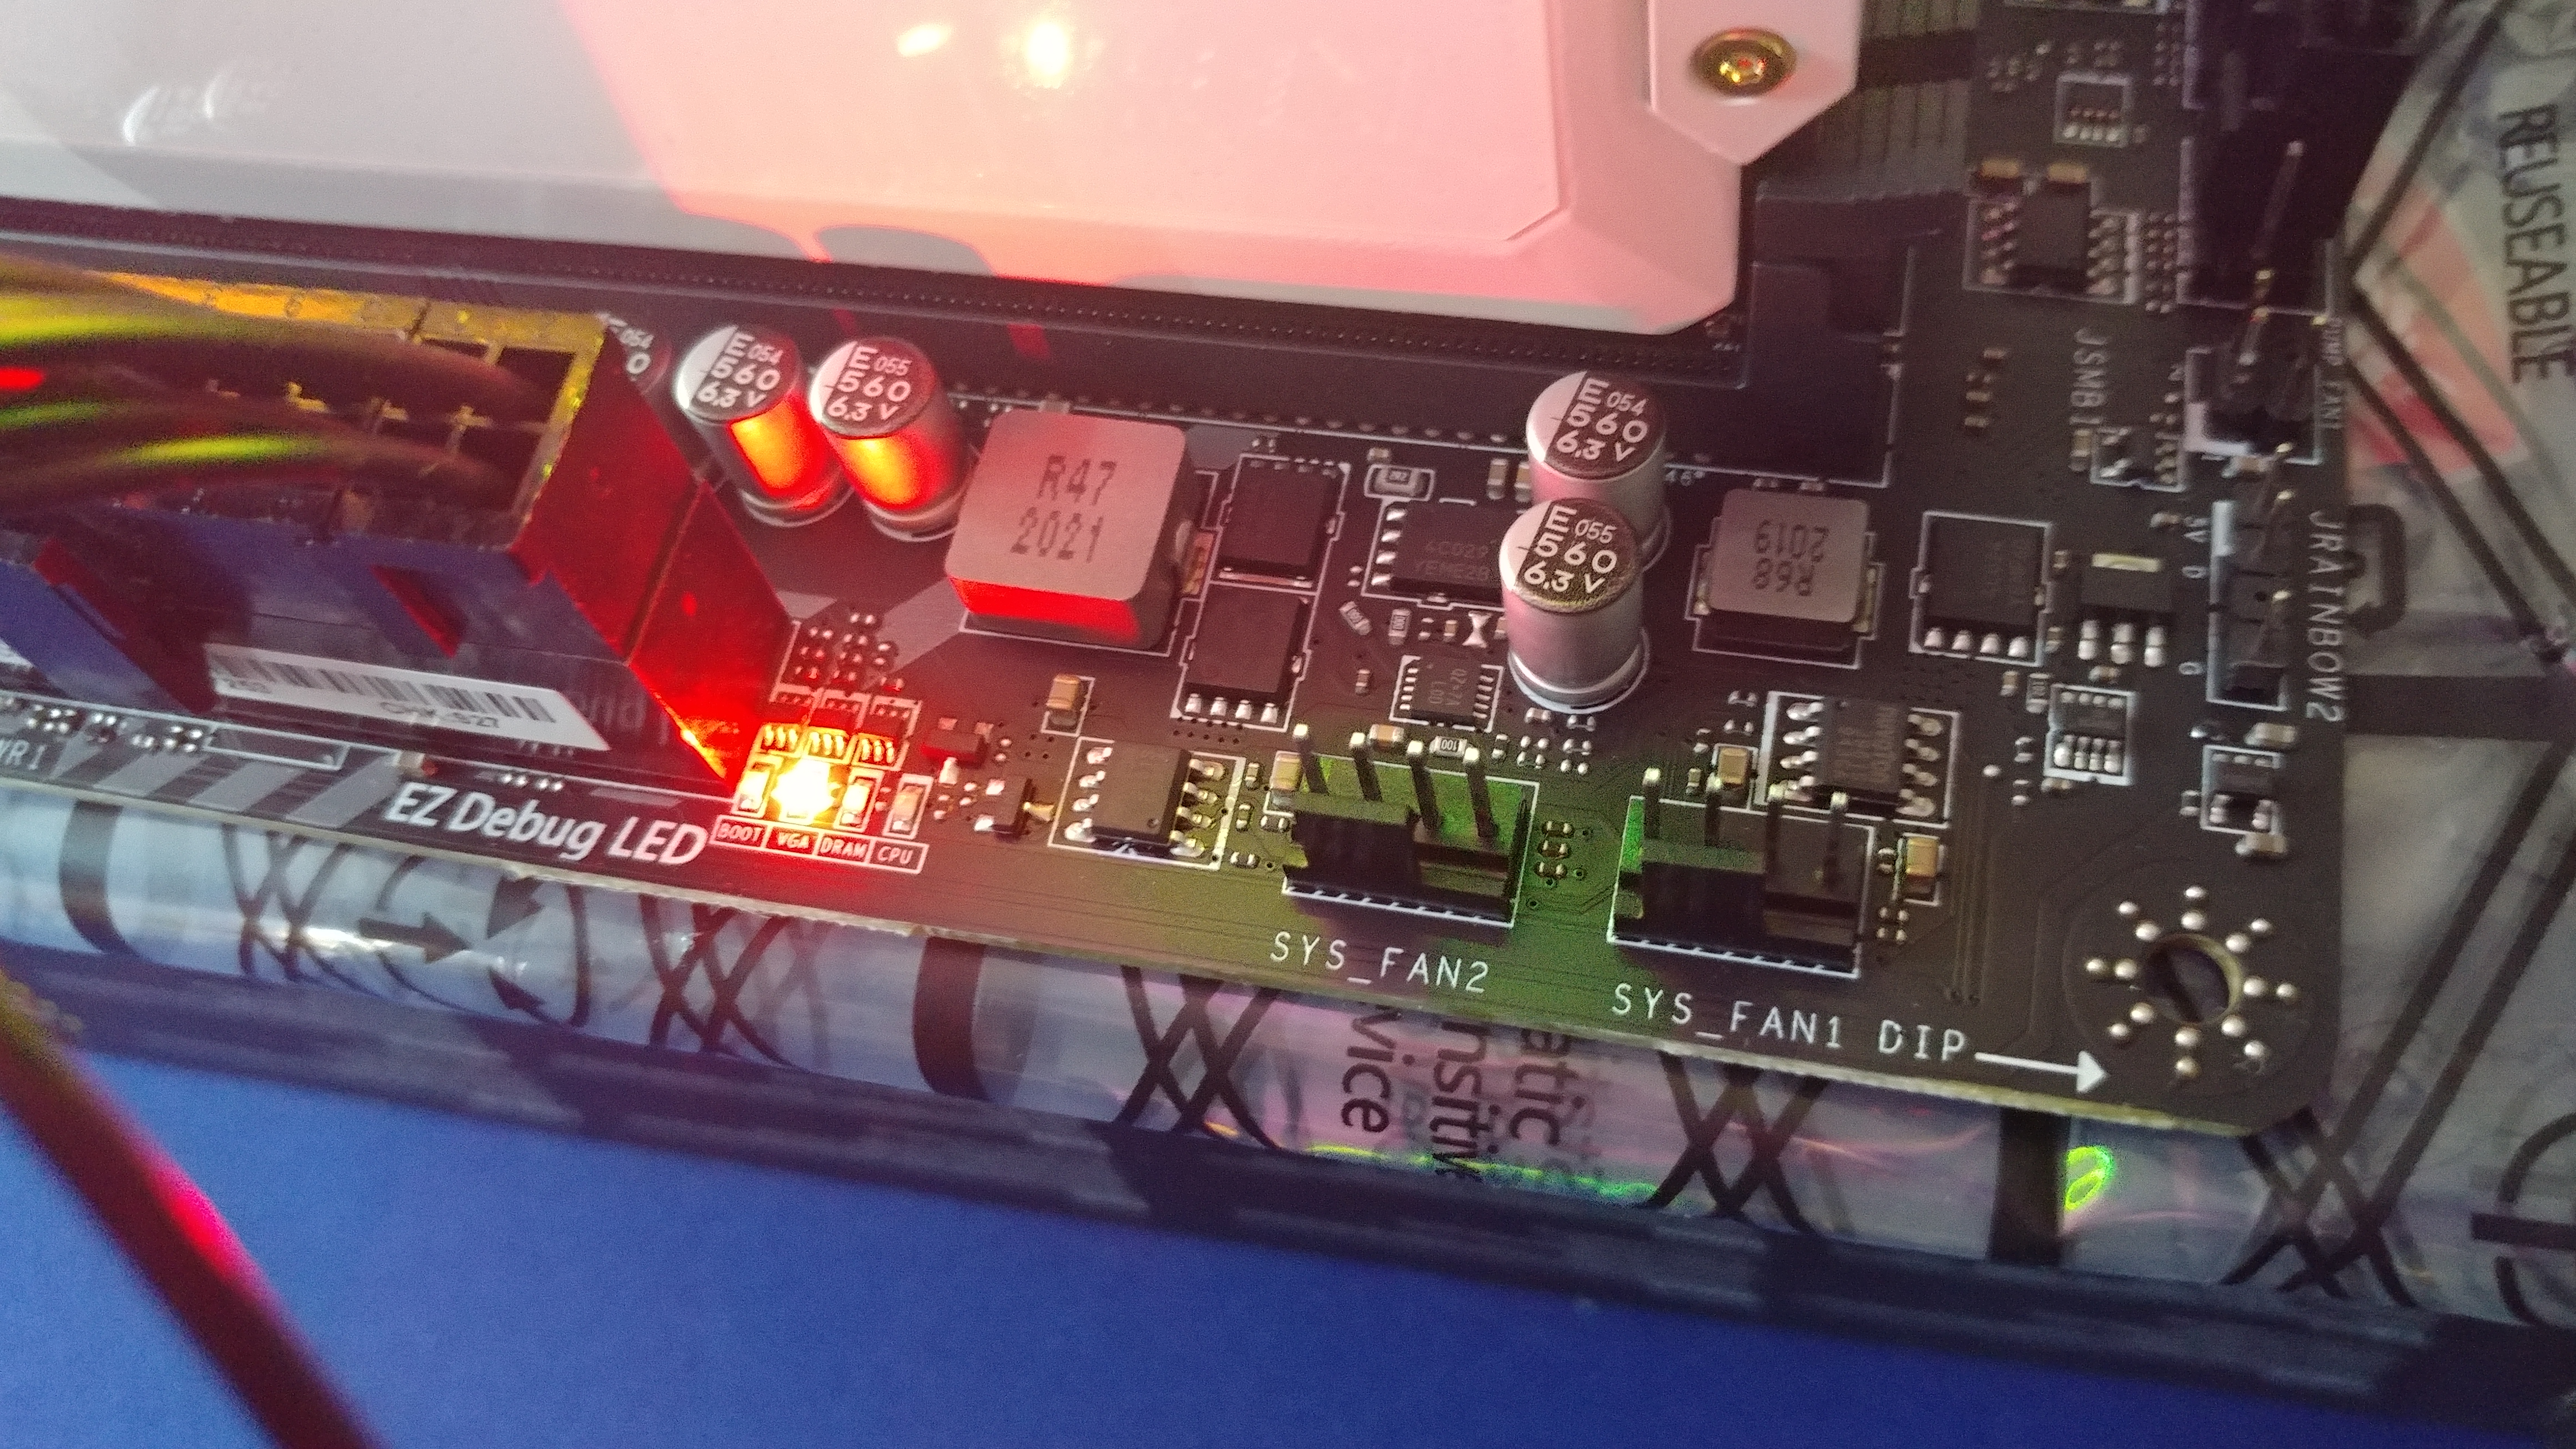
The 5950X does not have an integrated GPU so of course I got a VGA hardware LED error, but everything else looked good so I kept going.
I replaced the stock AIO fans with Lian Li UNI fans for some extra sweet aRGB-ness and installed the parts in a push-pull configuration. Also, I originally thought the Lian Li AIO had a 280mm radiator but it was actually only 240mm. So I ended up with some extra 140mm UNI fans, but opted to use two of them in the back for the hell of it (you can see them peeking through the slats).
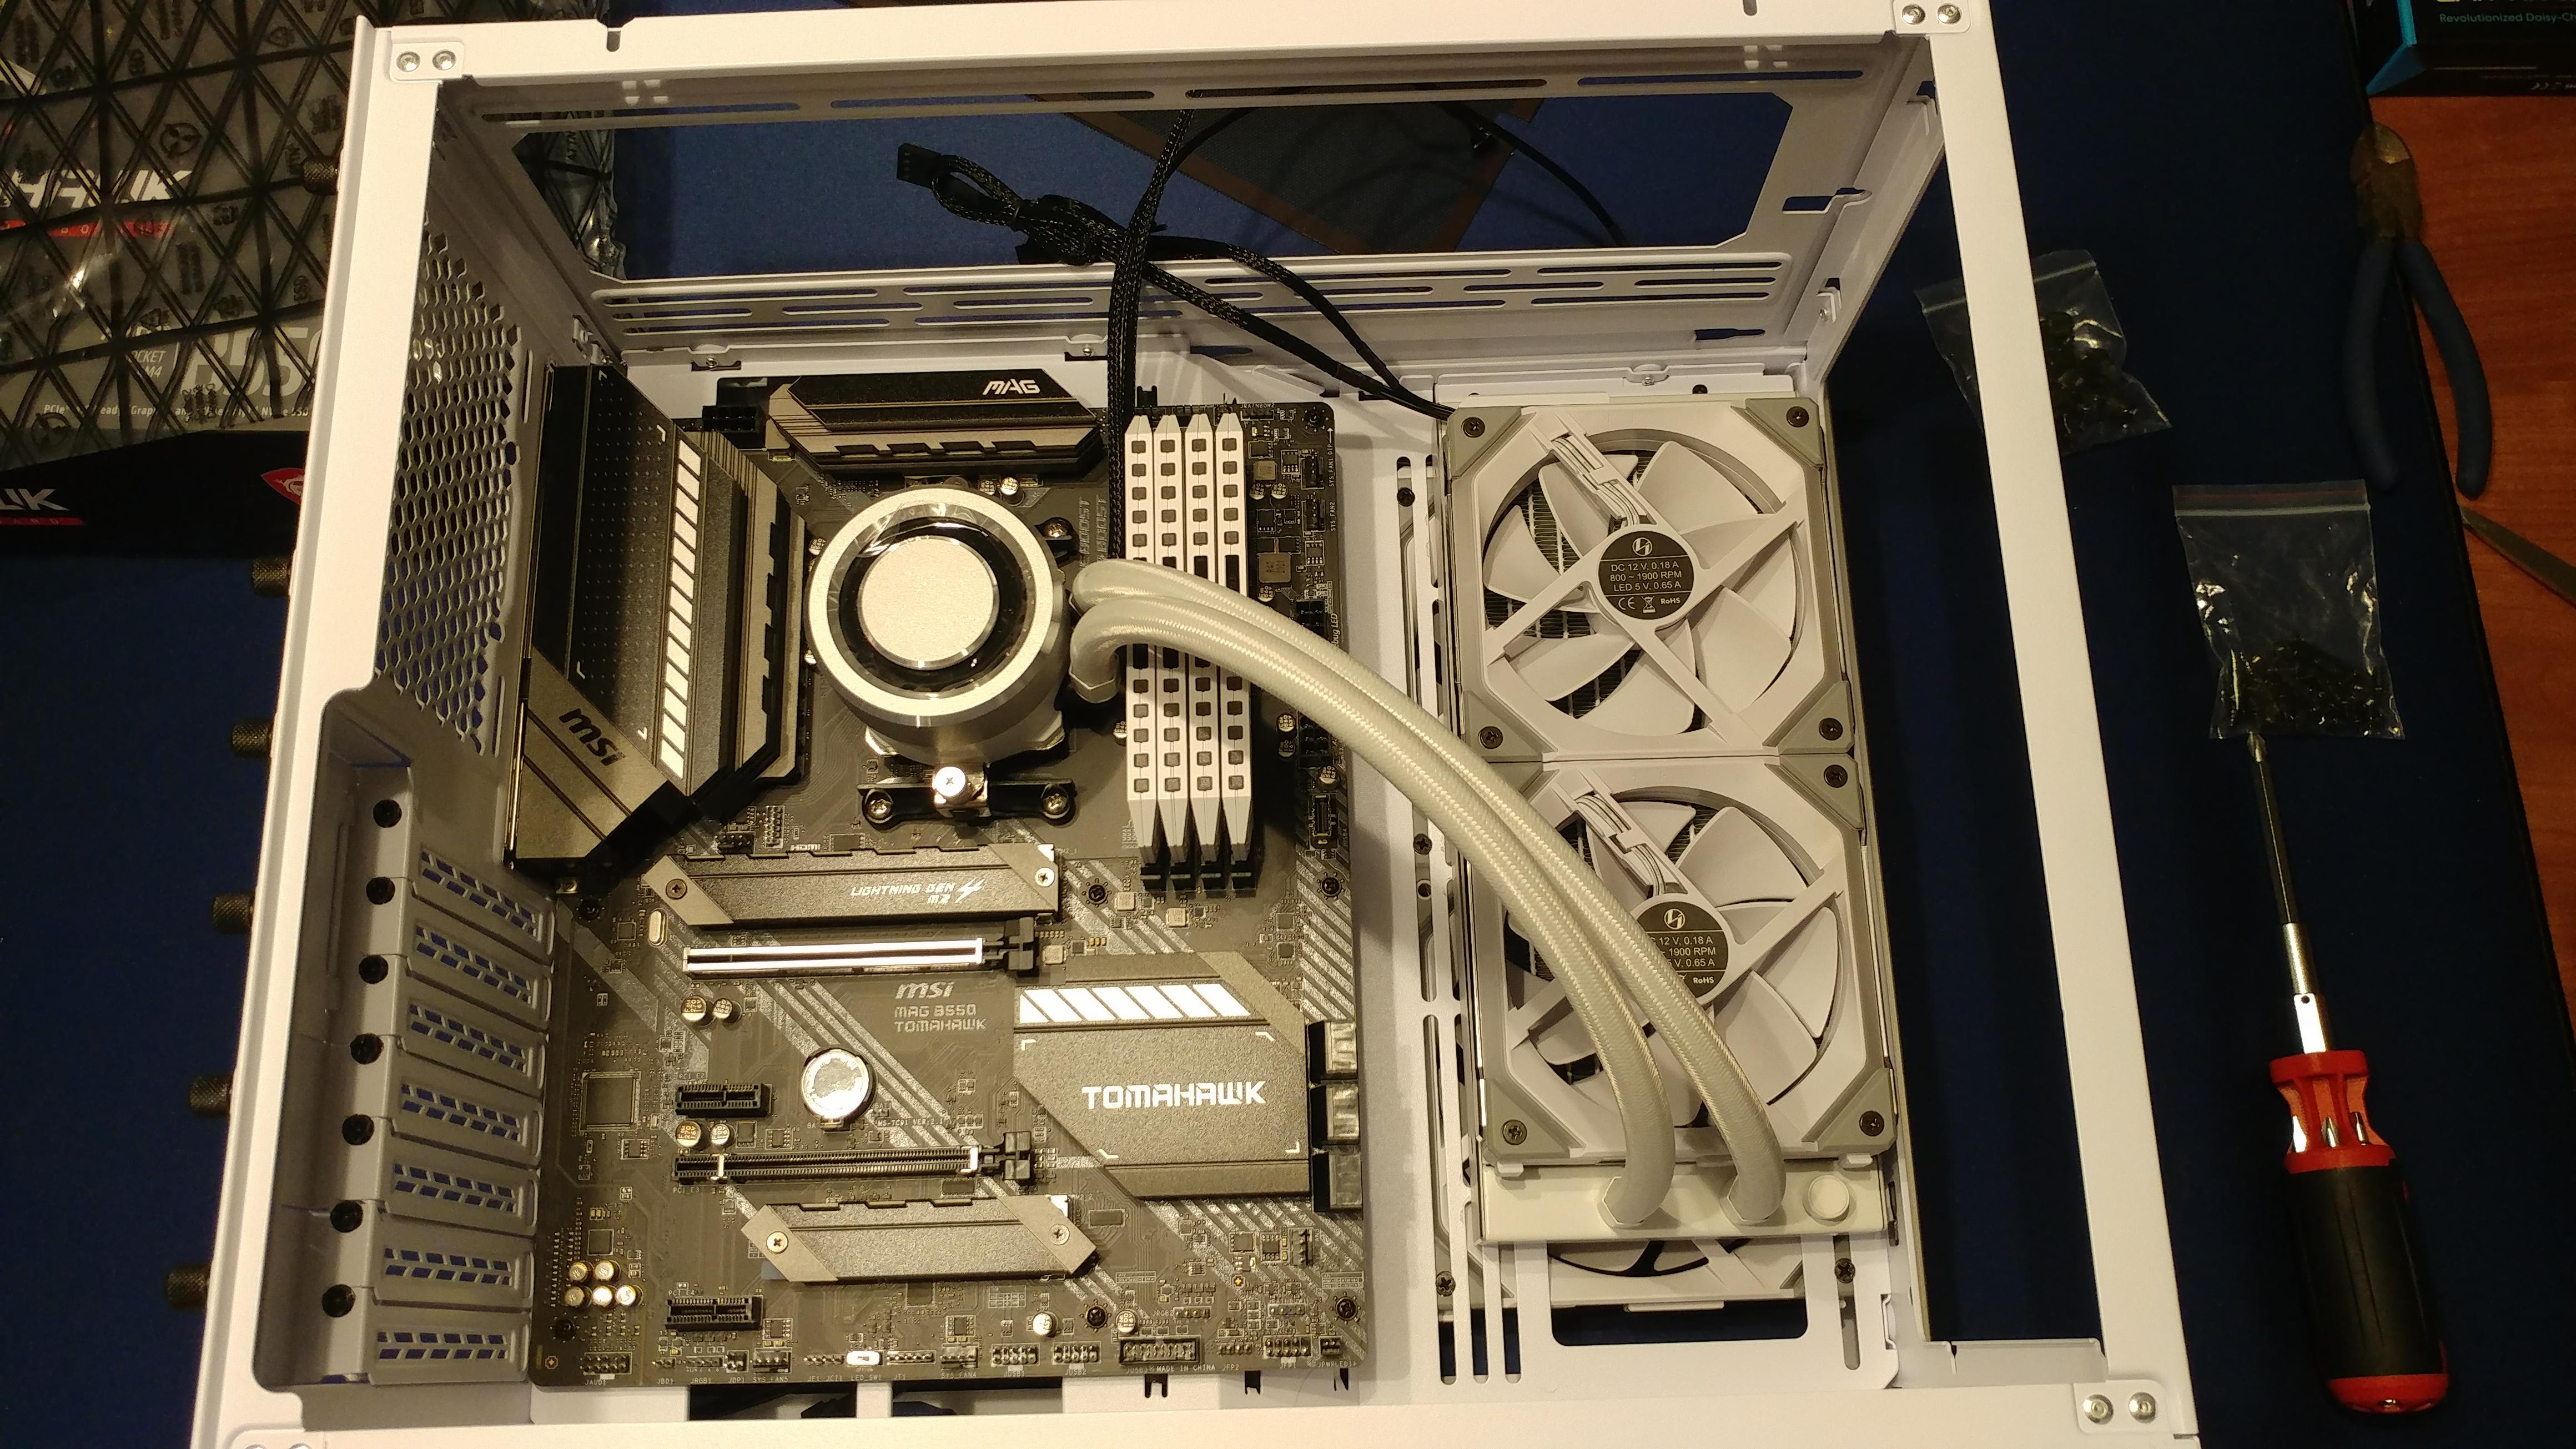
I’m glad the AIO was only 240mm because the 24-pin ATX power cables definitely would not have fit with a 280mm radiator and a full size ATX motherboard. I also had to flip the radiator so the inlet/outlet were at the top to provide clearance for the massive RTX 3090 (see later pictures). It’s not an ideal orientation but as long as the pump block isn’t the highest point in the loop it should be fine.
A view of the rear compartment again as it begins to fill up with cables. I decided to run the front panel I/O cables down the left side of the fans (rather than down the center) to leave more space, though I needed cable extensions to do this.
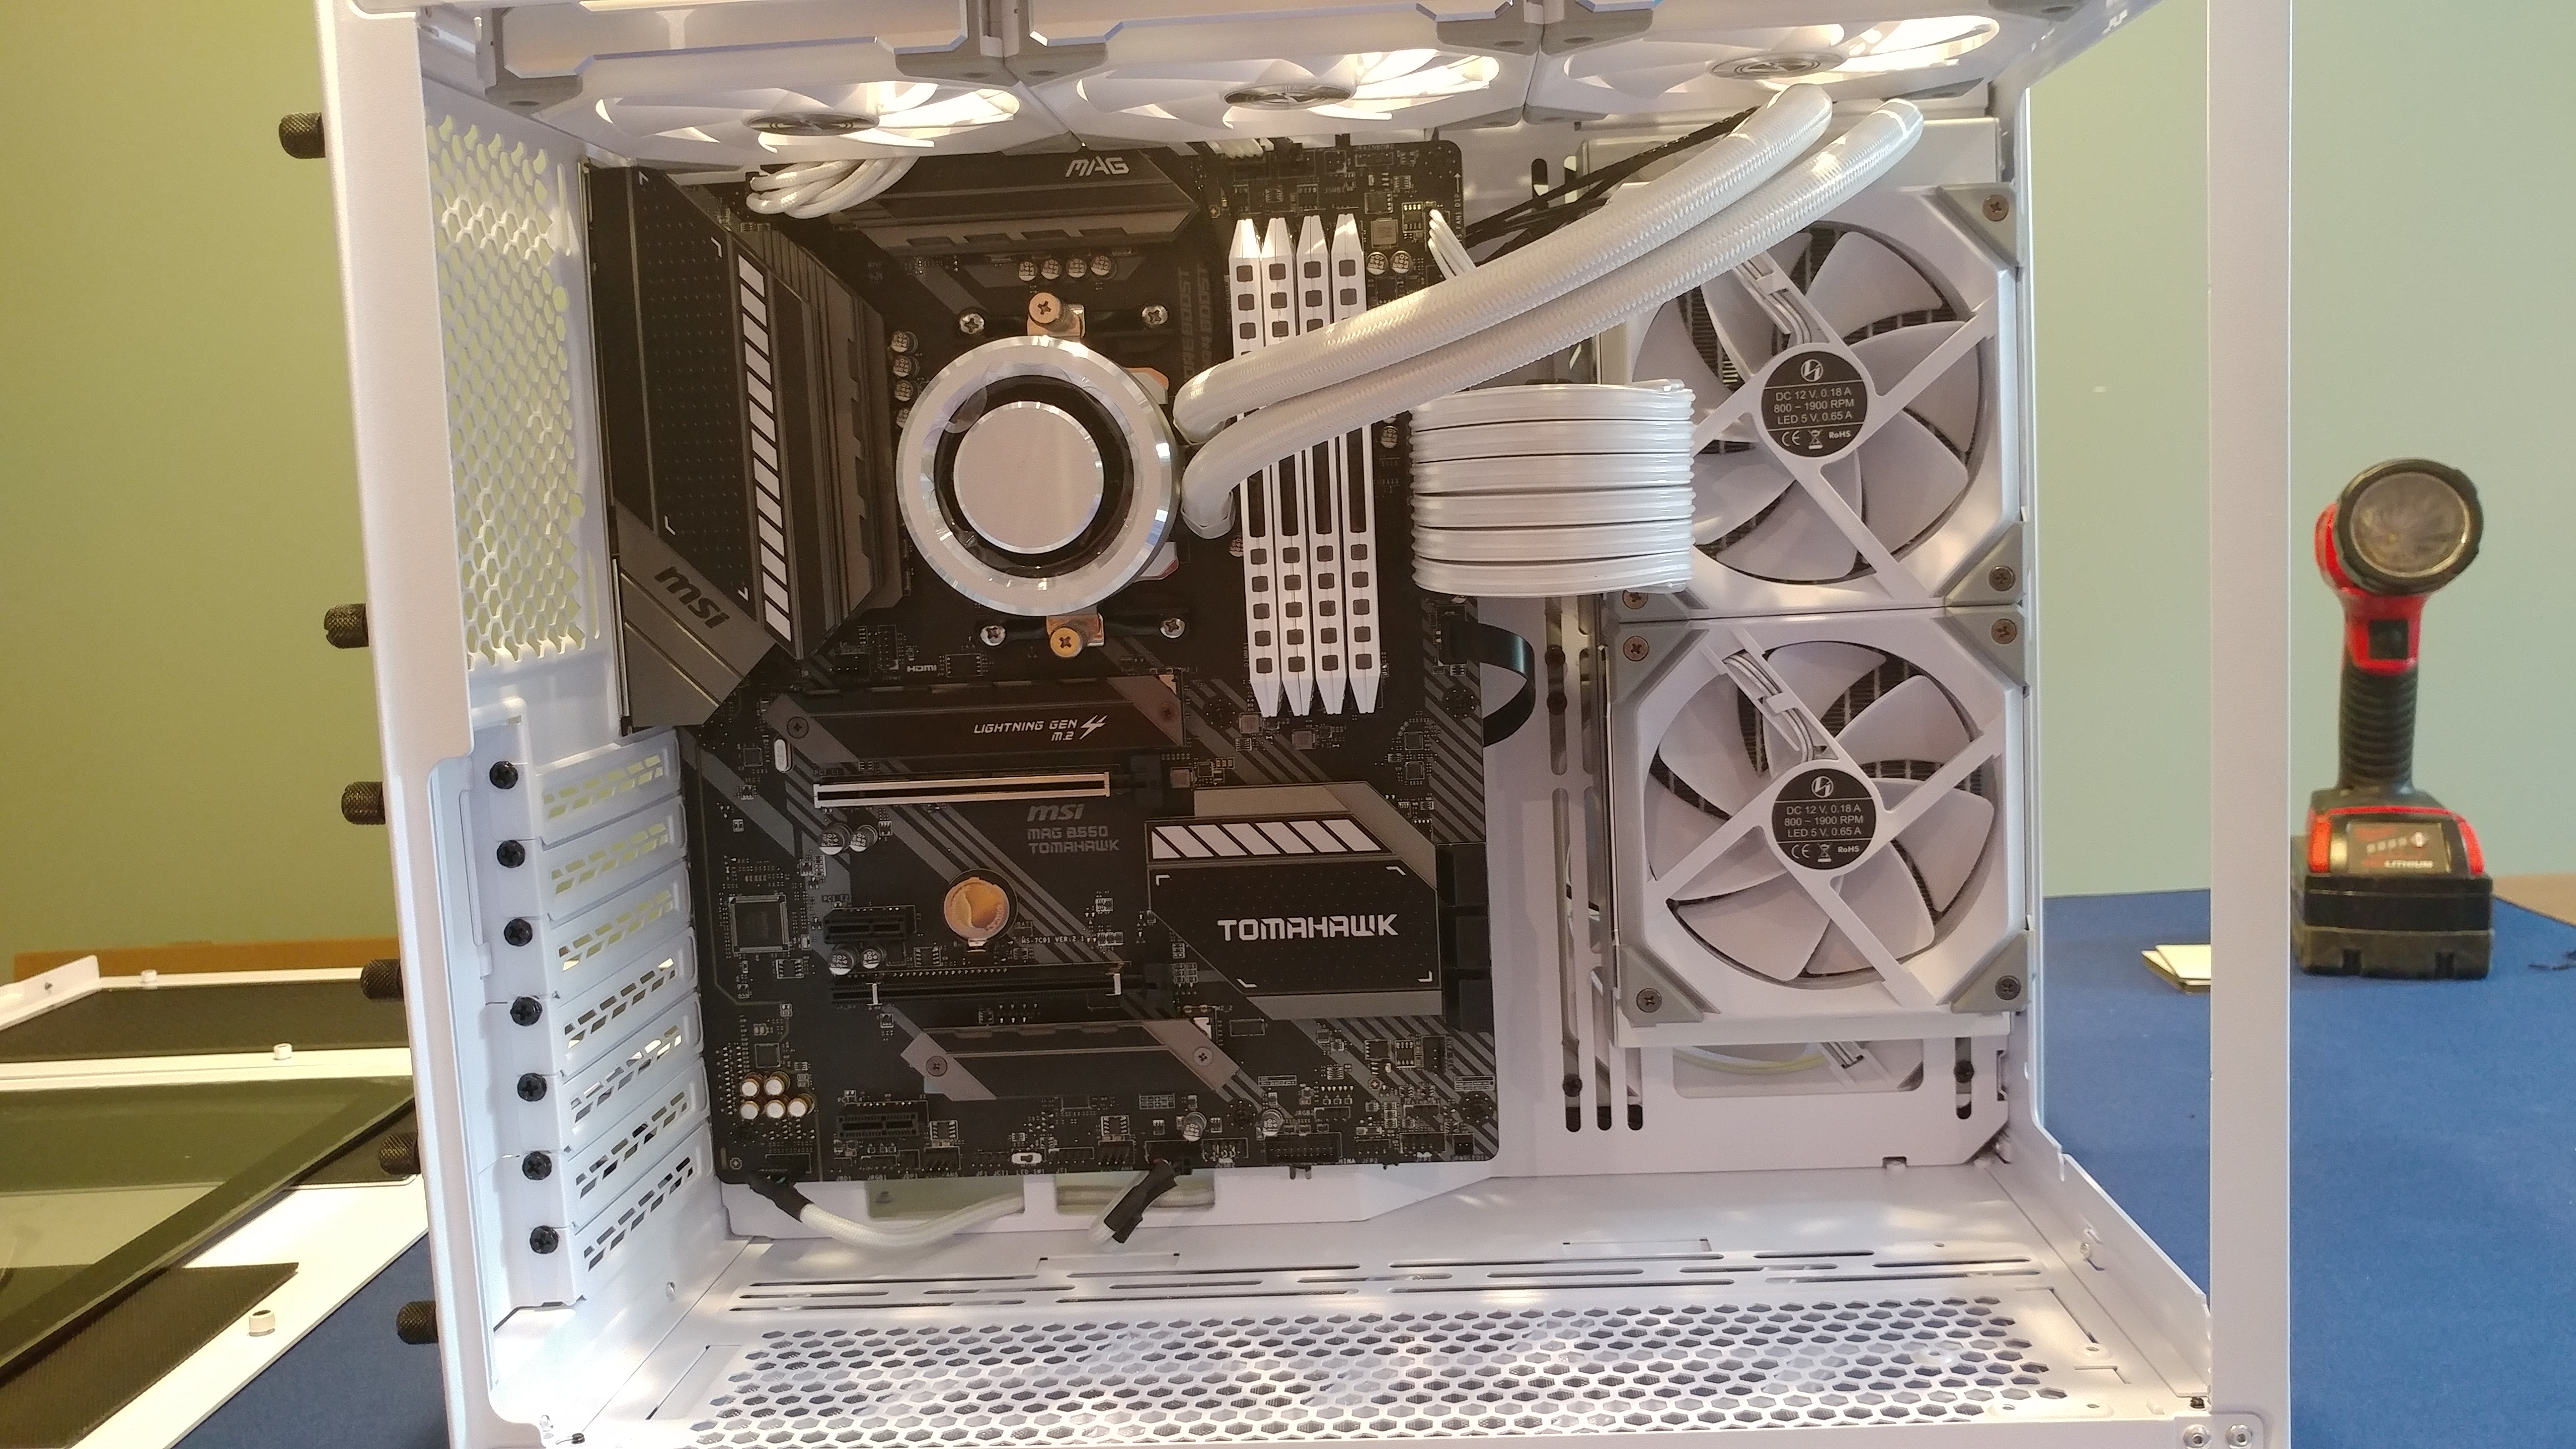
A view of the front again with the GPU, custom Raspberry Pi resource monitor, and bottom three fans installed.
The Story
I tend to build a new PC—or refresh my existing PC—once every 5 or so years. I will be entering into fatherhood this summer and I am anticipating a pretty drastic reduction in the amount of time I can spend thinking about PC parts!
So, my goal was to build a no-compromises machine. Partly because I want this PC to last more than 5 years, and partly just to see what I can do with the skills and knowledge I’ve acquired over the last 10 or so builds. I wanted three things out of this machine:
- Extreme performance
- Cool and quiet
- Coordinated aesthetics (and RGB!!)
I’ll make separate posts covering each of these topics as I think there are some interesting facets to each. For instance, this is my first build with two power supplies!
I try to repurpose old PC parts whenever possible. Parts tend to move from my main rig into our home server, and then into the home theater PC we keep by our living room TV (the one I lobotomized).
Parts Shortages
Anyone shopping for PC parts during the pandemic was painfully aware of how difficult it became to find items in stock starting around the third quarter of 2020. The world’s factories had been shutdown for a quarter or more by then, and existing retailer inventory was beginning to dry up. OEMs also began cutting factory orders anticipating (incorrectly) that there would be a decrease in demand.
Instead, there was a surge in demand as many consumers spent more time at home during quarantine/lockdown and had more disposable income than usual thanks to stimulus payments. Many were also flush with cash due to spending less on activities like commuting, dining out, and leisure activities away from home. But the desire for entertainment did not go away. It simply shifted to activities that could be enjoyed from home, such as PC gaming.
Scalpers and Bots
The sharp decrease in supply and the surge in demand produced an imbalance that led to the proliferation of scalping and bots (automated online purchasing). It quickly became nearly impossible for a normal person to purchase the most desirable parts, and eventually, just about any PC part. GPUs were particularly difficult to purchase at MSRP because at the same time, cryptocurrency mining making a comeback fueled by many of the same economic factors.
To actually find PC parts for purchase, consumers resorted to camping retailer websites day and night, watching bot video streams (sometimes of the very bots they were competing with to buy parts!), and literally tracking cargo containers across oceans. I myself watched a bot stream on Youtube for weeks before finally picking up an Nvidia RTX 3090 at MSRP in late November 2020 on newegg.com.
I also watched a bot stream for over a month trying to get my hands on an AMD Ryzen 9 5950X. That was when I discovered fairgame, which is an opensource project that enables normal people like me to run our own bot. The thinking is that if running a bot becomes trivial enough that normal people can do it, then it levels the playing field between consumers and scalpers.
If everyone is botting, then no one is botting.
So, I set up the bot to watch the Amazon listing for the 5950X and within three days I had a confirmed purchase. Three weeks later—in the last week of 2020—the CPU arrived. After the purchase I immediately shut down my bot because I had no interest in contributing to the scalping problem.
Finally Complete
Unexpectedly, it was my many-months delayed order of custom CableMod cables that prevented me from truly finishing the build. Not the CPU or the GPU… cables! I suppose I got very lucky otherwise. I started the build in November 2020 and while I had enough parts to have a functioning system in January, it took until May 2021 to have every last part in hand and installed.
Overall, I’m very happy with how the build turned out. It looks and performs great and is completely silent under light loads and sufficiently quiet for my tastes under heavy loads. My only complaint is that (a)RGB products are still very cumbersome to work with, but I’ll cover that in a separate post.